Cable Box Connections
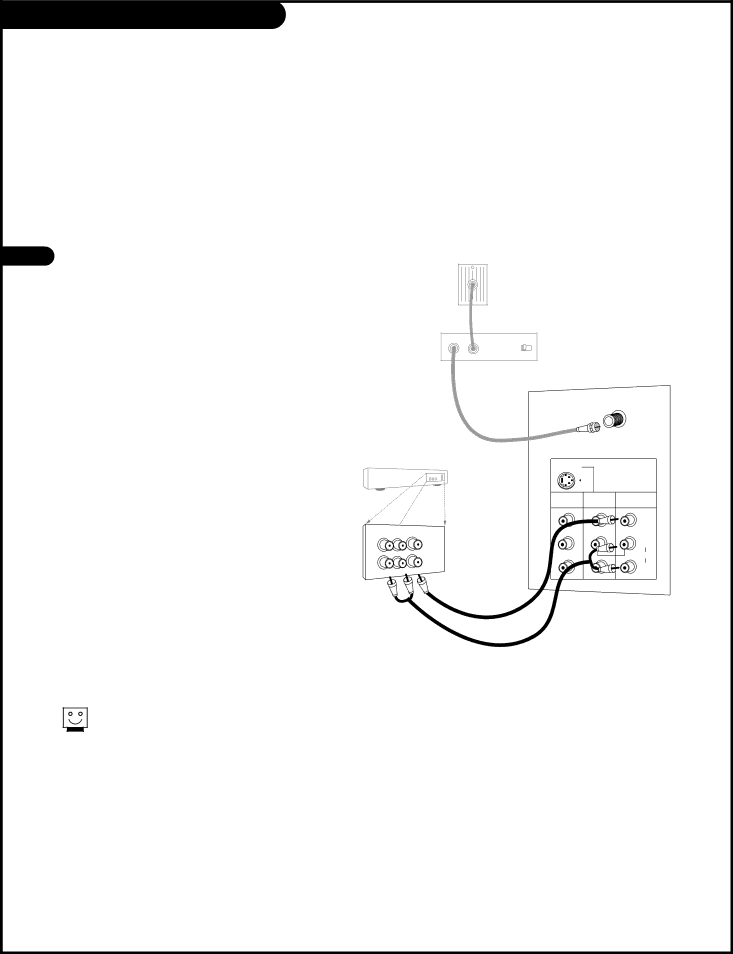
1 | Locate the output jack on the back of | |
your cable box. Connect this to the | ||
| ||
| Antenna jack on the back of your TV. |
Or find the composite video and audio jacks on the back of your cable box, and connect them following the instructions provided with your equipment.
This can be combined with any other equipment you may want to hook up.
Cable TV
Wall Jack Panel
Out | In |
| Output |
| Switch 3 4 |
| RF Coaxial Wire |
|
|
| (75 ohm) | ANT IN | |
|
| ||
|
| +75 Ω | |
Cable Box |
|
| |
|
|
| |
| MONITOR | VIDEO | VIDEO |
| OUT | INPUT 2 | INPUT 1 |
|
|
| VIDEO |
Audio | Video |
|
|
L | R |
|
|
TV |
|
| (L) |
| MONO |
| AUDIO |
|
|
| |
VCR | (R) |
|
If you’re using a cable box, leave the TV on channel 3 or 4 and use your cable box to change channels.
P A G E 1 0