Connections to other equipment
To connect a HDMI or a DVI device to the unit
The HDMI input receives digital audio and uncompressed video from a HDMI device or uncompressed digital video from a DVI device.
When you connect to a DVI device with a
Left of the unit |
|
|
|
To PC/DVI AUDIO IN | To DVI output |
| |
| Audio cord (not supplied) |
| DVI device |
| HDMI - to - DVI adapter cable | ||
|
| ||
| (HDMI type A connector) |
| |
To HDMI IN | (not supplied) | or |
|
| HDMI device | ||
| HDMI cable (type A connector) | ||
|
| ||
| (not supplied) | To HDMI output |
|
|
|
| |
NOTE:
• When using HDMI/DVI1/2 IN to connect your HDMI or DVI devices, you must select the corresponding audio input source (HDMI or DVI) on the menu screen. Otherwise you will only see the image with no sound.
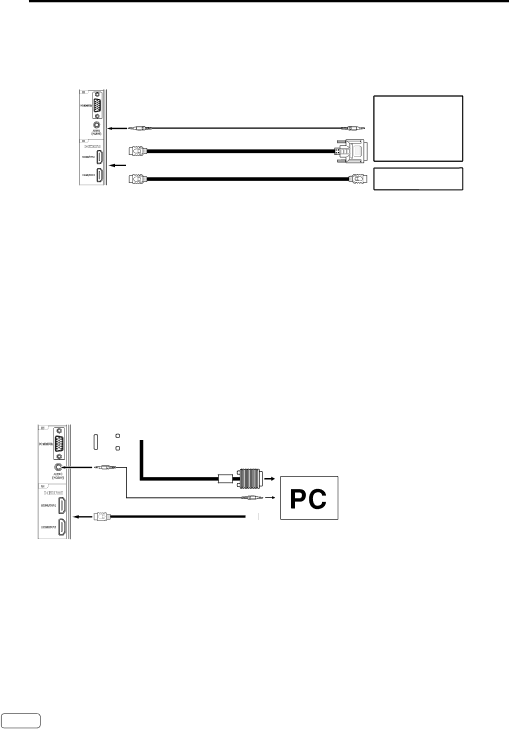
To connect the TV to a PC (Personal Computer)
BEFORE YOU CONNECT THIS TV TO YOUR PC, CHANGE THE ADJUSTMENT OF YOUR PC’S RESOLUTION AND REFRESH RATE (60 HZ).
Connect one end of a (male to male) VGA cable to the video cord of the computer and the other end to the VGA connector PC MONITOR IN on the rear of the TV. Attach the connectors firmly with the screws on the plug. In case of a Multimedia computer, connect the audio cord to the audio output of your Multimedia computer and to the AUDIO IN connector of the PC/DVI AUDIO IN jack of the TV.You can also connect the PC with HDMI cable. If you use HDMI cable, you don’t have to connect the audio cord. If you use
Press INPUT SELECT on the remote control to select PC mode.
Switch on the computer. The TV can operate as the computer monitor.
Left of the unit
![]()
![]() To PC MONITOR IN
To PC MONITOR IN
VGA cable (not supplied)
To PC/DVI
AUDIO IN Audio cord (not supplied)
To HDMI IN HDMI cable (not supplied) ![]()
![]()
Monitor Display modes
Mode | Resolution | Refresh rate |
VGA | 640x480 | 60/ 75 Hz |
VGA | 720x400 | 70Hz |
SVGA | 800x600 | 60/ 75 Hz |
XGA | 1024x768 | 60/ 70/ 75 Hz |
WXGA | 1360x768 | 60Hz |
SXGA | 1280x1024 | 60Hz |
WXGA+ | 1440x900 | 60Hz |
WSXGA+ 1680x1050 | 60Hz | |
FHD | 1920x1080 | 60Hz |
To return to normal mode Press INPUT SELECT again.
NOTE:
• The
• If there is no video signal from the PC when the unit is in PC mode, “No Signal” will appear on the
• When the PC connected to the HDMI terminal and 1920x1080 resolution (FHD) is selected, the top and bottom, right and left edges of the picture may be hidden on all picture sizes. In this case, use the PC MONITOR IN jack (VGA cable) is recommended to connect.
• When the PC’s resolution is set to 1920 x 1080/60 Hz (FHD mode), a signal that differs from the FHD signal, which has been confirmed operational on this TV, may appear depending on the PC used. In this case, “Auto” or other Position Adjustment functions may fail to correct the image position.
To solve this problem, change the PC settings to select another resolution.
EN 14