Pioneer BDR-207DBK Installation Einbau, Connections, Raccordement, Anschlüsse

Page 7

INSTALLATION


INSTALLATION

EINBAU

1.Turn off the power of the personal computer and remove the power cord from the AC outlet, then remove the cover or the front panel.

2.Remove the blank panel installed on the front of the 5.25 inch slot.

3.Insert the drive into the slot.

4.When affixing is required, please refer to the instruction manual for the computer.

Please use screws with a length of 5 mm (3/16 in.) or less for mounting. Using longer screws may cause damage to the drive.

When the mounting screws are loose etc., the vibrations from disc rotation may generate a ripping noise. To prevent it, the screws should be tightened securely.

When slide rails are required, please contact your shop or the computer manufacturer.

CONNECTIONS

Turn off the power supply of the personal computer.

When connecting the power cable from the personal computer, pay close attention to the shape and polarity of the cable.

When connecting the Serial ATA interface cable, pay close attention to the shape and polarity of the cable.

Be sure to supply electrical power for this product from the personal computer which is connected to it. Do not use any other power supply than the internal one of the personal computer.

1.Couper l’alimentation de l’ordinateur personnel, débrancher le cordon d’alimentation et déposer le capot ou le panneau avant.

2.Retirer la plaque masquant de la fente de 5,25 pouces.

3.Introduire le lecteur dans la fente.

4.Si un ajustement est nécessaire, se reporter au manuel d’instruction de l’ordinateur.

Utilisez des vis d’une longujeur égale ou inférieure à

5 mm pour la fixation. L’utilisation de vis plus longues pourrait endommager le lecteur.

Lorsque les vis de fixation sont relâchées, les vibrations causées par la rotation du disque peuvent provoquer un bruit de déchirure. Pour éviter de désagrément, serrez les vis à fond.

S’adresser au magasin ou au fabricant de l’ordinateur lorsque des glissières sont nécessaires.

RACCORDEMENT

Mettre l’ordinateur personnel hors tension.

Lors du branchement du câble d’alimentation provenant de l’ordinateur personnel, faites bien attention à la forme et à la polarité du câble en question.

Lors du branchement du câble d’interface ATA de série, faites bien attention à la forme et à la polarité du cordon en question.

N’oubliez pas que l’alimentation de cet appareil doit être fournie par l’ordinateur auquel il est relié. N’utilisez aucune autre alimentation que celle de l’ordinateur personnel.

1.Schalten Sie die Spannungsversorgung des Personal-Computers aus, ziehen Sie den Netzstecker ab und nehmen Sie die Abdeckung oder die Frontplatte ab.

2.Entfernen Sie die Blende von einem leeren 5,25-Zoll-Laufwerkschacht.

3.Schieben Sie das Laufwerk in den Schacht ein.

4.Falls eine Befestigung erforderlich ist, schlagen Sie bitte im Handbuch des Computers nach.

Verwenden Sie Schrauben mit einer maximalen Länge von 5 mm zur Befestigung Bei Verwendung von längeren Schrauben kann das Laufwerk beschädigt werden.

Bei lockeren Befestigungsschrauben können die durch die Disc-Drehung verursachten mechanischen Schwingungen ein Reißgeräusch verursachen. Zur Vermeidung dieses Problems müssen die Schrauben fest angezogen werden.

Wenn Schiebeschienen benötigt werden, wenden Sie sich an das Geschäft, wo Sie den Computer erworben haben, oder an den Hersteller des Computers.

ANSCHLÜSSE

Schalten Sie die Spannungsversorgung des Personal- Computers aus.

Achten Sie beim Anschließen des Netzkabels des Personal- Computers auf korrekte Ausrichtung und Polarität des Steckverbinders.

Achten Sie beim Anschließen des seriellen ATA- Schnittstellenkabels auf korrekte Ausrichtung und Polarität des Steckverbinders.

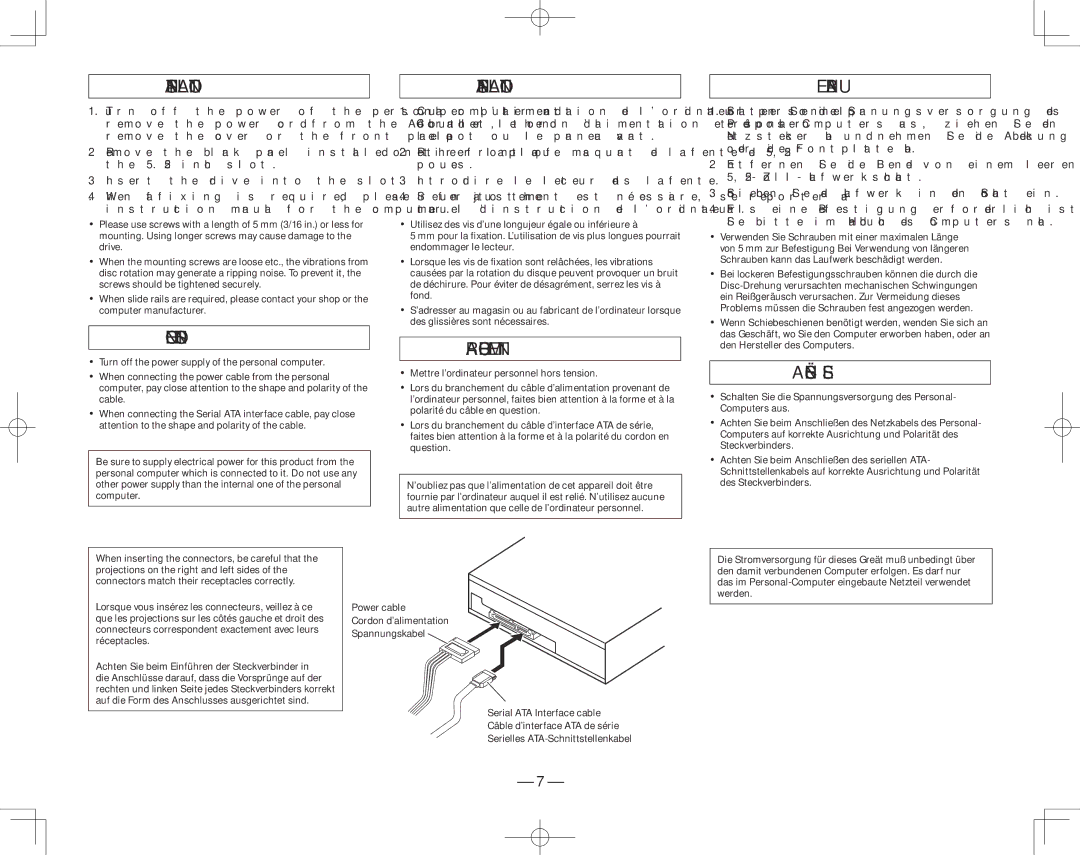
When inserting the connectors, be careful that the projections on the right and left sides of the connectors match their receptacles correctly.

Lorsque vous insérez les connecteurs, veillez à ce que les projections sur les côtés gauche et droit des connecteurs correspondent exactement avec leurs réceptacles.

Achten Sie beim Einführen der Steckverbinder in die Anschlüsse darauf, dass die Vorsprünge auf der rechten und linken Seite jedes Steckverbinders korrekt auf die Form des Anschlusses ausgerichtet sind.

Power cable

Cordon d’alimentation

Spannungskabel

Serial ATA Interface cable

Câble d’interface ATA de série

Serielles ATA-Schnittstellenkabel

Die Stromversorgung für dieses Greät muß unbedingt über den damit verbundenen Computer erfolgen. Es darf nur das im Personal-Computer eingebaute Netzteil verwendet werden.

– 7 –

Image 7
Contents Warnung For Canadian modelPour le modèle Canadien AvertissementAchtung AFTER-SALES Service for Pioneer ProductsInstructions DE Securite Safety InstructionsSicherheitsanweisungen Caracteristiques FeaturesLeistungsmerkmale Schnittstelle InterfacePropos DES Codes Regionaux About Region CodesÜber Regionalcodes Anschlüsse Installation EinbauConnections RaccordementFiche Technique SpecificationsTechnische Daten

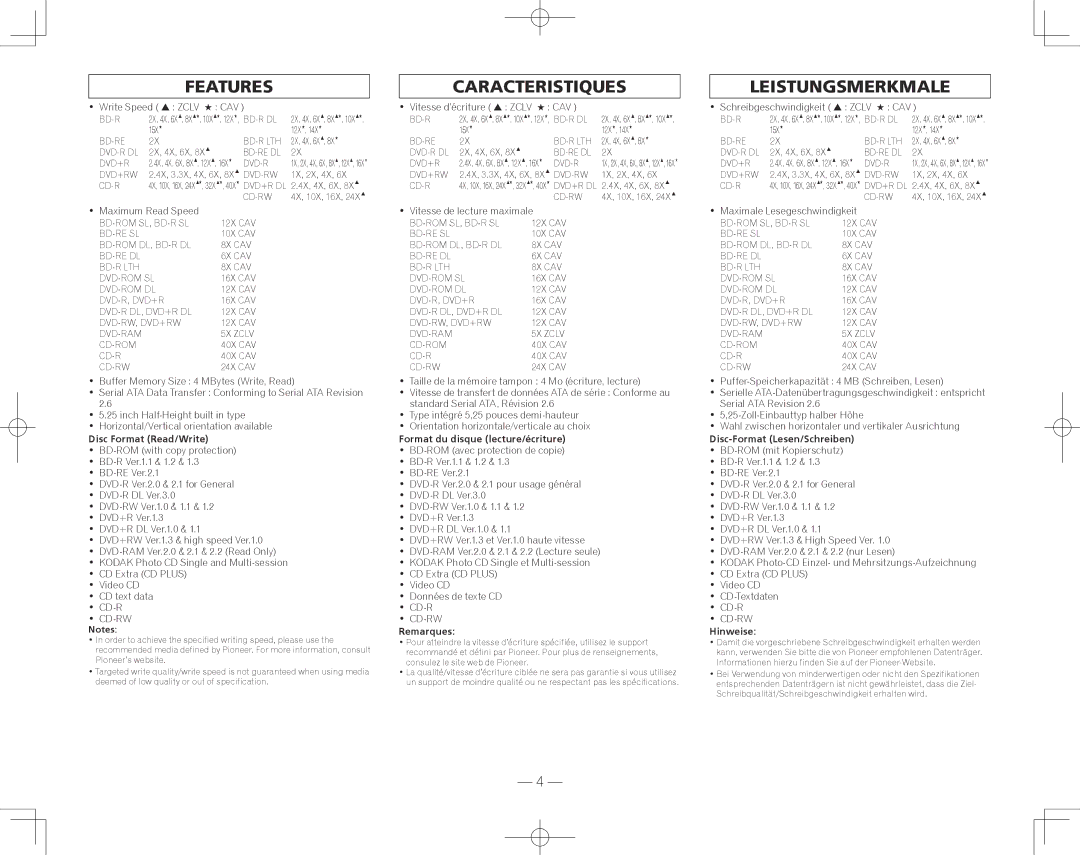
BDR-207DBK specifications

The Pioneer BDR-207DBK is a powerful Blu-ray disc writer that epitomizes reliability and performance for both home and professional use. This remarkable device supports a wide range of disc formats, making it an excellent choice for users seeking versatility in their optical media storage needs. With the capacity to read and write on Blu-ray, DVD, and CD formats, the BDR-207DBK proves to be a comprehensive solution for data archiving, media creation, and playback.

One of the standout features of the BDR-207DBK is its impressive writing speed. Supporting Blu-ray writing at a stunning 16x speed, it reduces the time required to create high-definition content significantly. Additionally, the device is equipped to handle 6x writing speeds for BDXL discs, which can hold up to 128GB of data. This capability is particularly useful for those managing large video files, backup data, or extensive software distributions.

The BDR-207DBK employs advanced technologies that enhance both performance and reliability. One such feature is the Pioneer's "Pure Read" technology, which ensures accurate data verification while reading discs, effectively minimizing read errors. This is especially important when working with older or scratched discs. Another important technology is the "Static and Dynamic Overwrite" modes, which optimize the writing process for improved stability and quality.

Additionally, the BDR-207DBK is equipped with a robust buffer memory, which reduces the risk of buffer underruns, a common issue during high-speed writing processes. This functionality ensures a smoother writing experience even when the data transfer rate fluctuates.

The design of the BDR-207DBK also deserves mention. It boasts a sleek, modern appearance, making it an aesthetically pleasing addition to any home entertainment setup or workstation. The device comes with user-friendly software, allowing for easy setup and operation regardless of the user’s technical expertise.

Compatibility is another strong point for the BDR-207DBK, as it works seamlessly with various operating systems, including Windows and macOS. This makes it a suitable choice for a diverse range of users, from casual consumers to tech professionals.

In summary, the Pioneer BDR-207DBK is a top-tier Blu-ray writer that combines speed, versatility, and innovation. Its advanced features, robust build, and compatibility make it an ideal option for anyone looking to elevate their optical media capabilities. Whether archiving precious memories or creating large-scale media projects, the BDR-207DBK stands out as a reliable and efficient choice.