EN 9
| **CHARGE MARKER | |
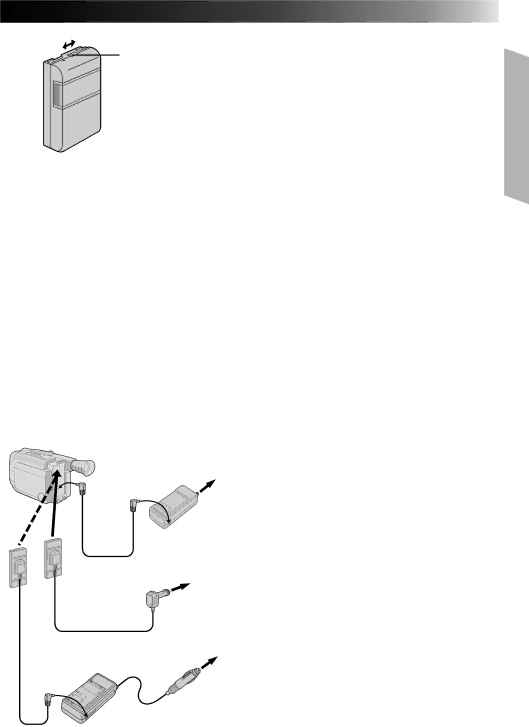
Charge marker | A charge marker is provided on the battery pack to | |
help you remember whether it has been charged or | ||
| ||
| not. Two colors are provided (red and | |
| choose which one means charged and which | |
| means discharged. |
NOTES:
●The recording time per charge is affected by such factors as the time spent in Record/Standby mode and the frequency of zooming. It is safer to have spare battery packs.
●Charging times noted on page 8 are for fully discharged battey pack, and discharging times are for fully charged battery pack.
●Charging and discharging times vary according to the ambient temperature and the status of the battery pack.
●Remember to set the charge marker after charging a battery pack or after detaching a discharged one from your camcorder.
●Perform the REFRESH function after no less than 5 chargings.
●High temperatures can damage the battery pack, so use only where good ventilation is available. Don’t allow it to discharge in container, such as a bag.
●If you stop recharging or discharging part way through, make sure to remove the battery pack before unplugging the adapter’s AC cord.
●Remove the battery pack from the adapter immediately after discharging.
●To avoid interference with reception, do not use the AC Power Adapter/Charger near a radio.
●Make sure you unplug the DC cord before charging or discharging the battery pack.
●A blinking CHG. indicator means that the battery pack has become hot. Wait until it cools down to continue.
●The CHG. indicator may not light properly with a brand new battery pack, or with one that’s been stored for an extended period. In this case, remove and reattach the battery pack and recharge it. The CHG. indicator should light during recharging. If not, contact your nearest JVC dealer.
DC OUT | To AC outlet | |
| ||
terminal |
| |
To DC |
|
|
in jack |
|
|
| AC Power | |
| Adapter/Charger | |
DC cord |
| |
|
| |
|
| To car's |
|
| cigarette |
Car Battery Cord |
| lighter socket |
|
| |
|
| |
USING A CAR BATTERY
Use the optional Car Battery Cord or Car Battery Charger/Adapter (connect as shown in the illustration to the left).
NOTES:
●When using the car battery, leave the engine idling.
●The optional Car Battery Charger
●When using the optional Car Battery Charger or Car Battery Cord
USING AC POWER
Use the AC Power Adapter (connect as shown in the illustration to the left).
NOTE:
The supplied AC Power Adapter/Charger features automatic voltage selection in the AC range from
Car Battery Charger/Adapter 110 V to 240 V.