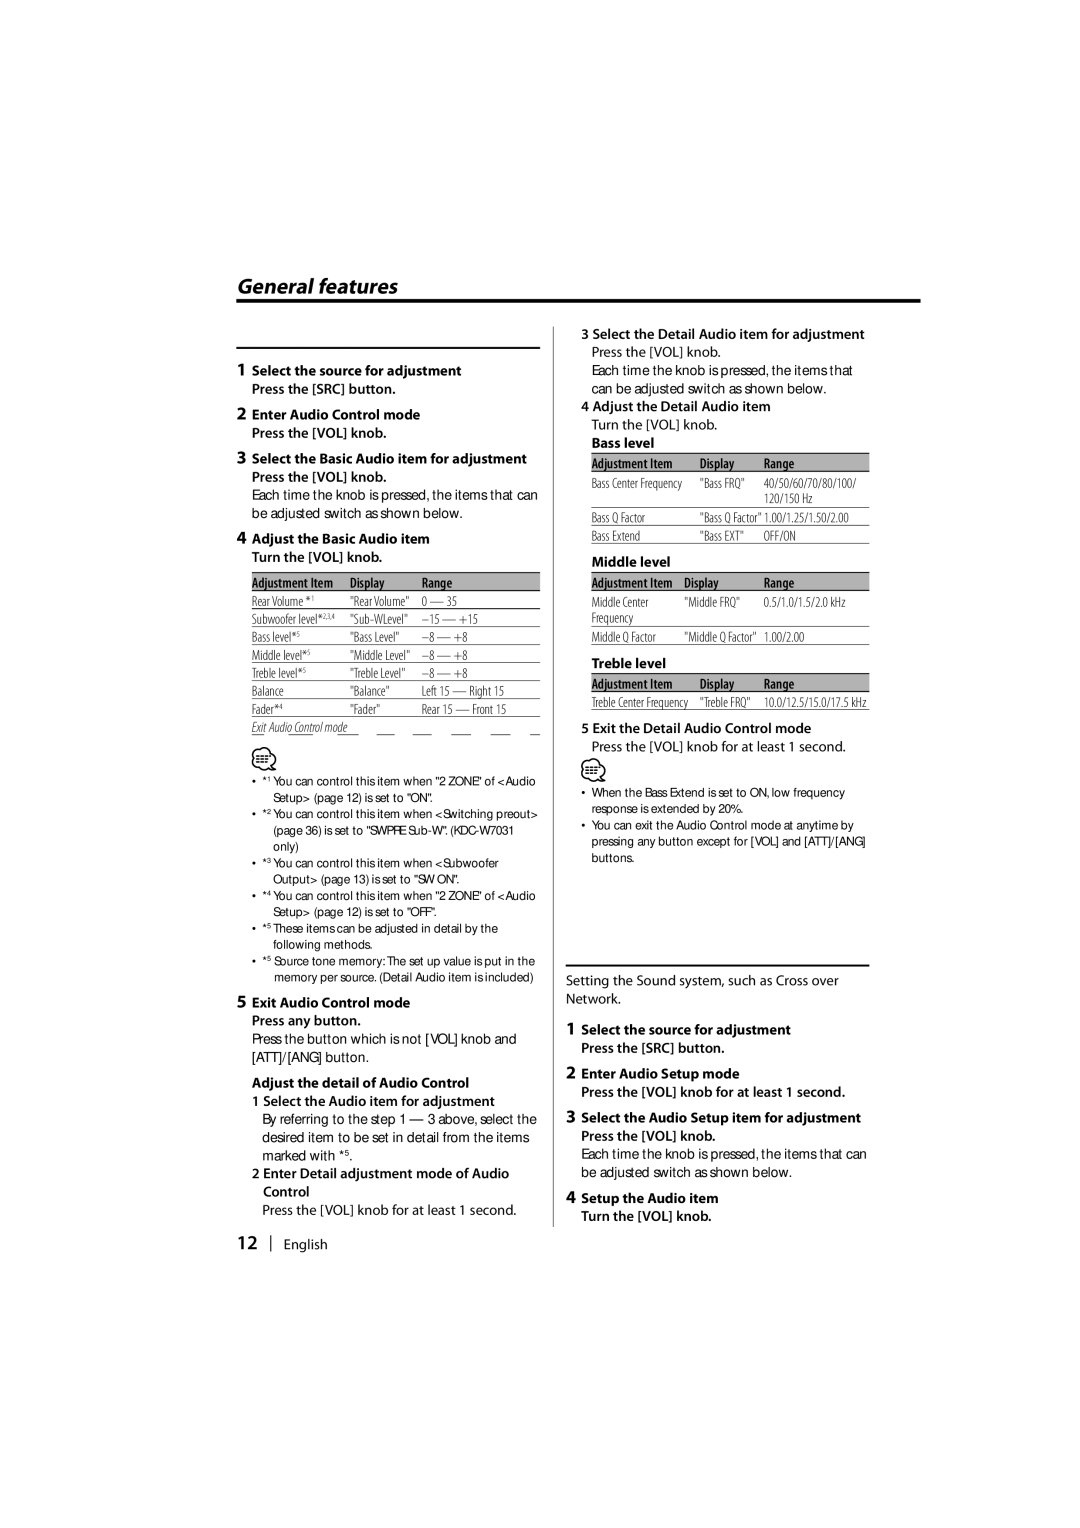
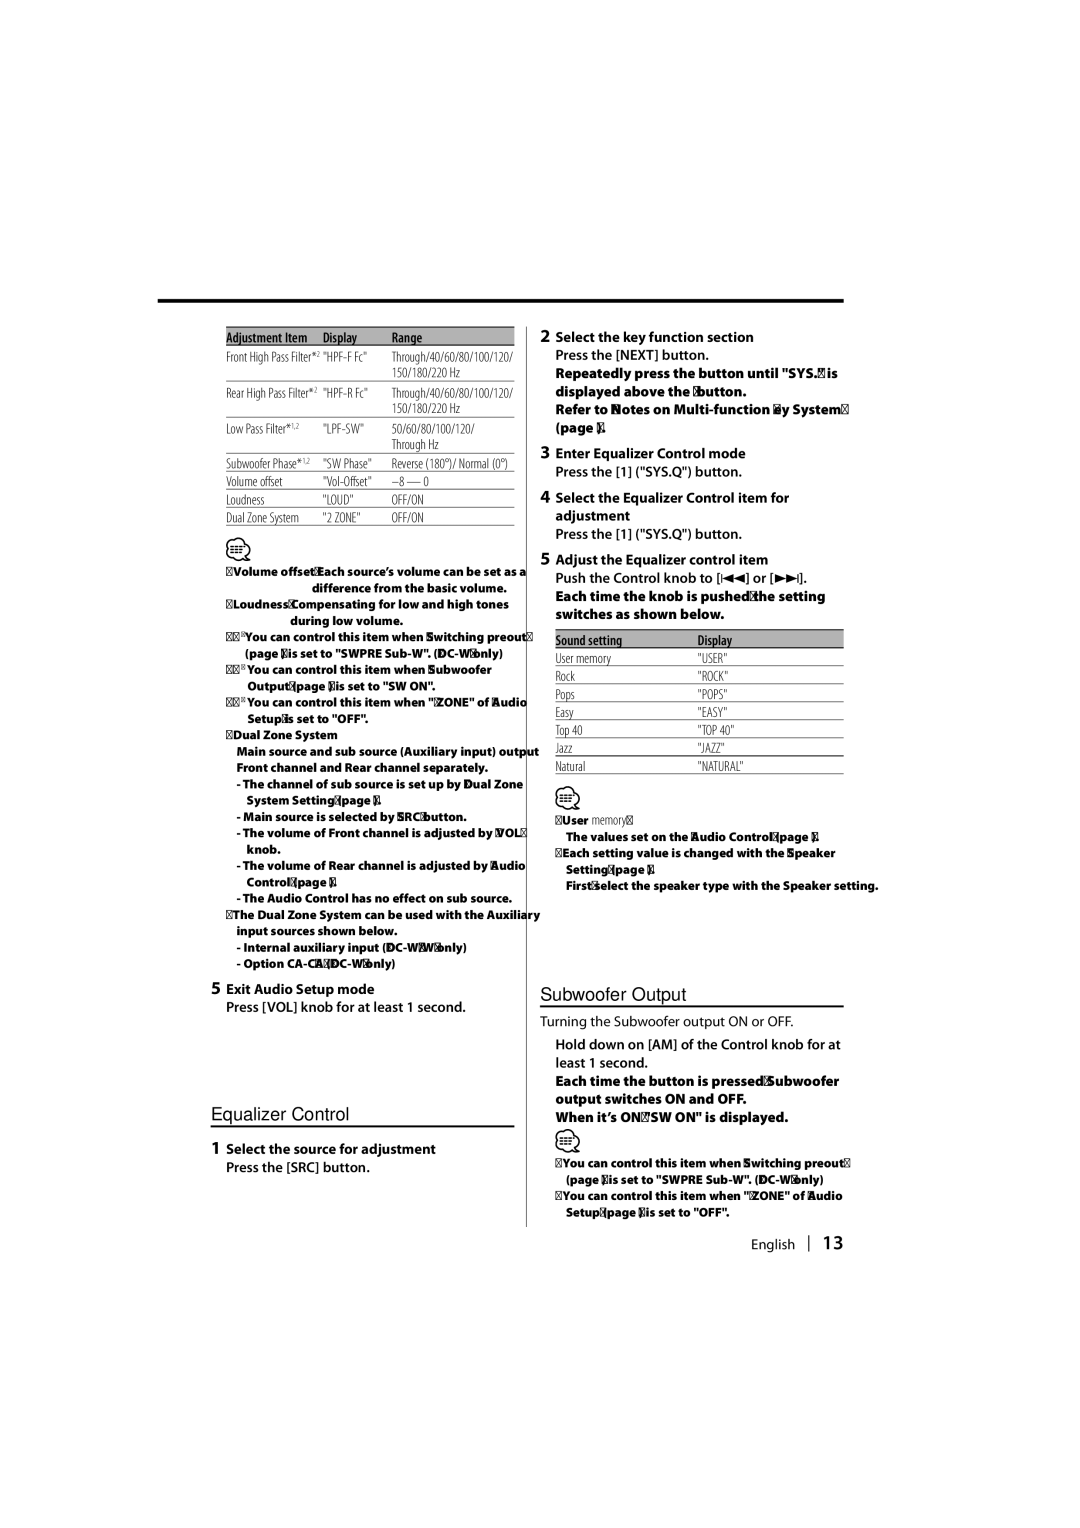
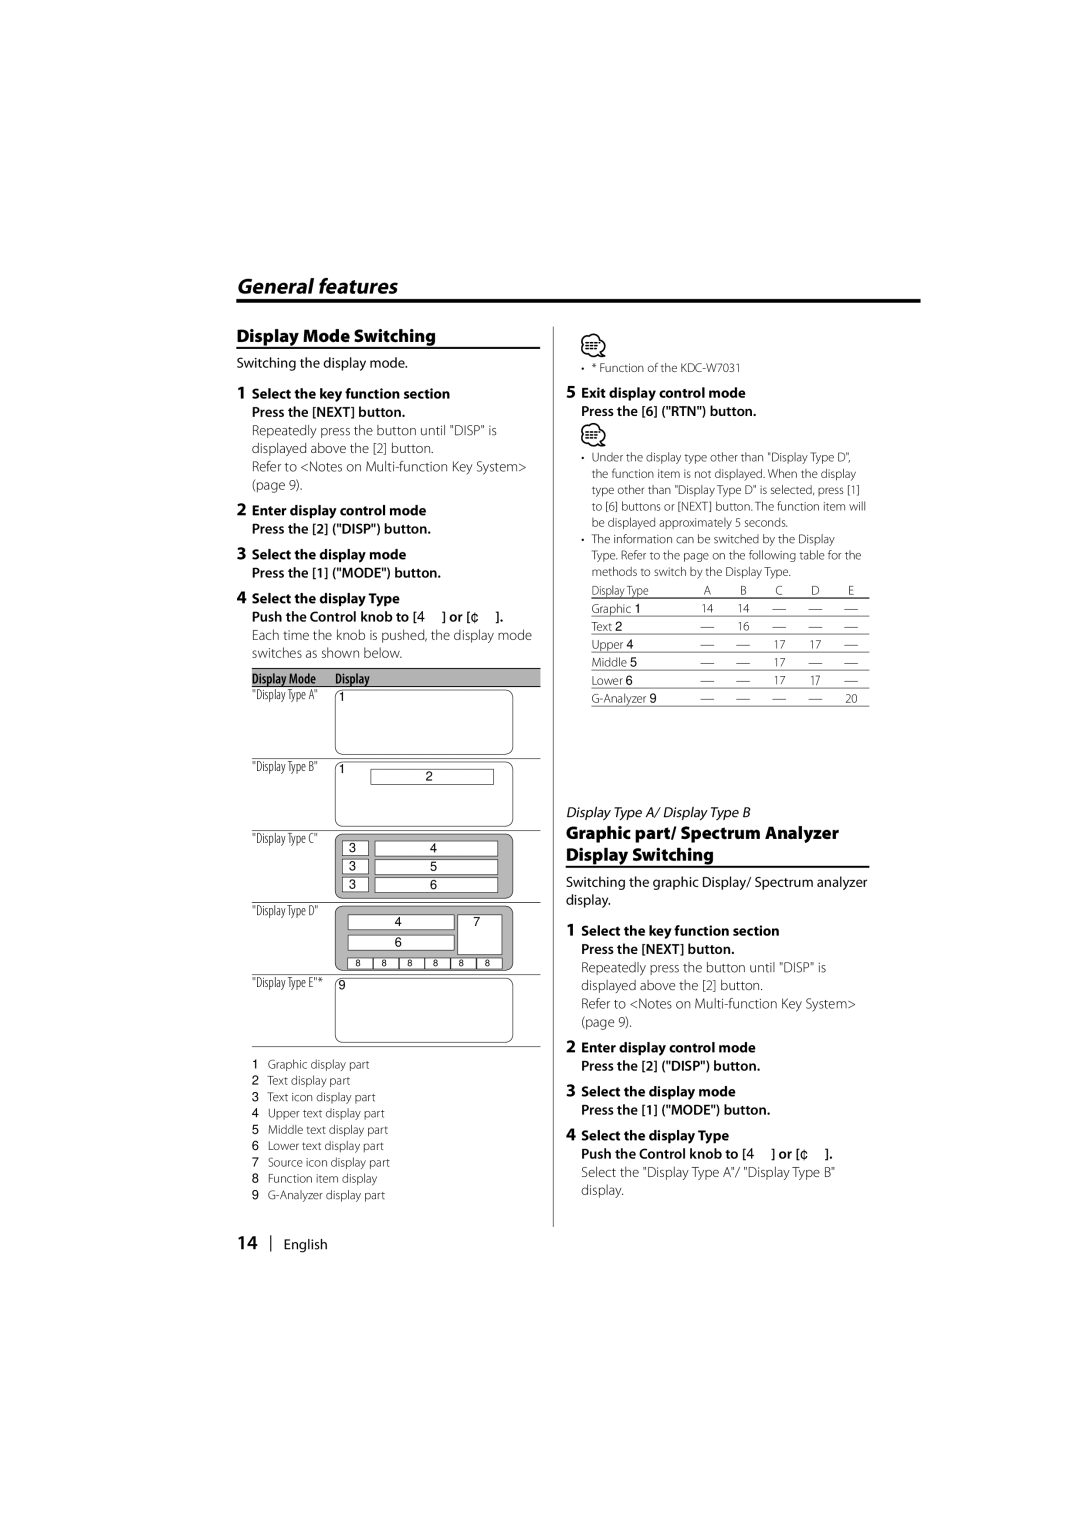
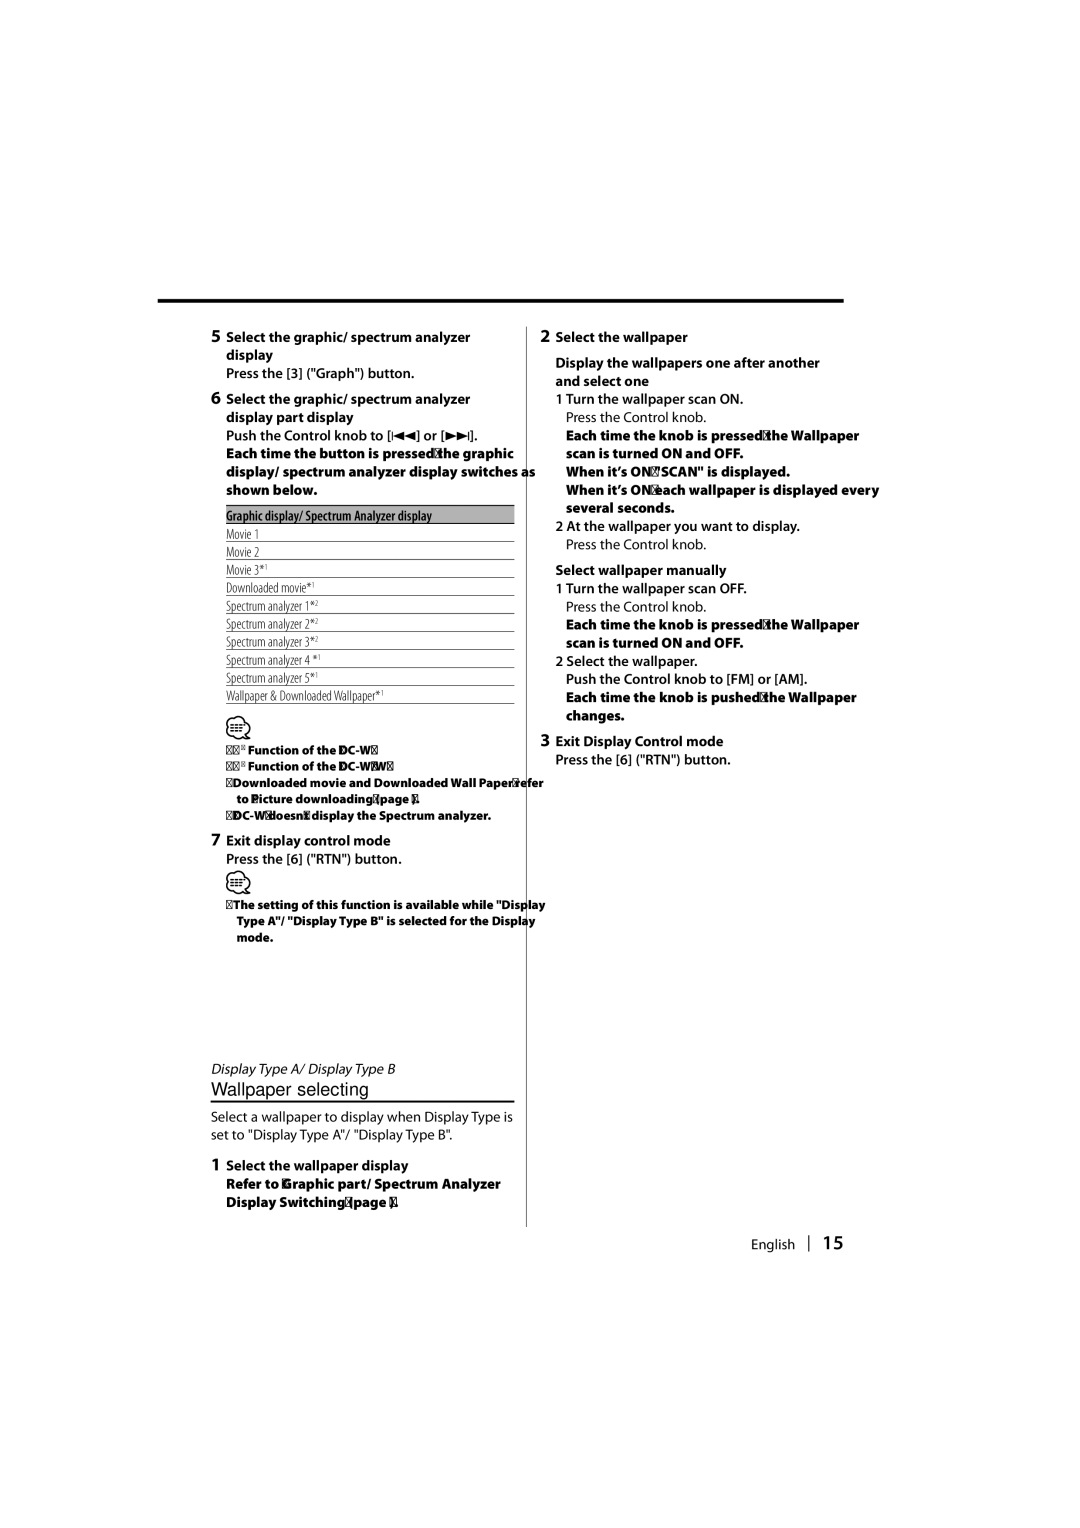
Kenwood KDC-W7031, KDC-W7531, KDC-W8531 instruction manual About CDs

Page 7

About CDs

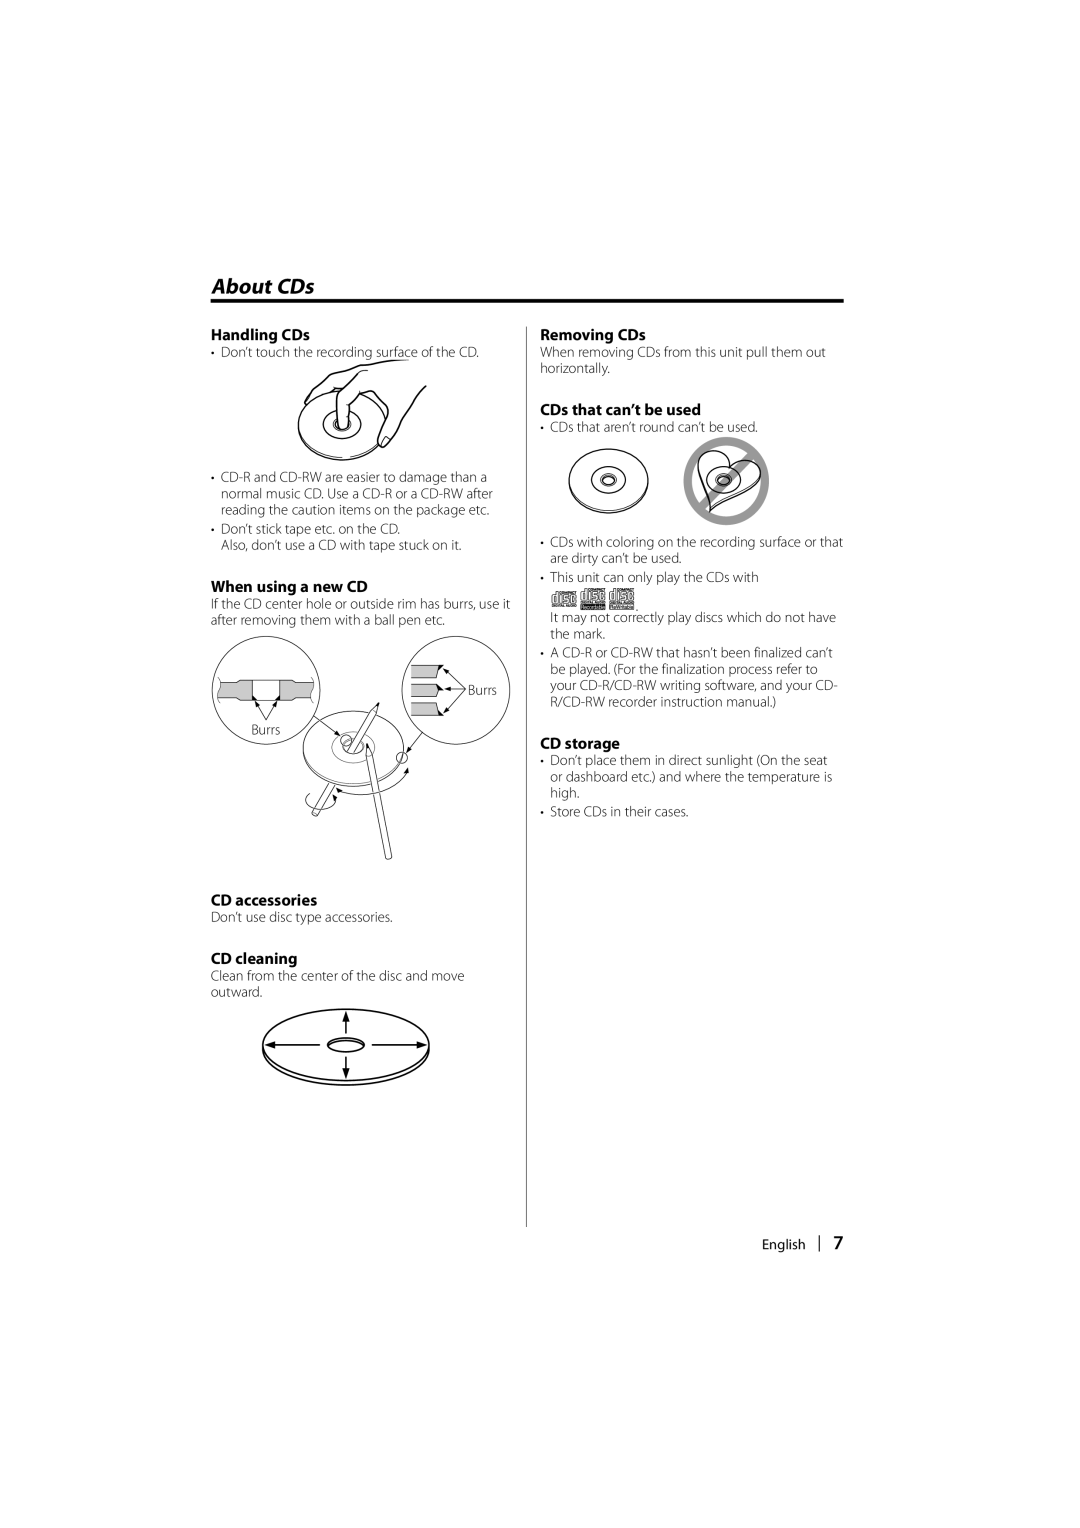
Handling CDs

• Don’t touch the recording surface of the CD.

CD-R and CD-RW are easier to damage than a normal music CD. Use a CD-R or a CD-RW after reading the caution items on the package etc.

Don’t stick tape etc. on the CD.

Also, don’t use a CD with tape stuck on it.

When using a new CD

If the CD center hole or outside rim has burrs, use it after removing them with a ball pen etc.

Burrs

Burrs

CD accessories

Don’t use disc type accessories.

CD cleaning

Clean from the center of the disc and move outward.

Removing CDs

When removing CDs from this unit pull them out horizontally.

CDs that can’t be used

• CDs that aren’t round can’t be used.

CDs with coloring on the recording surface or that are dirty can’t be used.

This unit can only play the CDs with

.

It may not correctly play discs which do not have the mark.

A CD-R or CD-RW that hasn’t been finalized can’t be played. (For the finalization process refer to your CD-R/CD-RW writing software, and your CD- R/CD-RW recorder instruction manual.)

CD storage

Don’t place them in direct sunlight (On the seat or dashboard etc.) and where the temperature is high.

Store CDs in their cases.

English 7

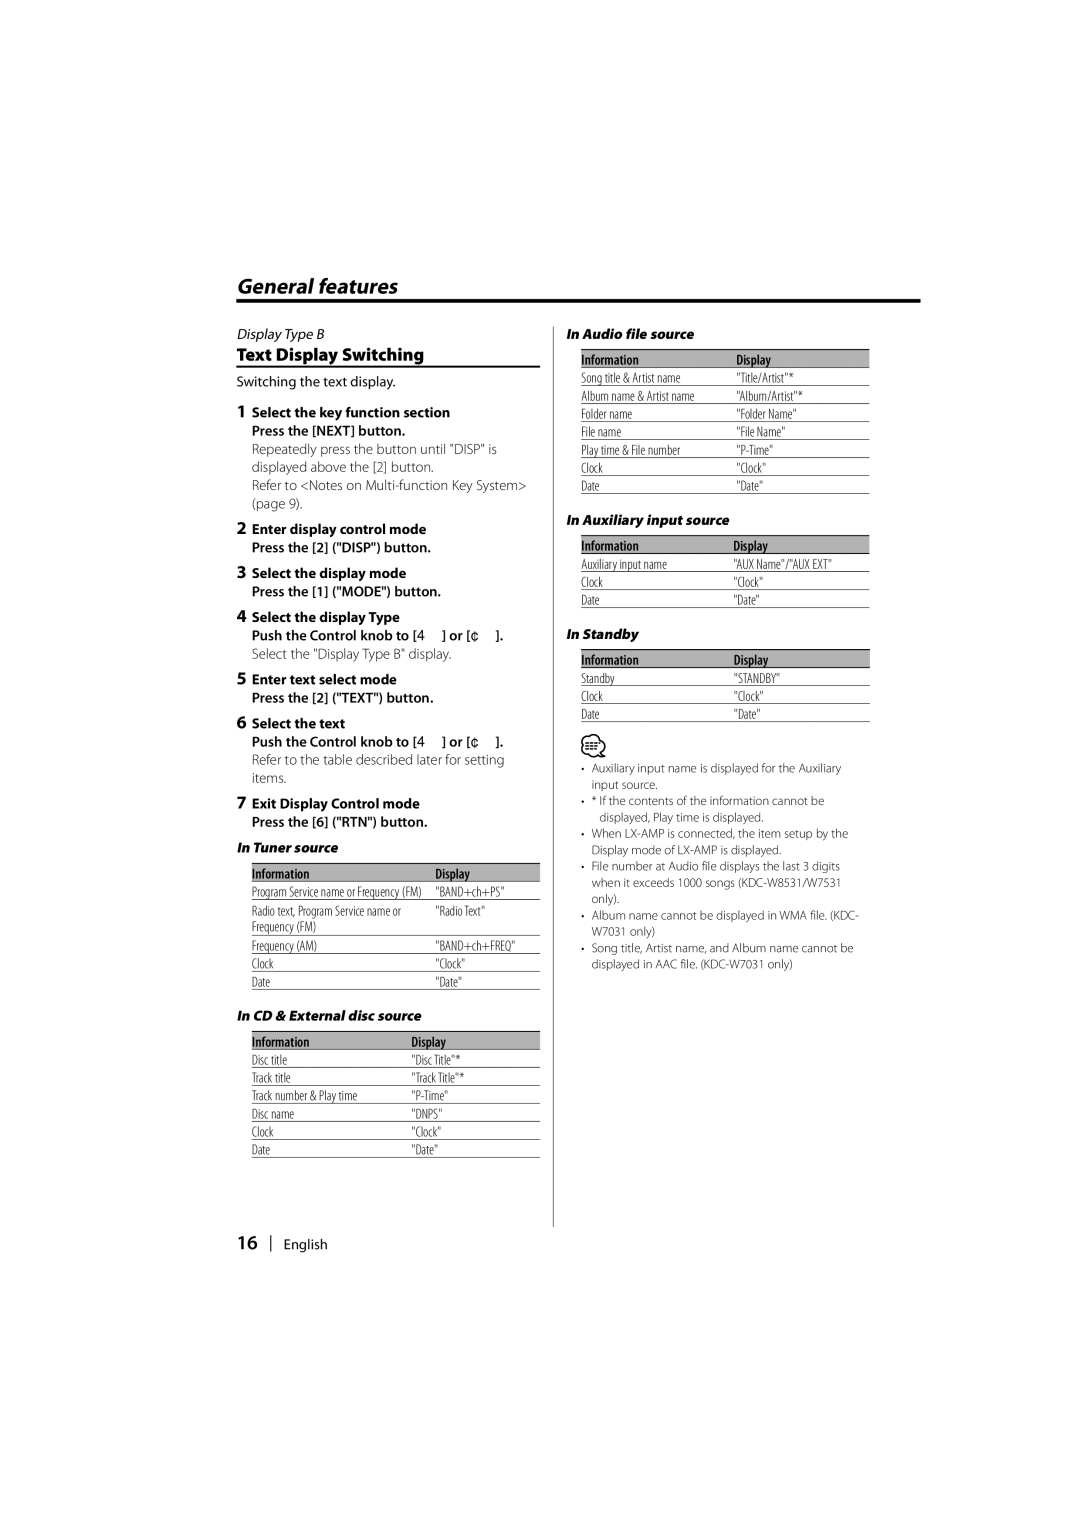
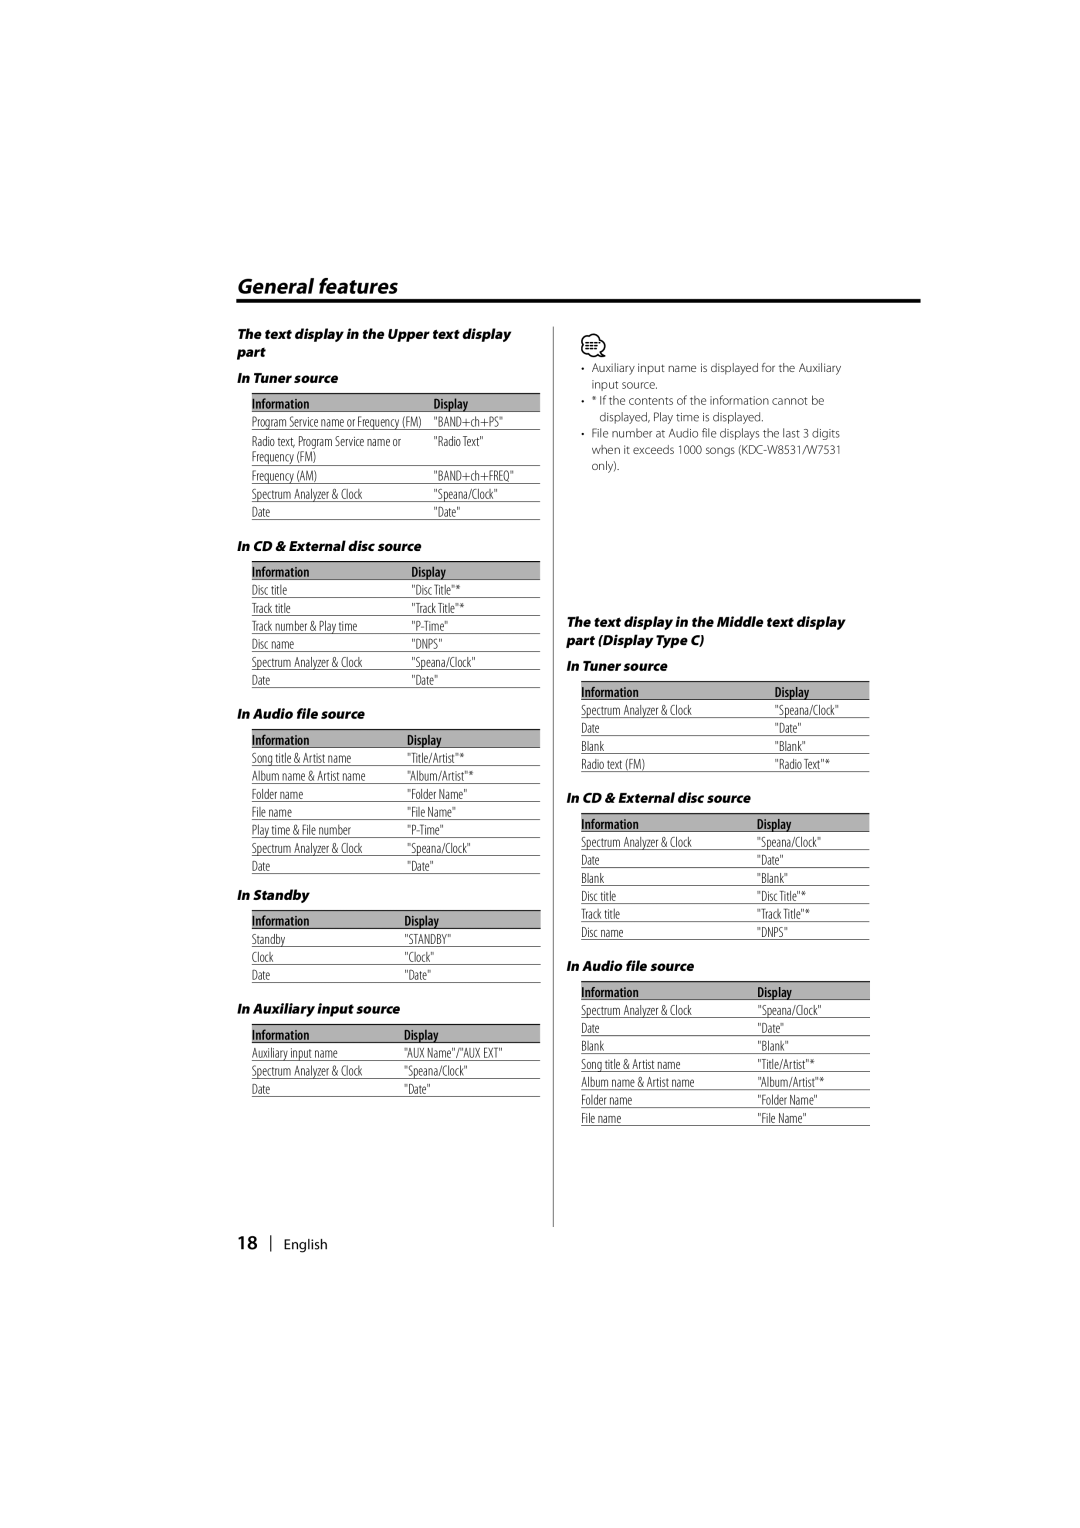
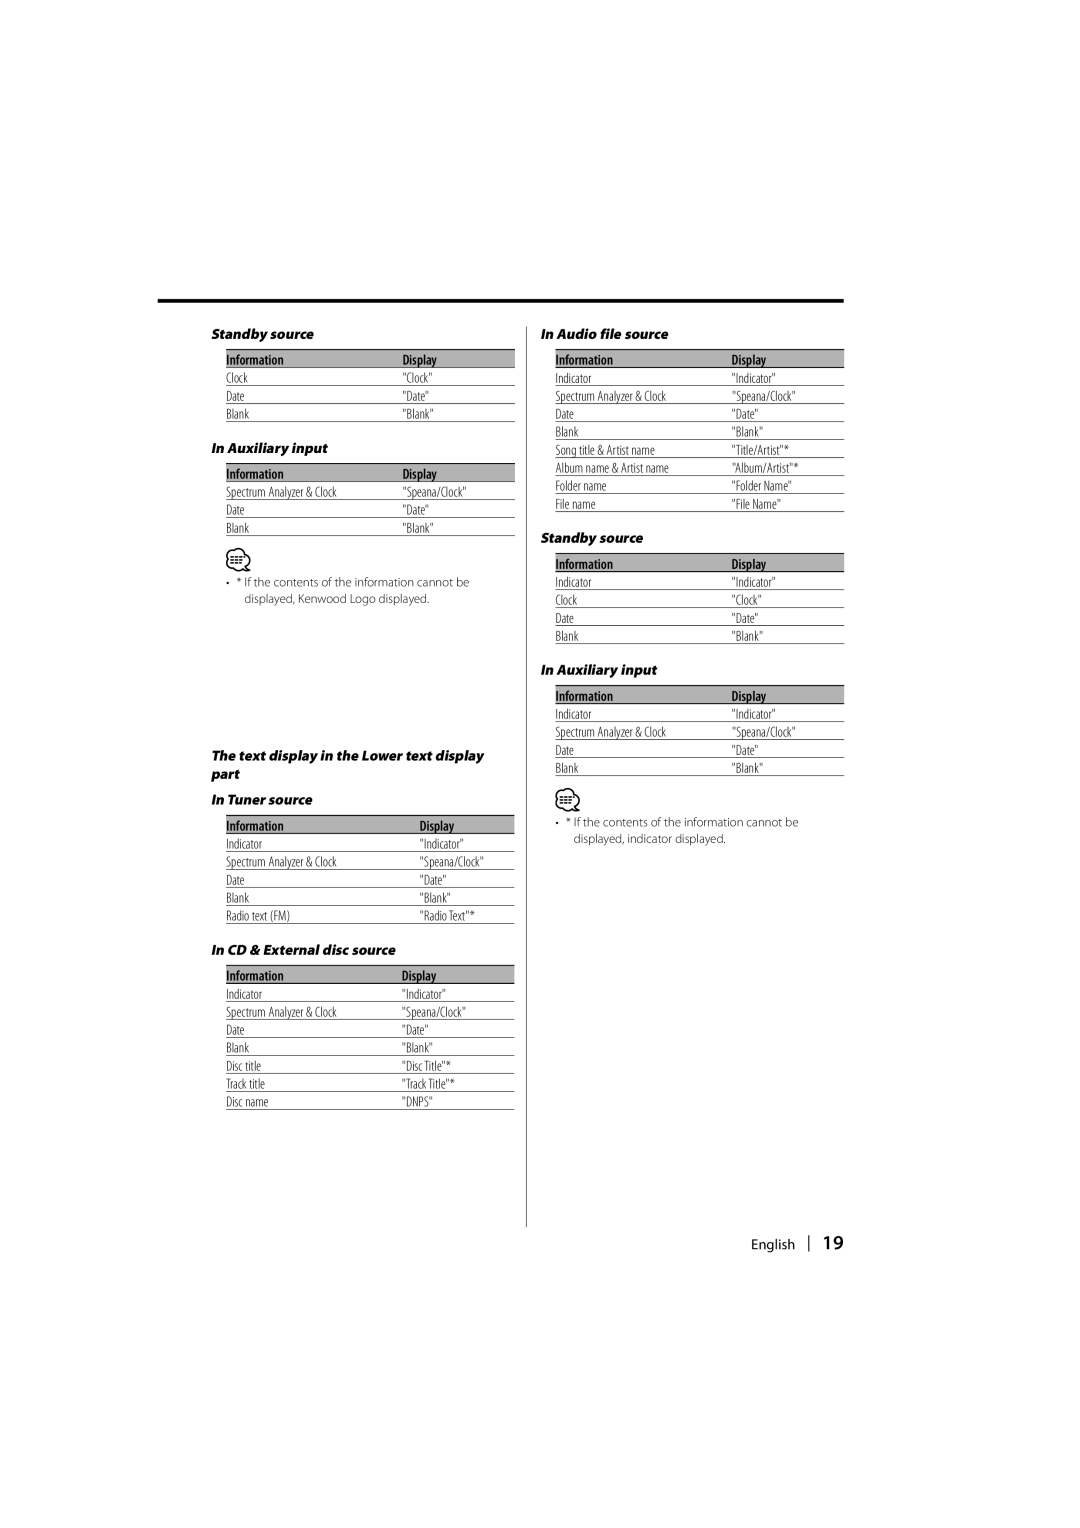
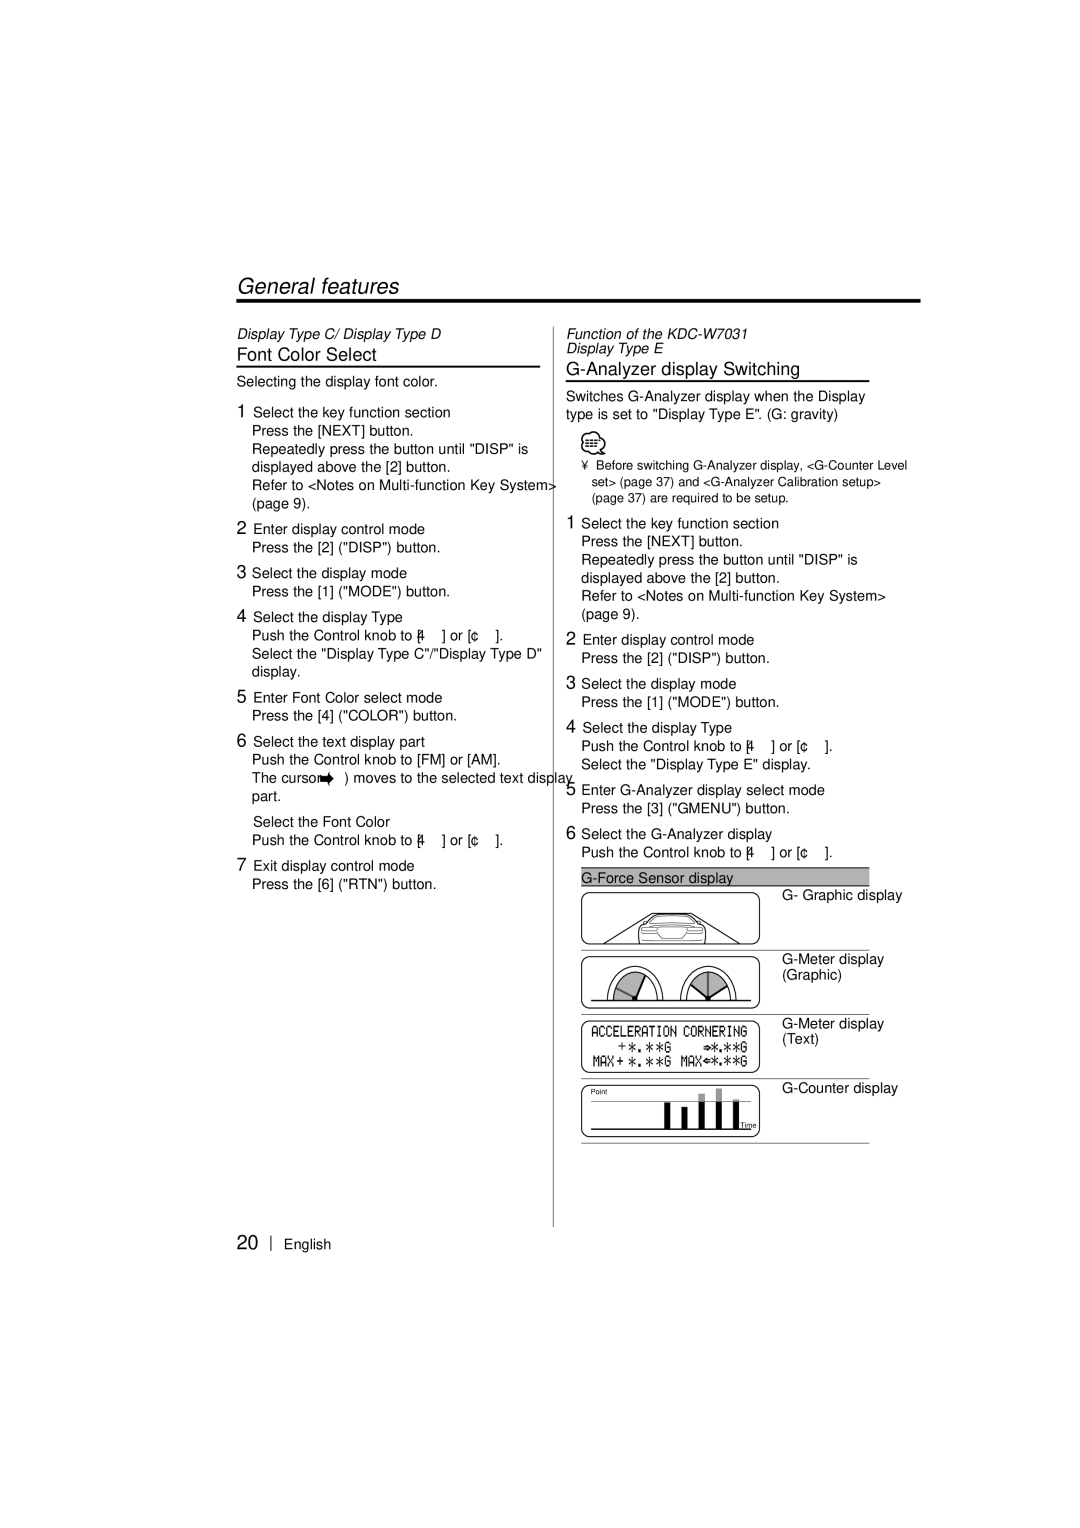
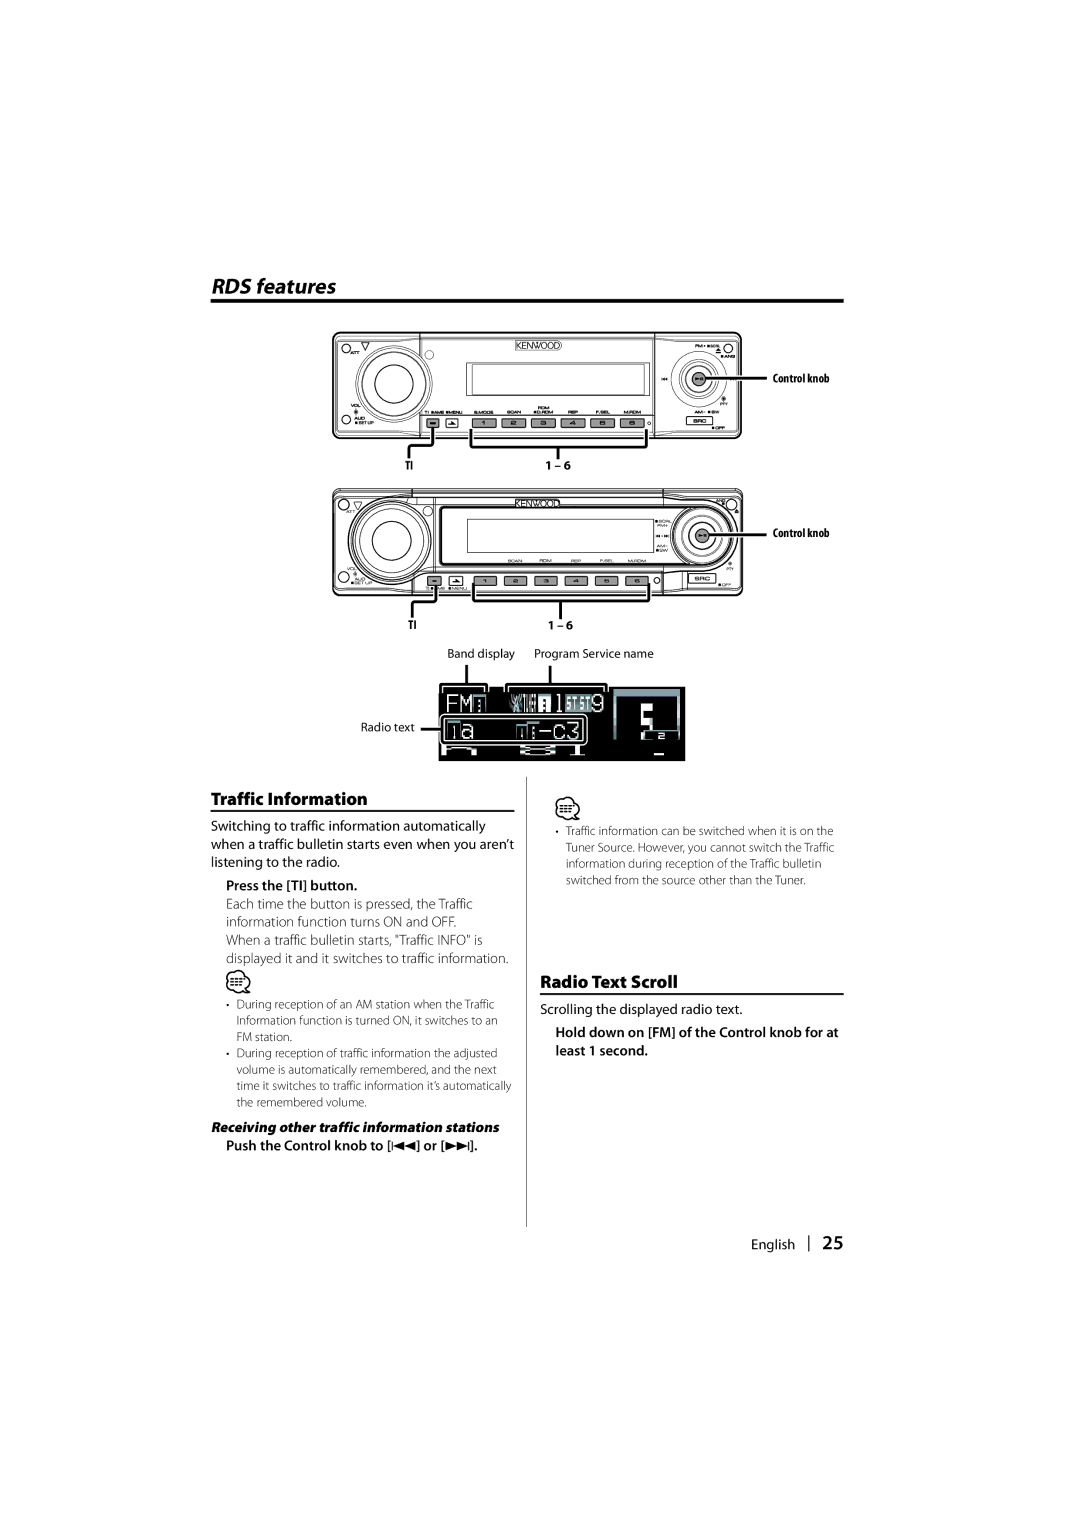
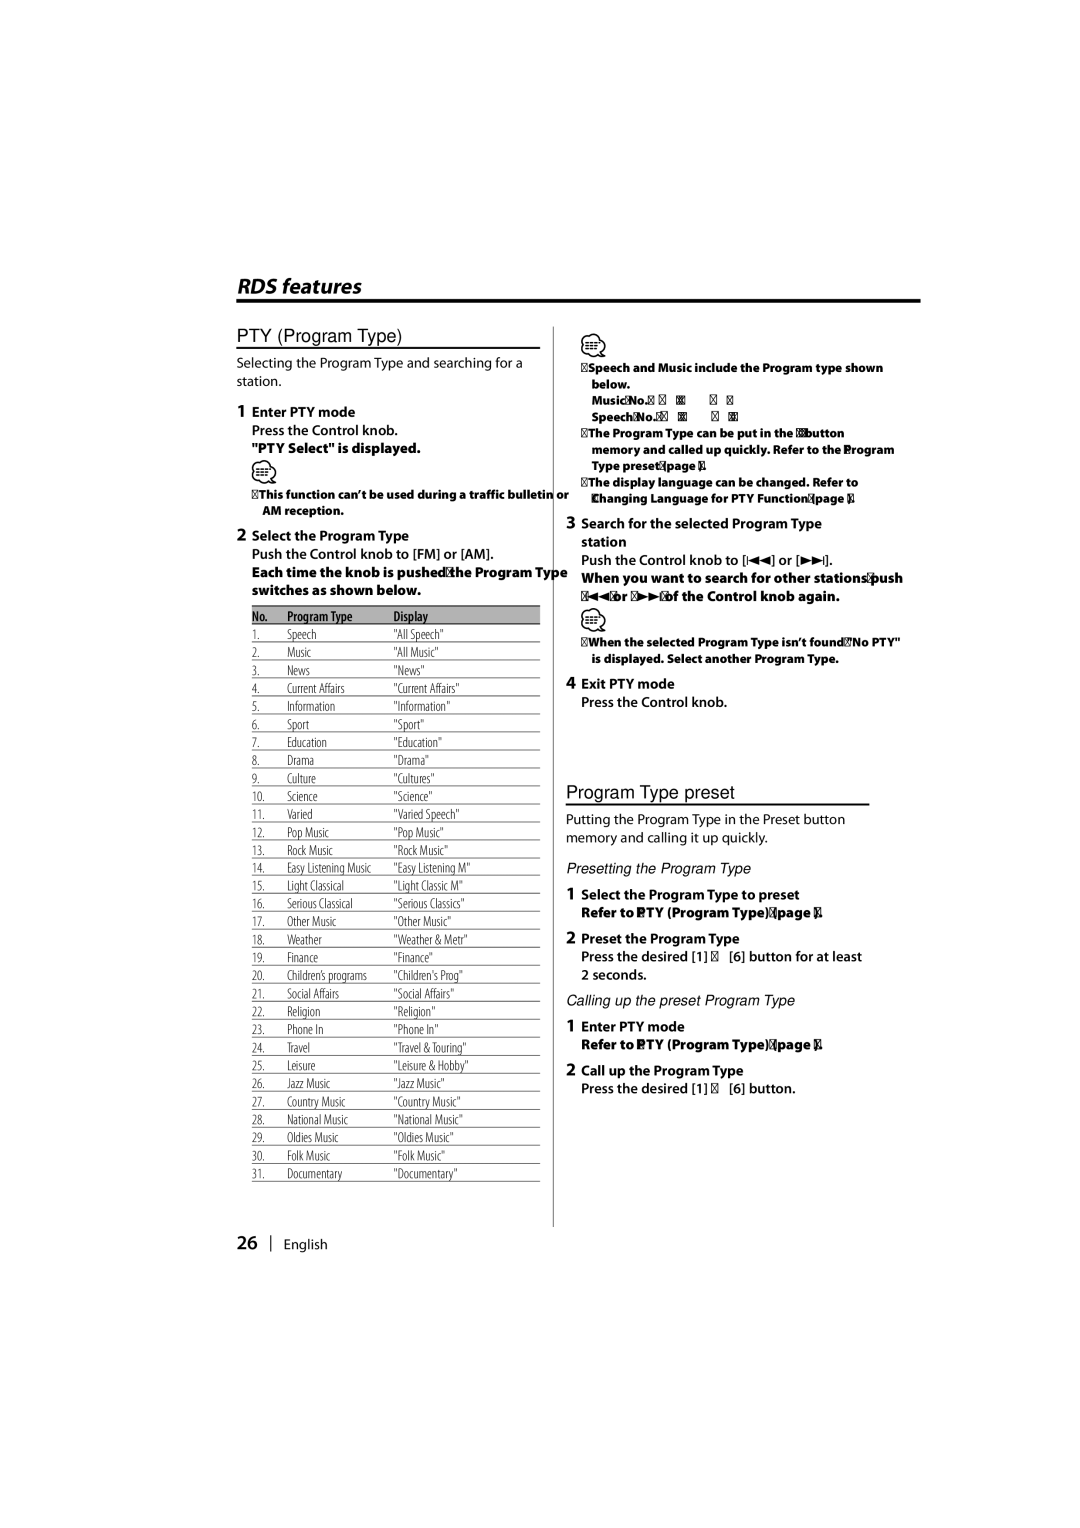
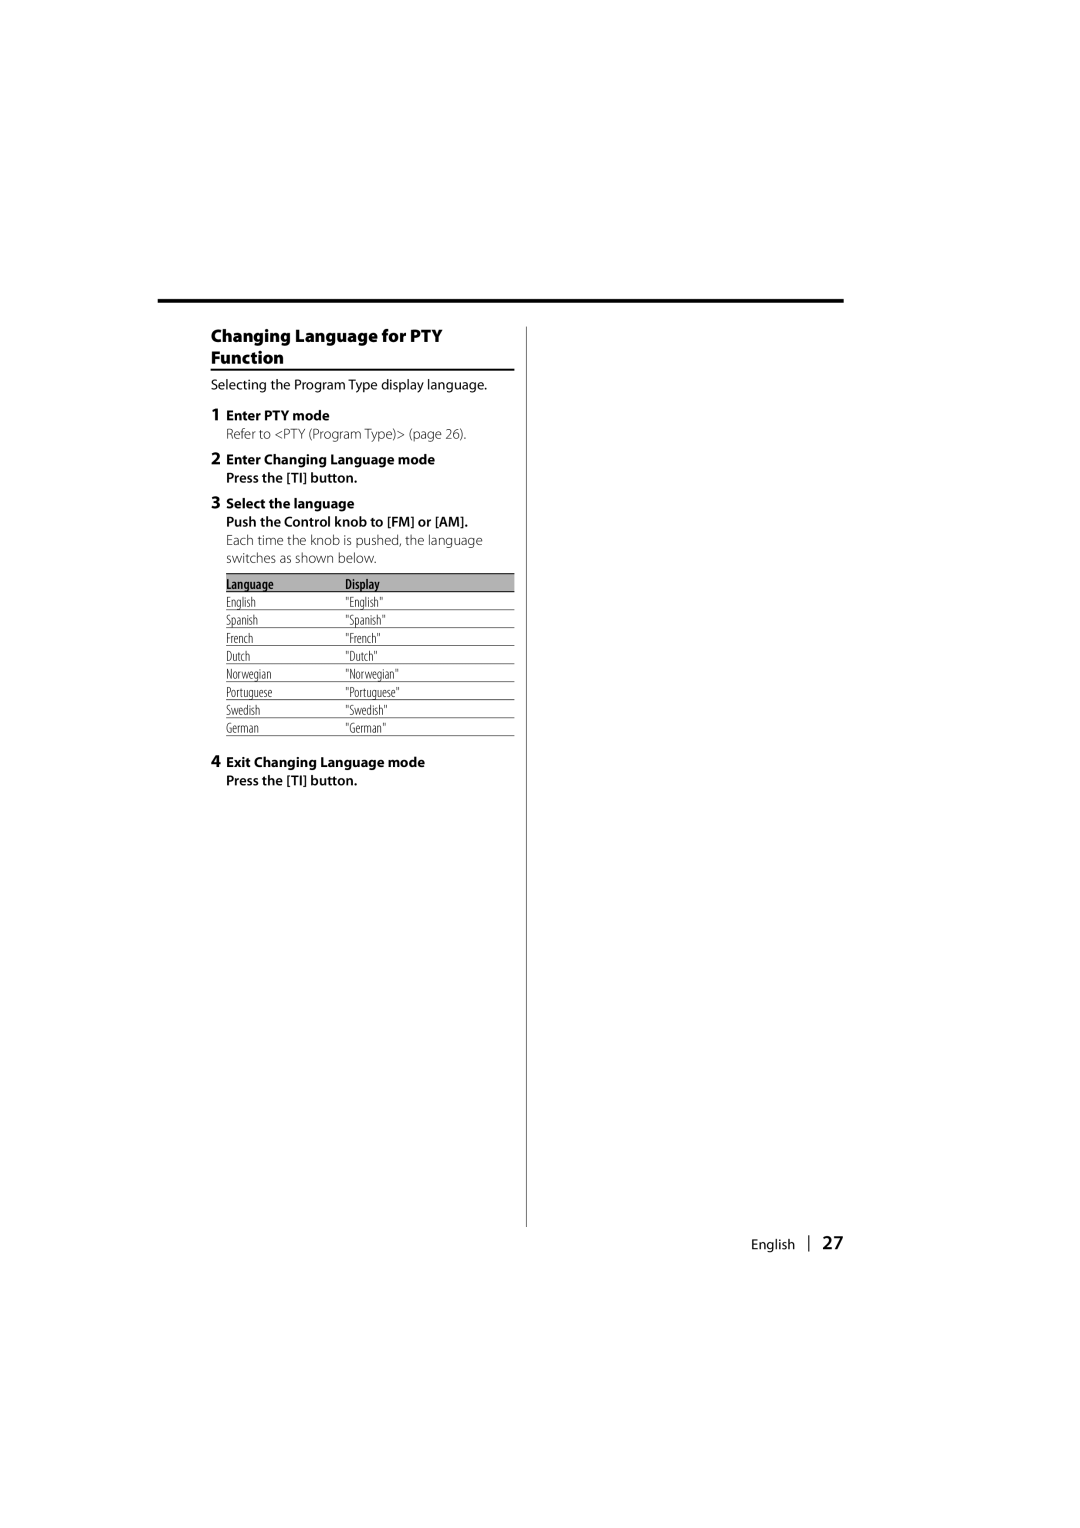
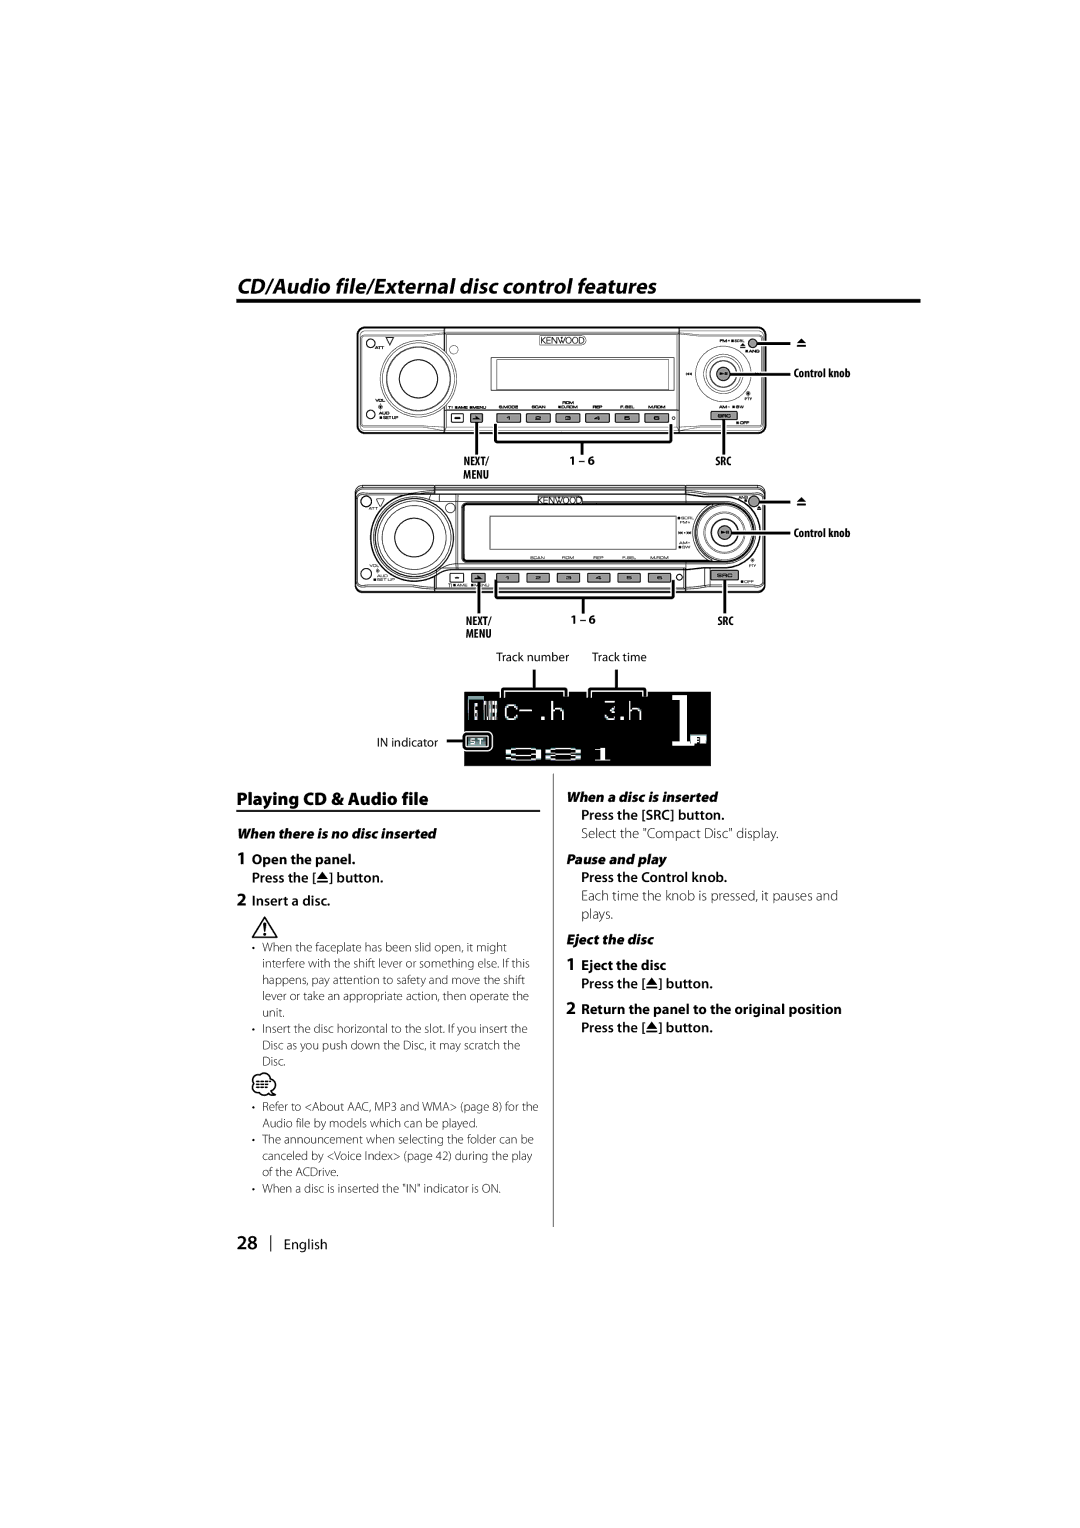
Image 7
Contents KDC-W8531 KDC-W7531 KDC-W7031 Contents Connecting Wires to Terminals Do Not Load 8 cm 3 in. CDs in the CD slot Safety precautions To prevent injury or fire, take the following precautions Attach the panel while you are on the vehicleAbout DAB Tuner control Cleaning the UnitCleaning the Faceplate Terminals Before using this unit for the first timeClass Laser Product Marking of products using lasers Except for some areasAbout CDs About AAC, MP3 and WMA Real operational example of the Multi- function Key System Setting each functionWhat’s the Multi-function Key System? Displaying the desired functionSelecting the Source General featuresPower VolumeRemoving the Faceplate Faceplate Angle AdjustmentSpeaker Setting Theft Deterrent FaceplateAudio Control Audio SetupHold down on AM of the Control knob for at least 1 second Exit Audio Setup mode Press VOL knob for at least 1 secondEqualizer Control Subwoofer OutputSwitching the graphic Display/ Spectrum analyzer display Display Mode SwitchingGraphic part/ Spectrum Analyzer Display Switching Switching the display modeSelect the wallpaper Push the Control knob to FM or AM Wallpaper selectingWallpaper & Downloaded Wallpaper*1 Select the wallpaper displayAudio file source Text Display SwitchingTuner source CD & External disc sourceCursor moves to the selected text display part Date Blank Radio text FM Radio Text Text display in the Upper text display part Tuner sourceSpeana/Clock Song title & Artist name Title/ArtistAuxiliary input Standby sourceText display in the Lower text display part Tuner source Font Color Select Analyzer display SwitchingSelect the Font Color Push the Control knob to 4 or ¢ OEM Disp is displayed External Display SwitchingSwitching the display in the External Display connected Enter display control mode Press the 2 Disp buttonListening to the audio during a call When a call comesWhen the call ends TEL MuteCanceling Direct Access Tuning Tuner featuresTuning Direct Access TuningOpen Auto Memory Entry Station Preset MemoryPreset Tuning Auto Memory EntryPress the TI button RDS featuresTraffic Information Radio Text ScrollPTY Program Type Program Type presetPresetting the Program Type Calling up the preset Program TypeSelecting the Program Type display language Changing Language for PTY FunctionPlaying CD & Audio file CD/Audio file/External disc control featuresDisc Search/Folder Search Playing External DiscFast Forwarding and Reversing Track/File SearchMagazine Random Play Track/File/Disc/Folder RepeatScan Play Random PlayFolder Select Canceling the Disc Random PlayCanceling the Folder Select mode Disc Random PlayText/Title Scroll Switching the Play modeCanceling the Letter Seek Letter SeekSelect the characters Push the Control knob to FM or AM Exit Menu mode Press the Menu buttonDisc Naming Dnps Play the disc you want to attach a name toSet the menu item Menu systemSecurity Code Select the Beep displayTouch Sensor Tone Manual Clock AdjustmentSwitching preout Date AdjustmentDate Mode DSI Disabled System IndicatorAnalyzer Reset Built-in Amp SettingCounter Level set S. Frequency Offset Dual Zone System SettingAnalyzer Stop Watch S. Bass Management SystemLocal Seek News Bulletin with Timeout SettingTuning Mode AMP ControlMonaural Reception Auxiliary Input Display Setting & Disc NamingRestricting RDS Region Region Restrict Function Auto TP SeekText Scroll Built-in Auxiliary input SettingPower OFF Timer CD Read SettingACDrive firmware version display Canceling DownloadingPicture downloading Voice IndexAudio Preset Call Audio Preset MemoryUnique ID display Sets the demonstration mode Demonstration mode SettingLoading and Replacing the battery Basic Operations of remote Accessory of the KDC-W8531Basic operations Tuner source Dual Zone SystemDisc source Accessories Installation Procedure Accessories/ Installation ProcedureConnecting Wires to Terminals Ignition cable Red Pin Red Unit Connector Function GuideConnecting the ISO Connector Cable Colour FunctionsFirewall or metal support InstallationInstallation Screwing the Faceplate on the UnitRemoving the hard rubber frame Lock Catch Accessory2 Removal toolAccessory2 Removal tool Removing the UnitGeneral Troubleshooting GuideDisc source Tuner source? Cannot play an Audio file ? The sound skips when an Audio file is being playedAudio file source Messages shown below display your systems conditionAutomatic disc changer exceeds 60C Hold ErrorWhen the temperature inside Play having no disc names presetSpecifications