SD1413
SERIES
CONTROL to select from the following Beep Tone options:
•BEEP ALL: Beep is heard any time a button is pressed (function activated).
•BEEP 2ND: Beep is heard only when a secondary function is activated (press and hold).
•BEEP OFF: Beep is not heard.
Liquid Crystal Display (LCD)
The liquid crystal display (LCD) panel (8) displays the frequency, time and activated functions of the unit.
NOTE: After being subjected to cold temperatures, LCD panels may take longer to respond and visibility of the numbers on the LCD may decrease slightly. The LCD display will return to normal when the temperature increases to a normal range.
Display (DISP)
Press this button to view Clock, Programme
Type (PTY), and Frequency of the station in
listening.
Auxiliary Input
Lift the cover on the right side of the radio to reveal the AUX IN connector (16). Use the included 3.5mm media cable to connect a portable media device for playback through the vehicle sound system.
Front Panel Release
The front panel REL (release) button (10) releases the mechanism that holds the front panel to the chassis.
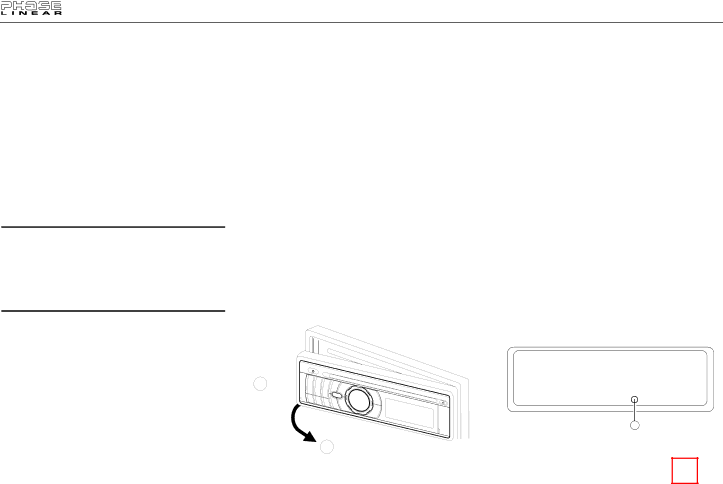
Detaching the Front Panel
To detach the front panel, first press the REL button (10) to release the left side of the panel. Next, grasp the released side and pull the panel off the chassis. After removing the front panel, store it in the supplied carrying case to protect it from dirt and damage.
REMOVE FRONT PANEL
1 ![]()
![]()
![]()
![]()
![]()
Re-attaching the Front Panel
To
Reset Button
The reset button (26) is located on the front of the chassis and can only be accessed with the front panel removed. The reset circuitry protects the microprocessor circuitry. Since resetting the unit will erase the time and preset memories, it should only be activated upon initial installation after all wiring is complete, or if there is a malfunction of any of the switches on the unit. In these circumstances, pressing the reset button will clear the system and return the unit to normal operation.
RESET
26
2
4