


WLTL34300 specifications
The Weslo WLTL34300 is a versatile and budget-friendly treadmill designed for home fitness enthusiasts. It caters to users of all fitness levels, providing an effective way to achieve cardiovascular health and weight management from the comfort of home. This model stands out due to its compact design and functionality, making it an ideal choice for those with limited space.One of the key features of the Weslo WLTL34300 is its 2.0 horsepower motor, which delivers a smooth, consistent performance. The motor allows users to reach speeds of up to 10 miles per hour, providing ample options for walking, jogging, or running. This flexibility in speed caters to a variety of workout intensities. Additionally, the treadmill includes a 2-position incline, allowing users to increase the challenge of their workouts without the need for a gym.
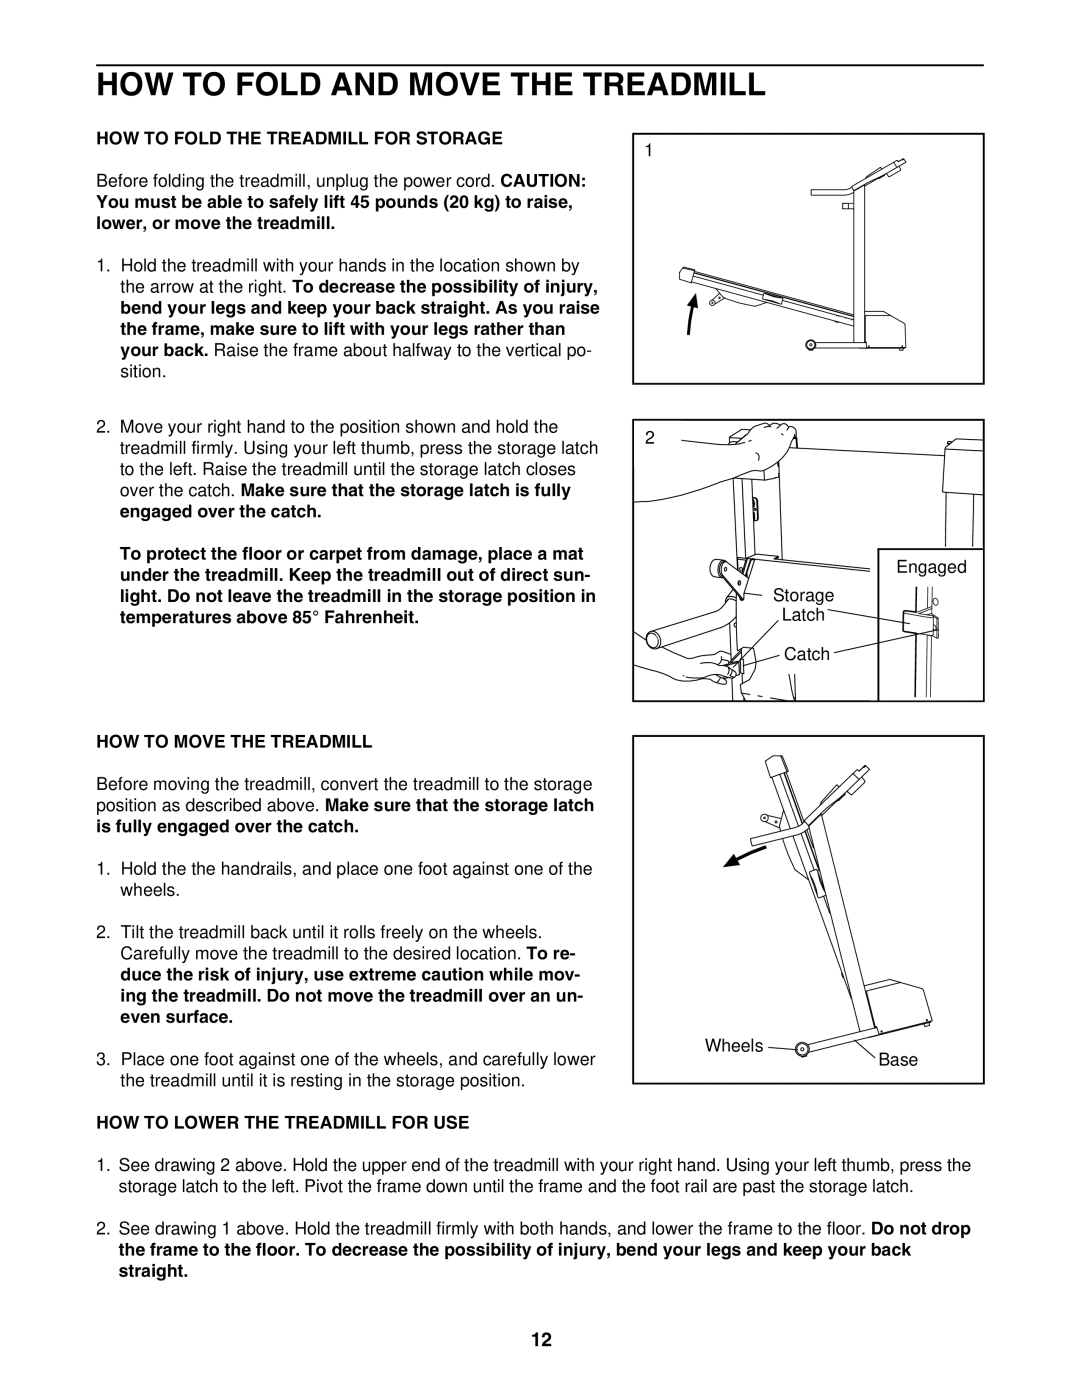
The running surface measures 16 inches by 50 inches, offering a comfortable area for users to exercise while maintaining a compact footprint. Its SpaceSaver design, which includes a folding mechanism, allows for easy storage between workouts, making it suitable for smaller living spaces.
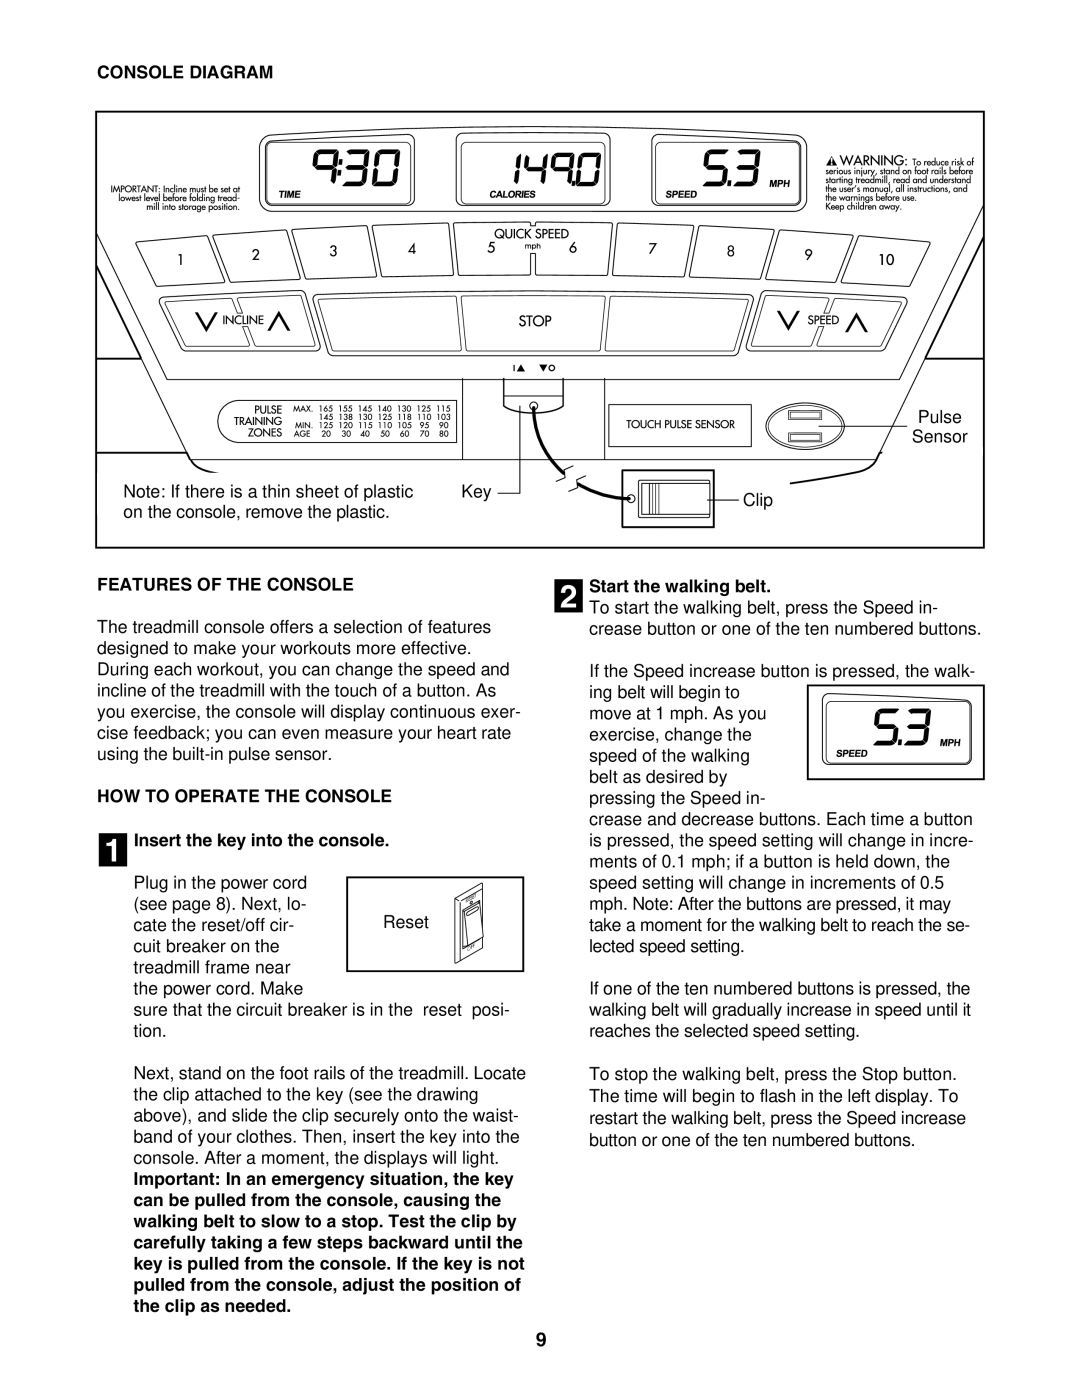
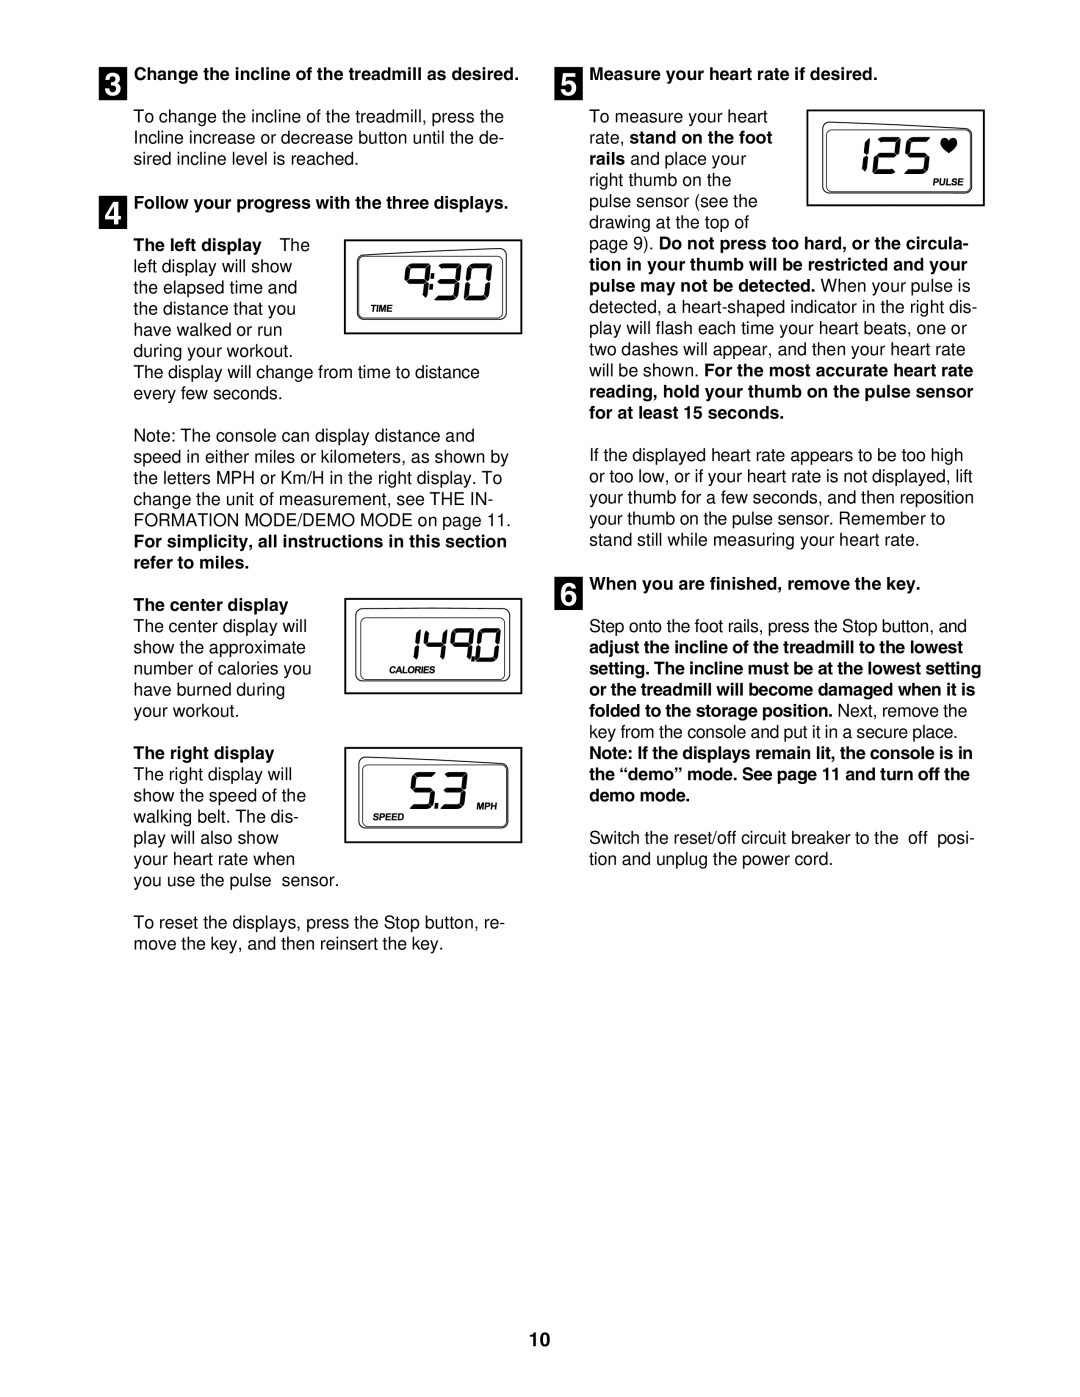
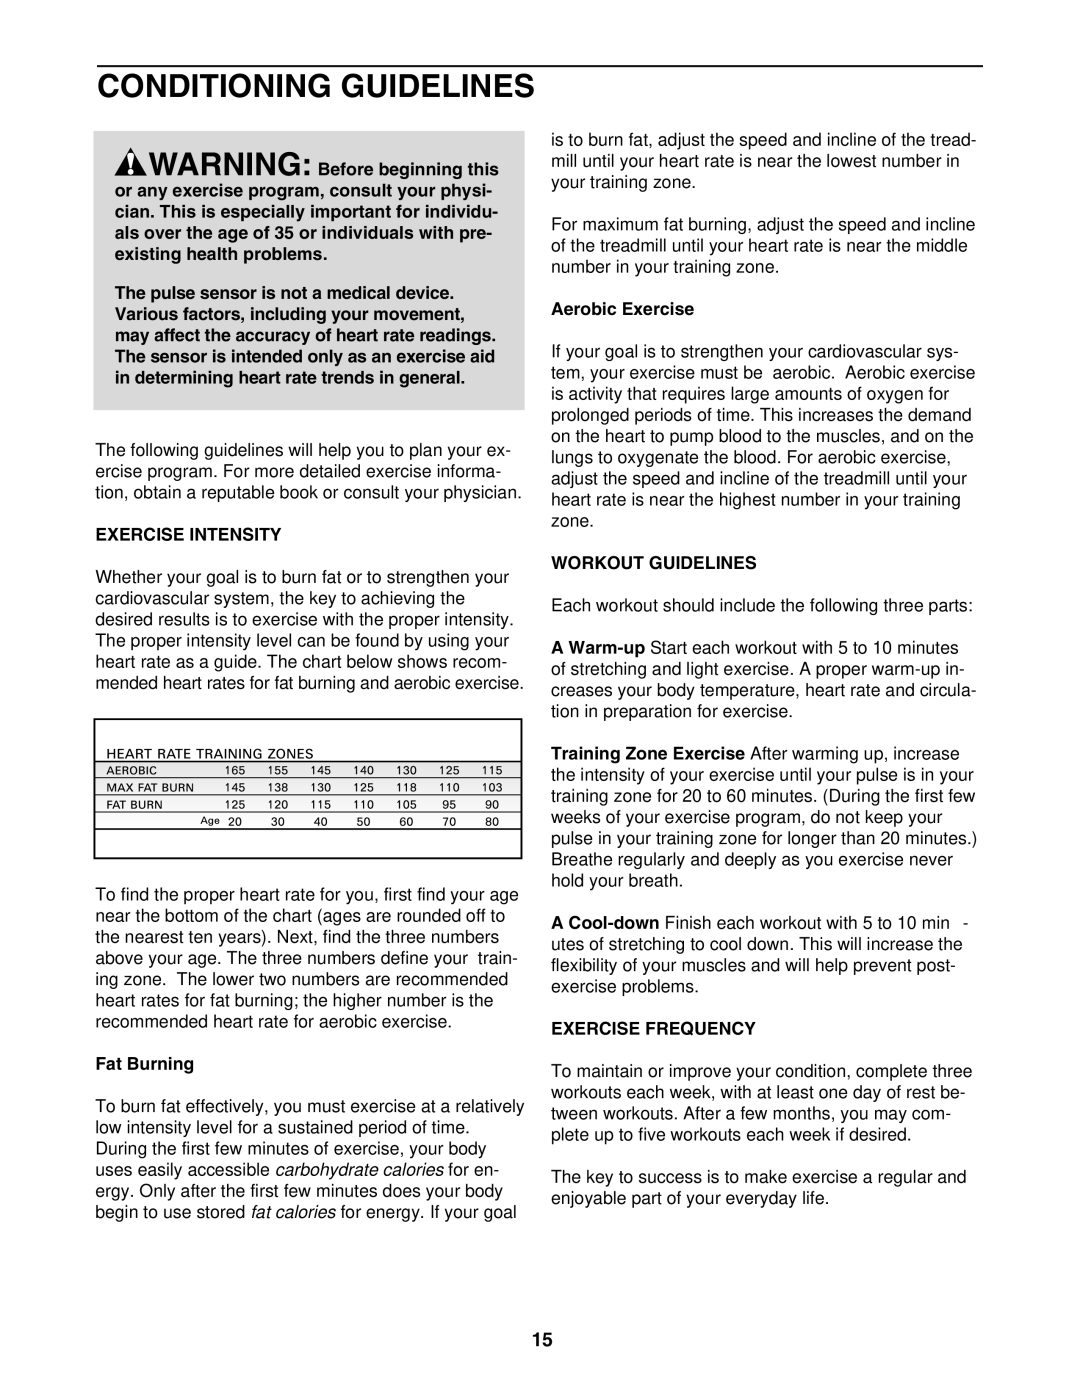
The WLTL34300 is equipped with an Easy Pulse heart rate monitor that provides real-time feedback during workouts. This feature enables users to track their heart rate effectively, ensuring they are training within their desired intensity zones. Moreover, the treadmill comes with a six-function display that showcases important metrics, including time, distance, speed, calories burned, and heart rate, allowing for detailed performance tracking.
Another notable characteristic is the incorporation of Weslo’s Comfort Cell Cushioning technology. This feature provides a more comfortable running experience by reducing impact on joints, which is particularly beneficial for longer workout sessions.
The treadmill also incorporates an integrated music port for MP3 players, enabling users to listen to their favorite tunes while working out. This entertainment feature helps to enhance motivation and make exercise more enjoyable.
In summary, the Weslo WLTL34300 is a well-rounded treadmill that combines affordability, essential technological features, and user-friendly characteristics. It is an excellent choice for individuals seeking an effective home fitness solution without compromising on quality or functionality.