Roland MP-60 owner manual Midi Send Channel Settings, Switching Local Control on Off

Page 31

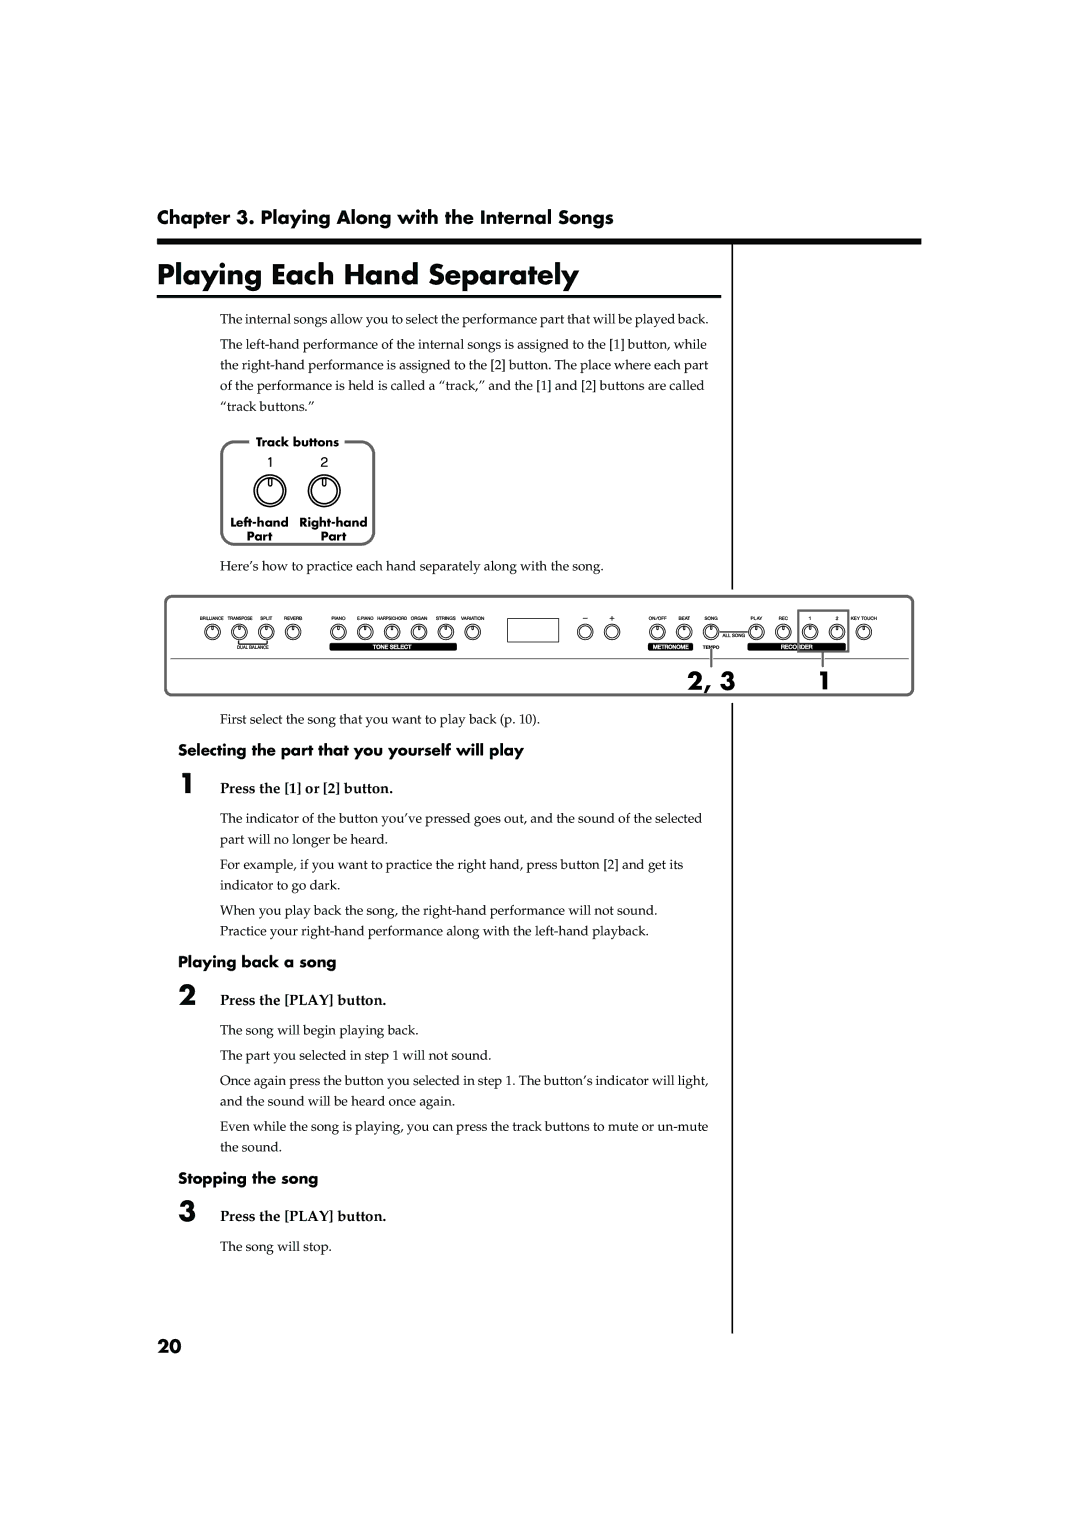
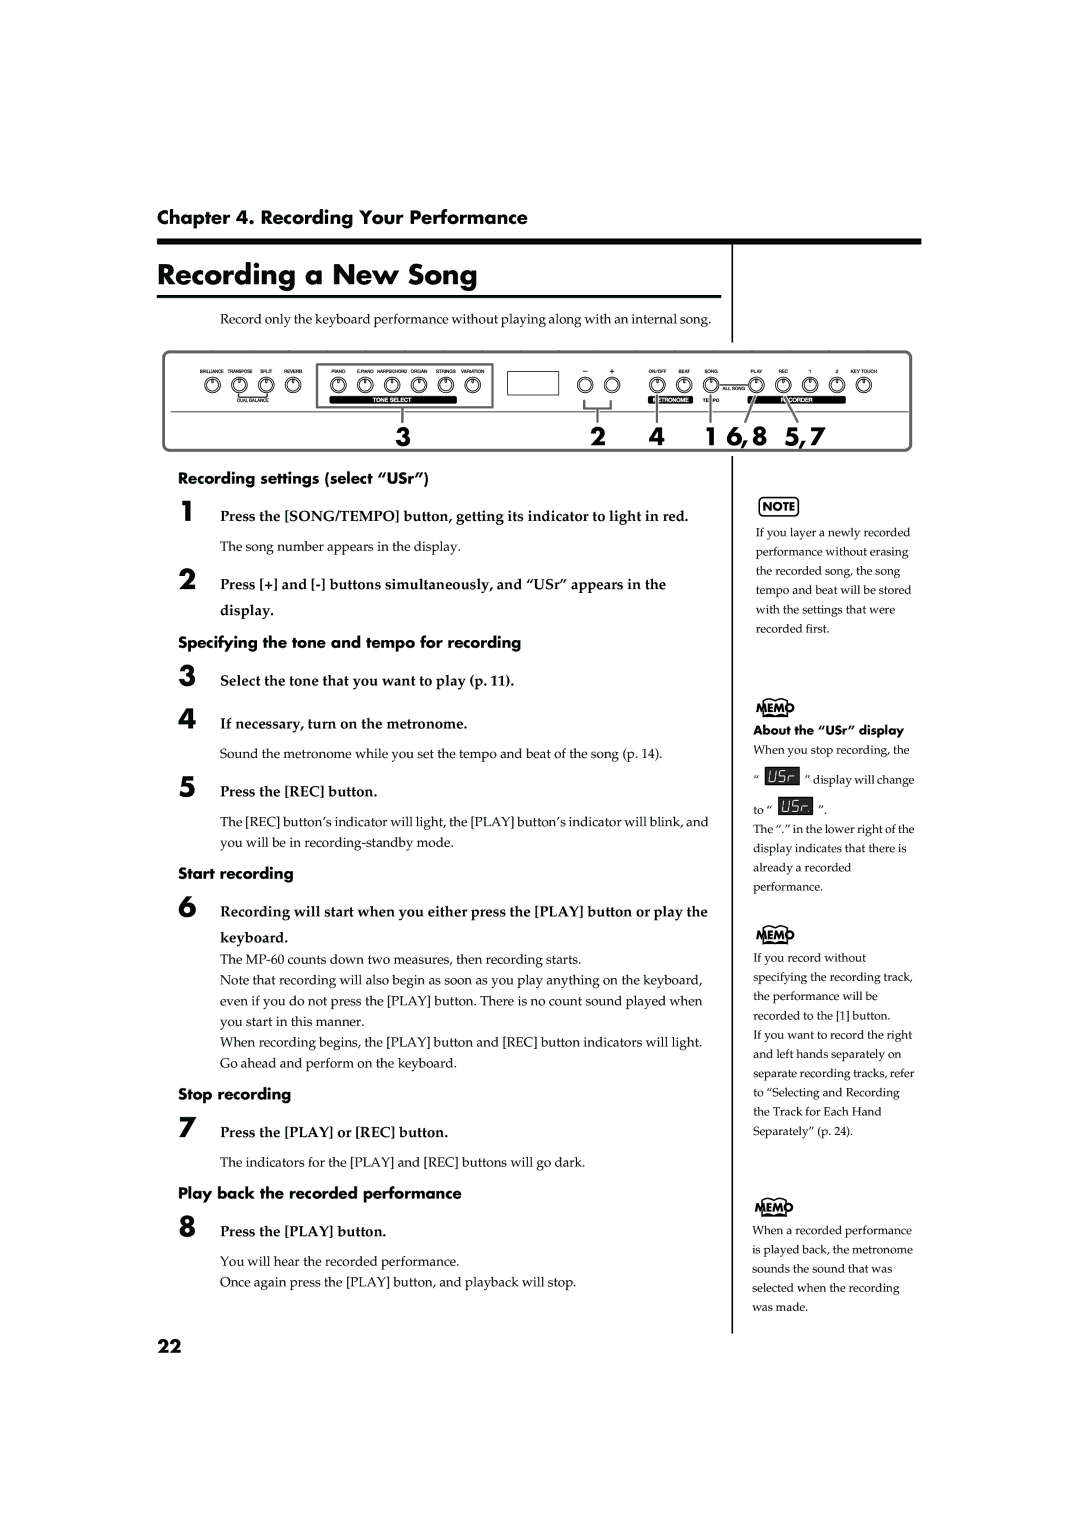
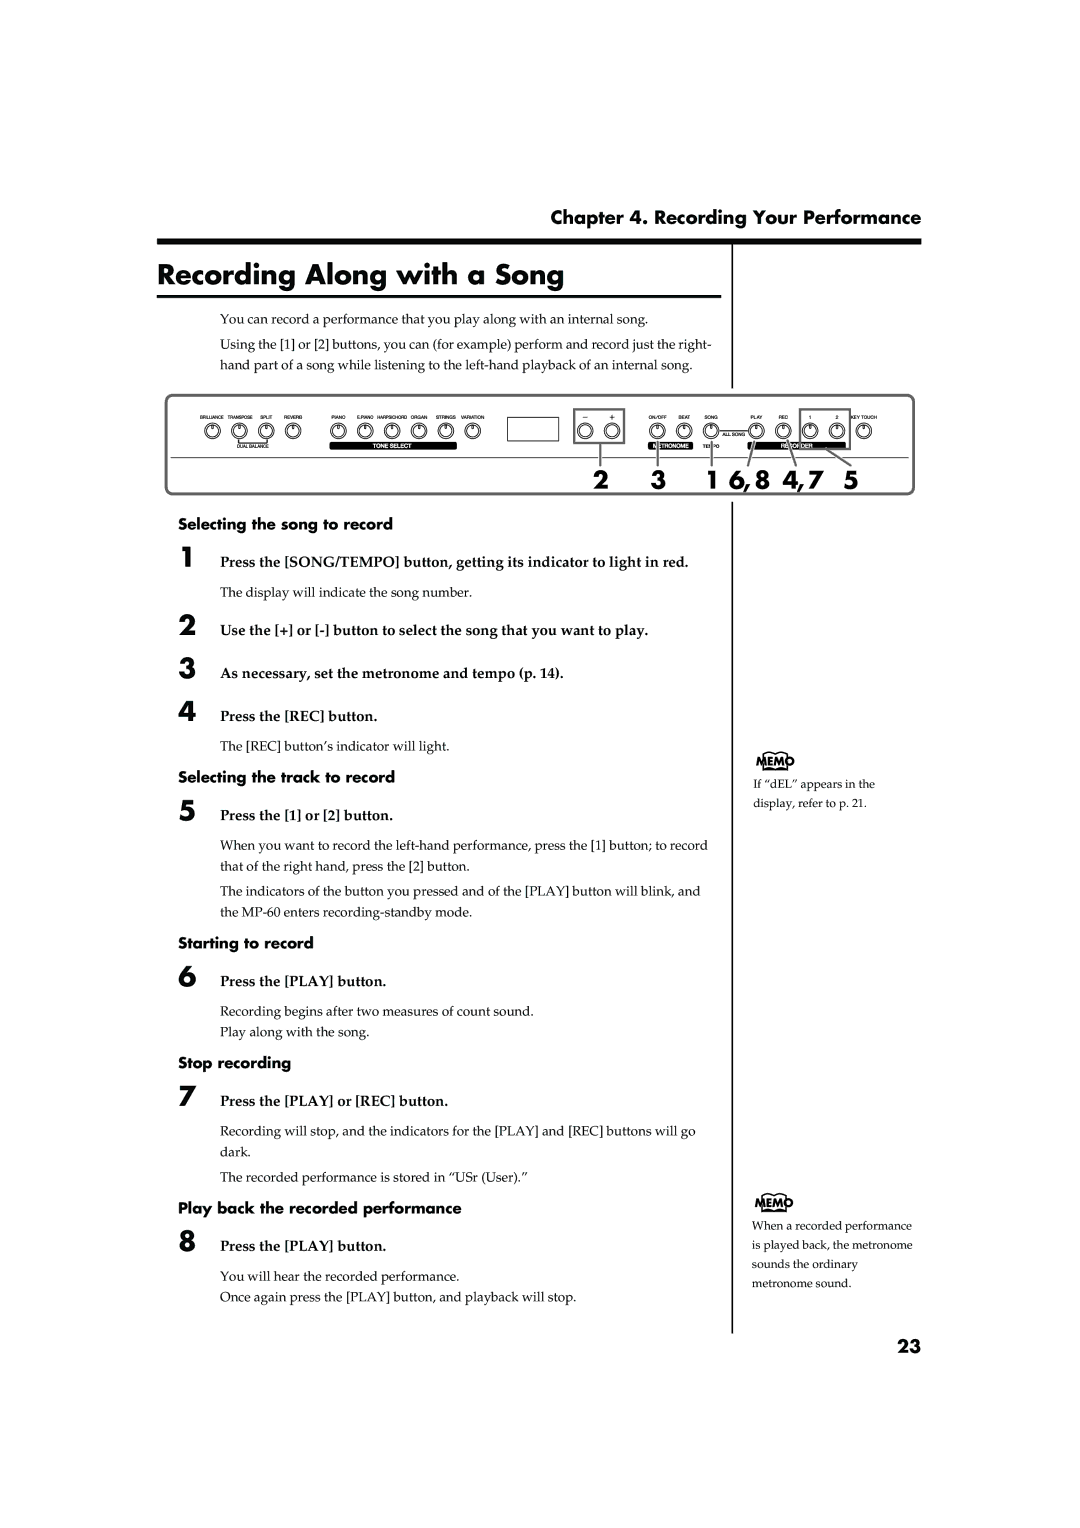
Chapter 6. Connecting External Devices

MIDI Send Channel Settings

MIDI features sixteen MIDI channels, numbered 1–16. Simply connecting a cable is not enough for communication to take place. The connected devices must be set to use the same MIDI channels. Otherwise, no sound will be produced, and no sounds can be selected.

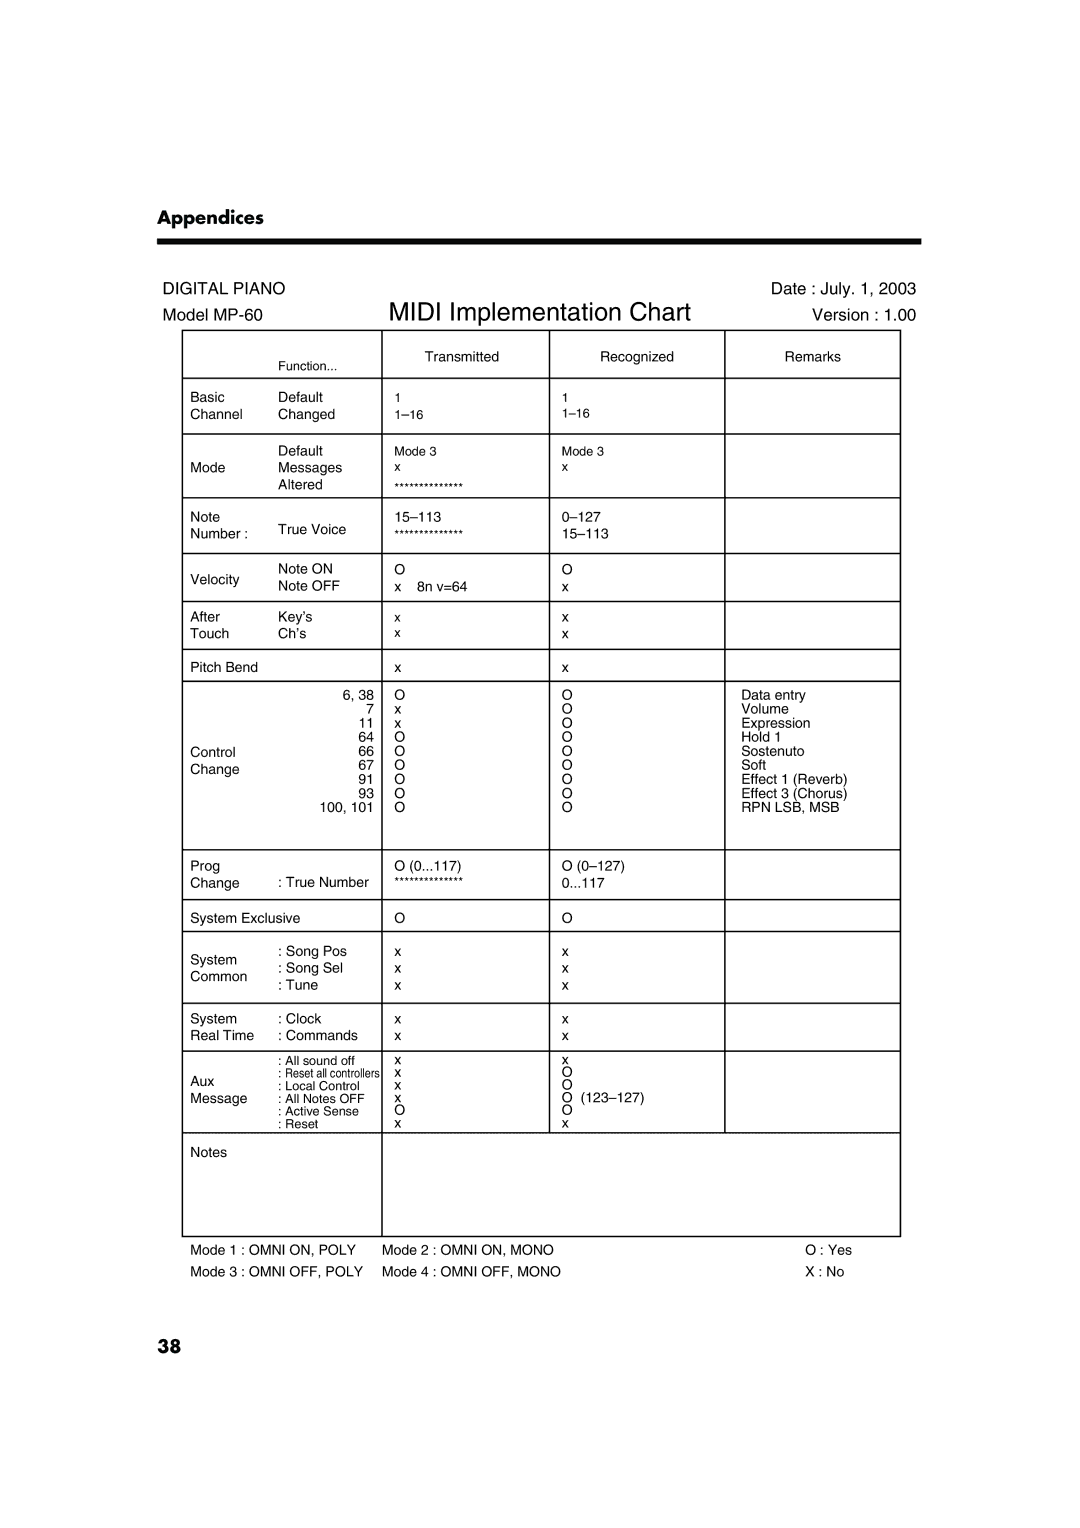
*The MP-60 receives all channels 1–16.

*If you are using Dual play (p. 12) or Split play (p. 13) on the MP-60, only the channel you specify here will be transmitted.

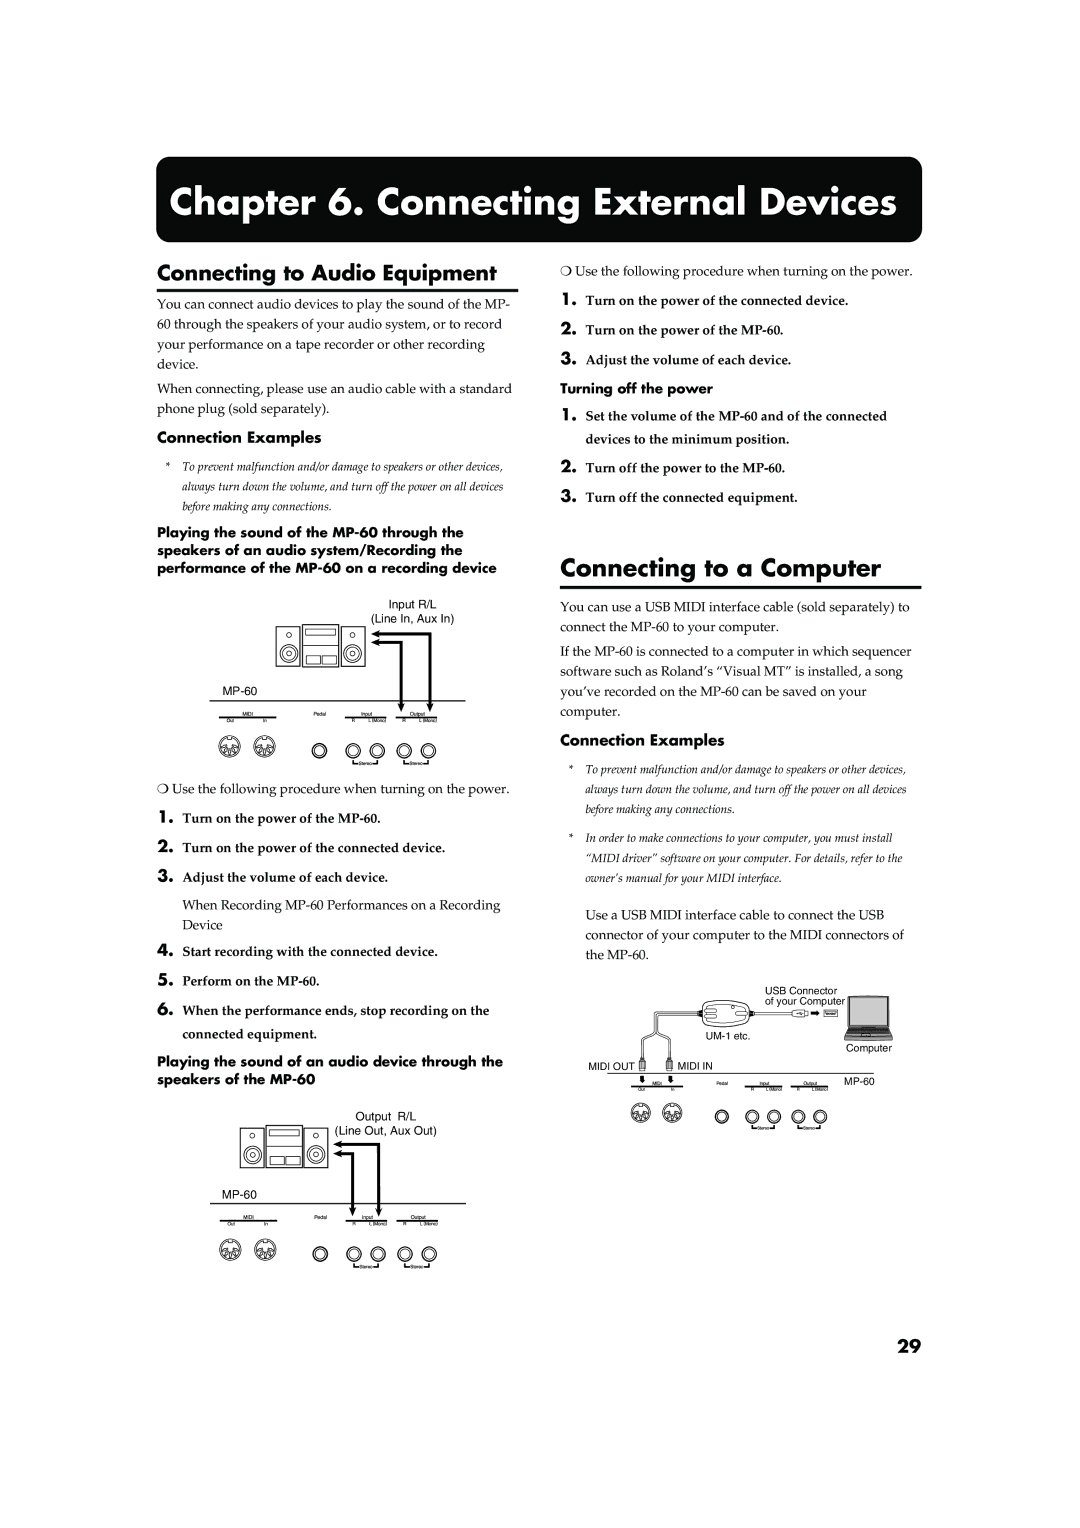
If you press the [STRINGS] button in step 2 of “Making MIDI-related Settings” (p. 30), a display like the following will appear.

fig.disp-1

Value

1–16

Power-up default setting

1

Switching Local Control on and

Off

When connecting a MIDI sequencer, set Local Control to “Off.”

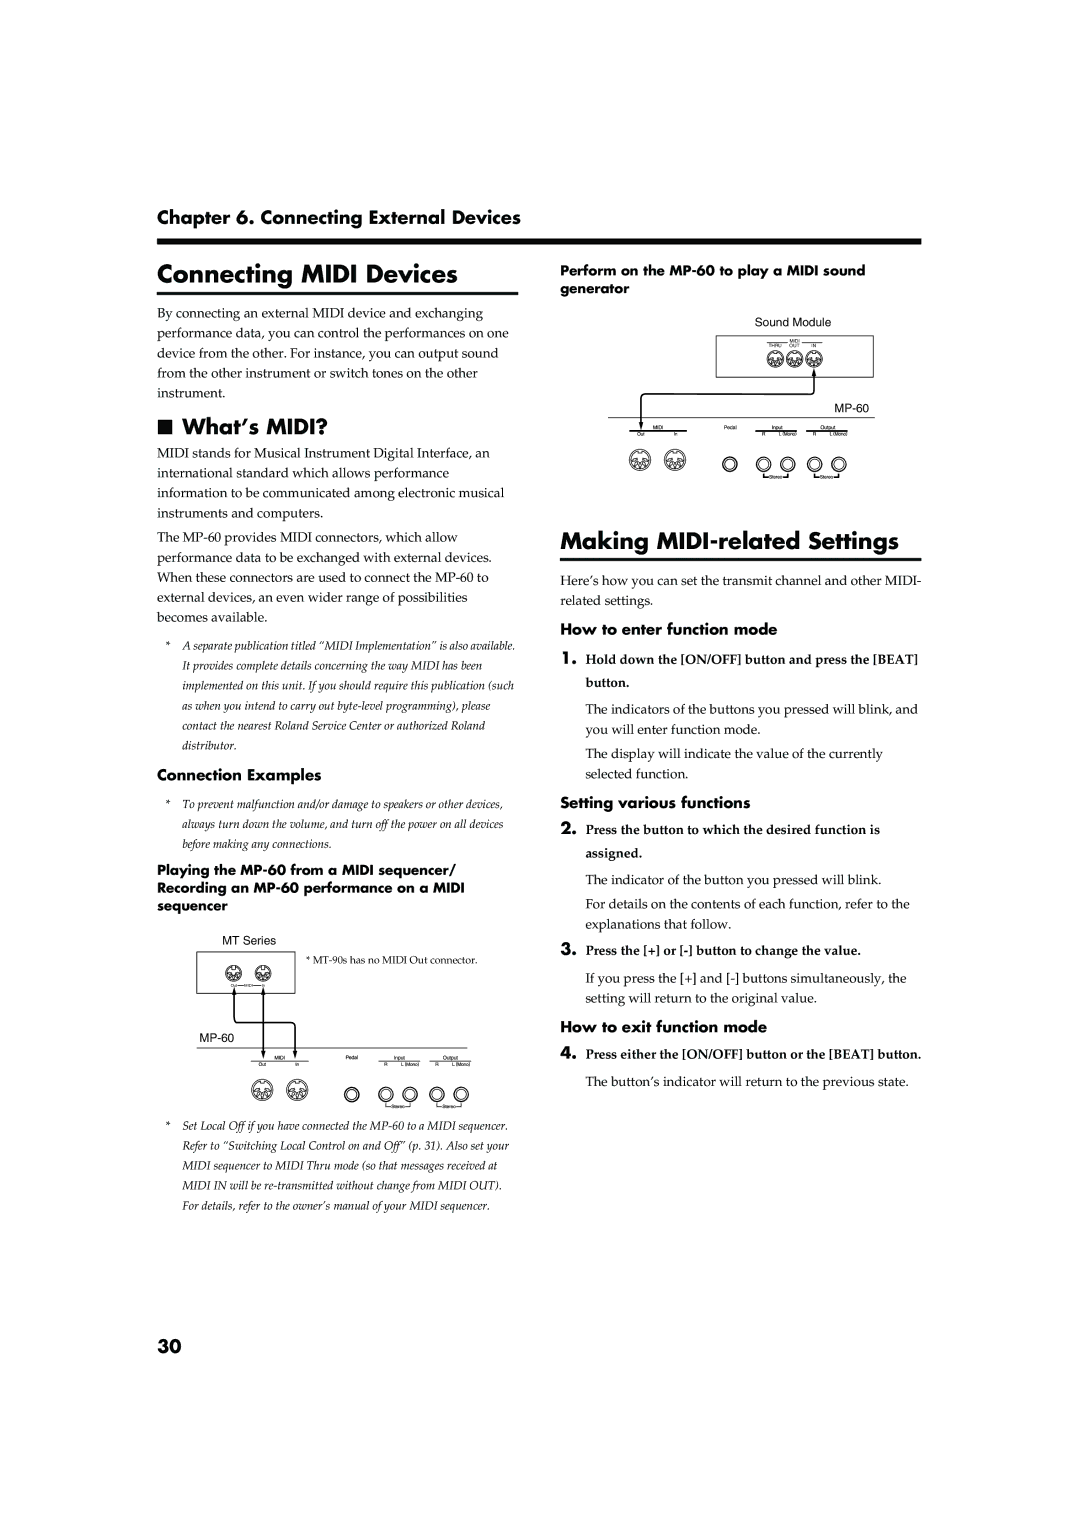
As illustrated, information describing what has been played on the keyboard is passed to the internal sound generator over two different routes, (1) and (2). As a result, you hear overlapping or intermittent sounds. To prevent this from happening, route (1) must be severed, by setting the unit to what is known as “Local Off.”

fig.localcont.e

(1)Local On


Sequencer

Sound

MIDI

MIDI

IN

OUT

Generator


Memory


MIDI

MIDI


OUT

IN

(2) Thru function On

Each note played is sounded twice

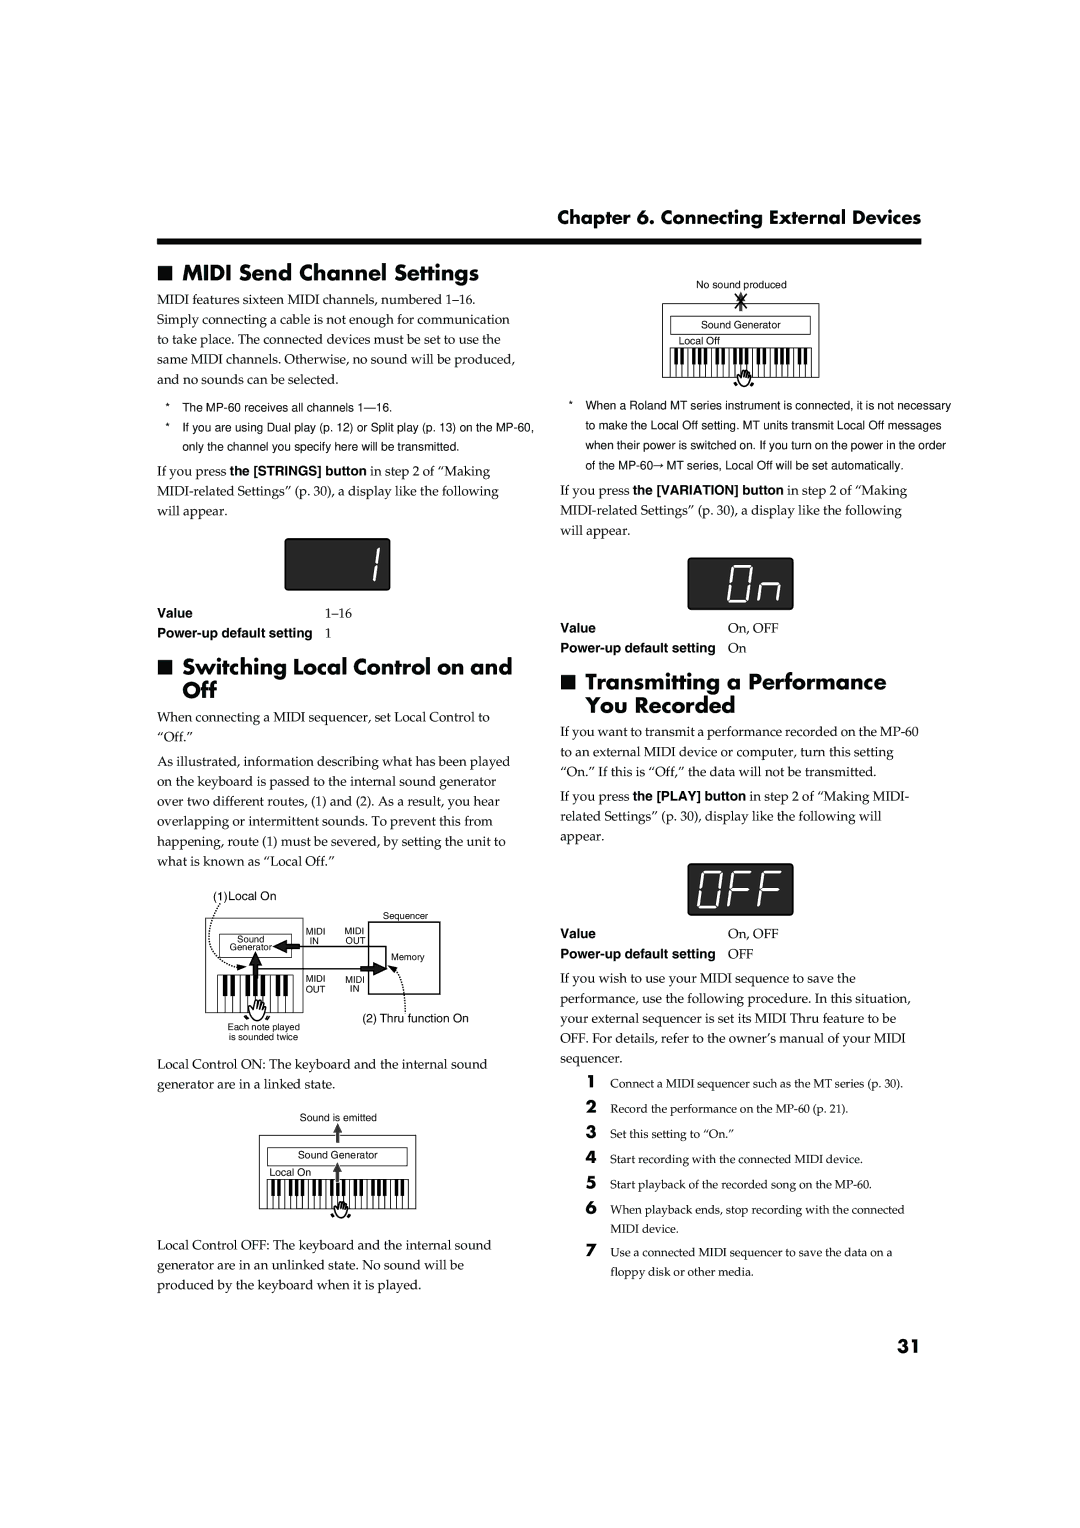
Local Control ON: The keyboard and the internal sound generator are in a linked state.

fig.localon.e

Sound is emitted

Sound Generator

Local On

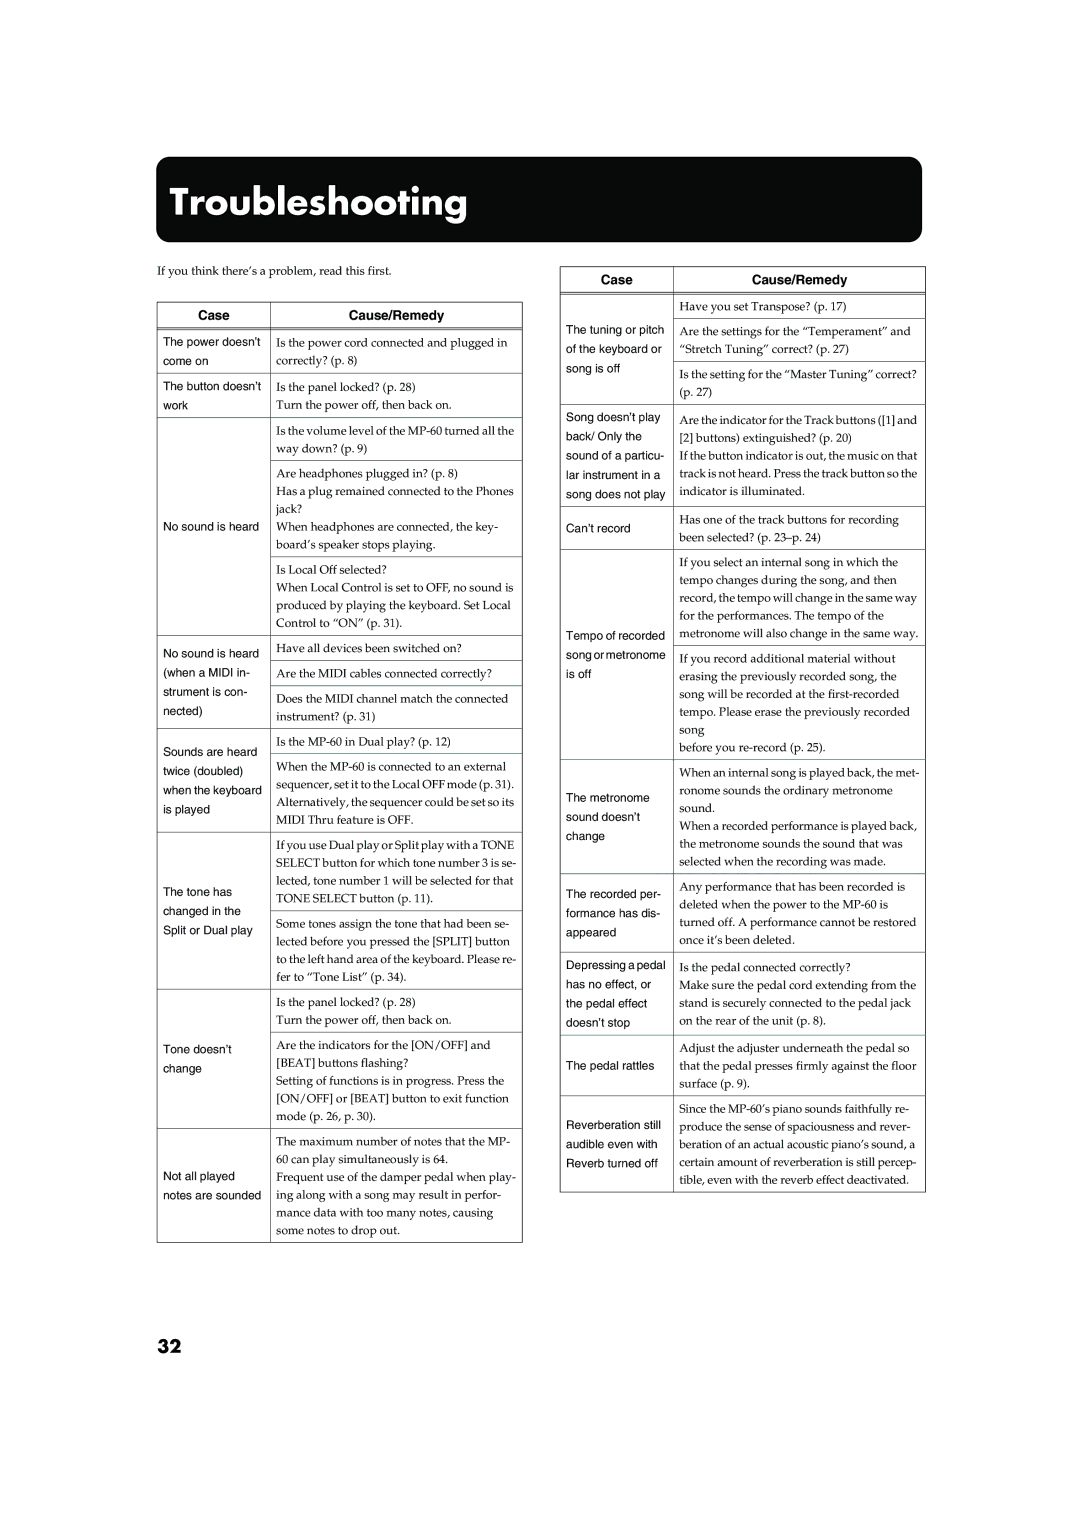
Local Control OFF: The keyboard and the internal sound generator are in an unlinked state. No sound will be produced by the keyboard when it is played.

fig.localoff.e

No sound produced

Sound Generator

Local Off

*When a Roland MT series instrument is connected, it is not necessary to make the Local Off setting. MT units transmit Local Off messages when their power is switched on. If you turn on the power in the order of the MP-60 MT series, Local Off will be set automatically.

If you press the [VARIATION] button in step 2 of “Making MIDI-related Settings” (p. 30), a display like the following will appear.

fig.disp-on

Value

On, OFF

Power-up default setting

On

Transmitting a Performance

You Recorded

If you want to transmit a performance recorded on the MP-60 to an external MIDI device or computer, turn this setting “On.” If this is “Off,” the data will not be transmitted.

If you press the [PLAY] button in step 2 of “Making MIDI- related Settings” (p. 30), display like the following will appear.

fig.disp-Off

Value

On, OFF

Power-up default setting

OFF

If you wish to use your MIDI sequence to save the performance, use the following procedure. In this situation, your external sequencer is set its MIDI Thru feature to be OFF. For details, refer to the owner’s manual of your MIDI sequencer.

1Connect a MIDI sequencer such as the MT series (p. 30).

2Record the performance on the MP-60 (p. 21).

3Set this setting to “On.”

4Start recording with the connected MIDI device.

5Start playback of the recorded song on the MP-60.

6When playback ends, stop recording with the connected MIDI device.

7Use a connected MIDI sequencer to save the data on a floppy disk or other media.

31
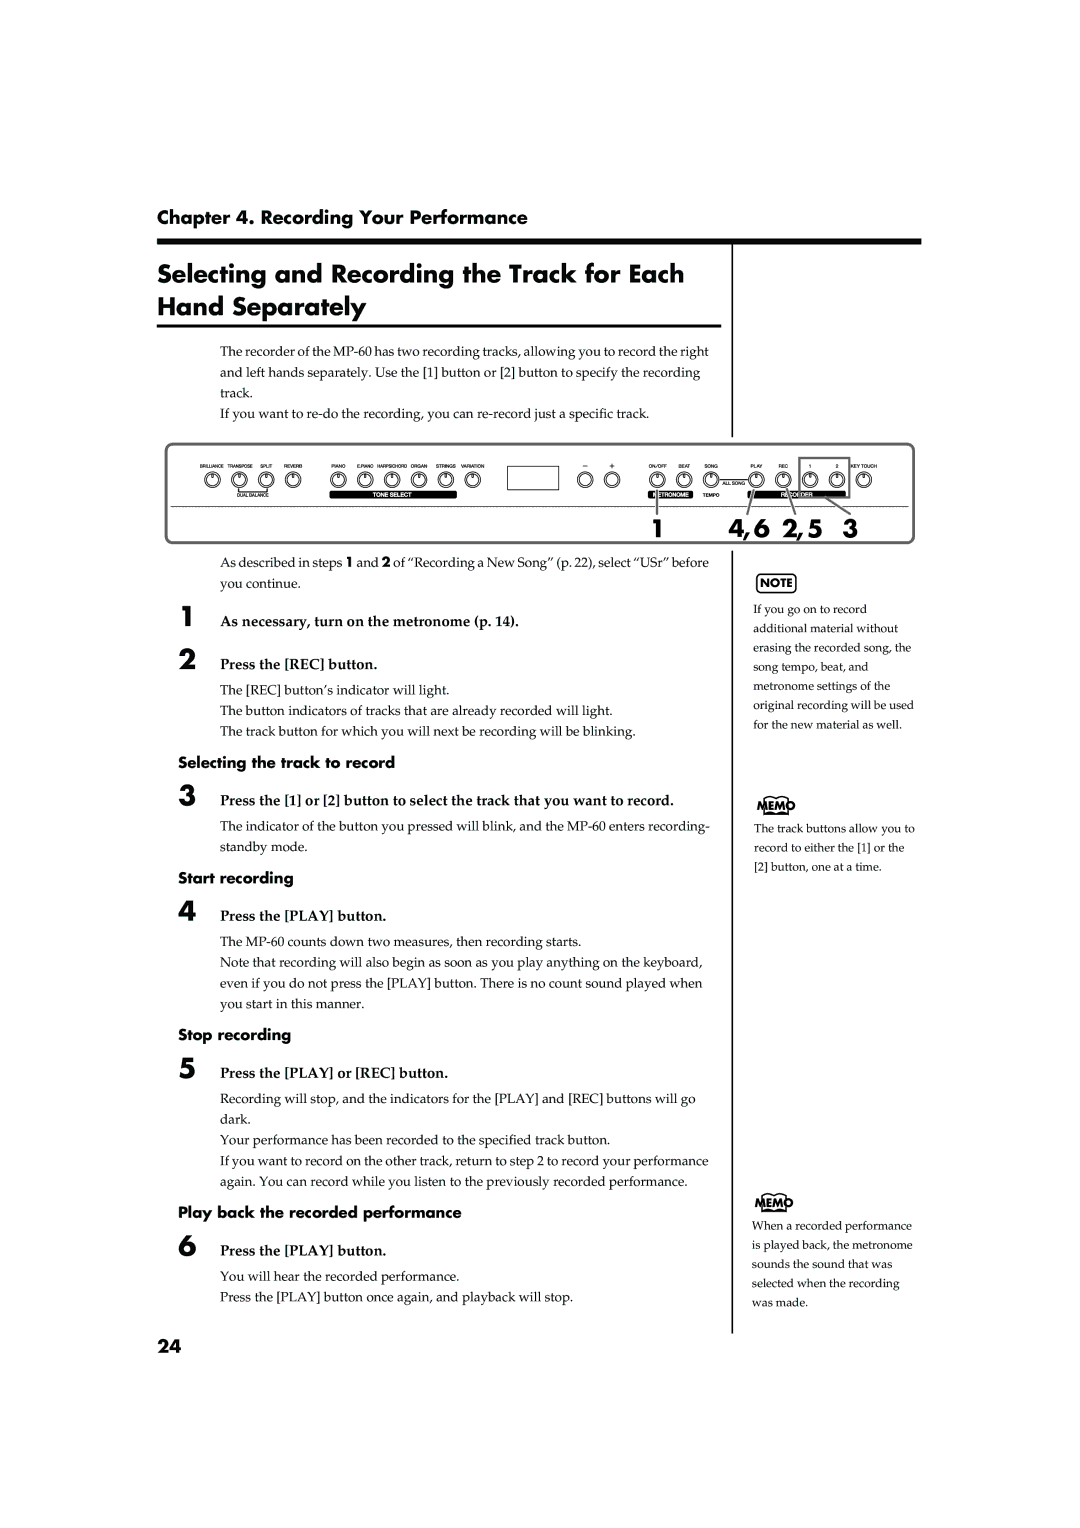
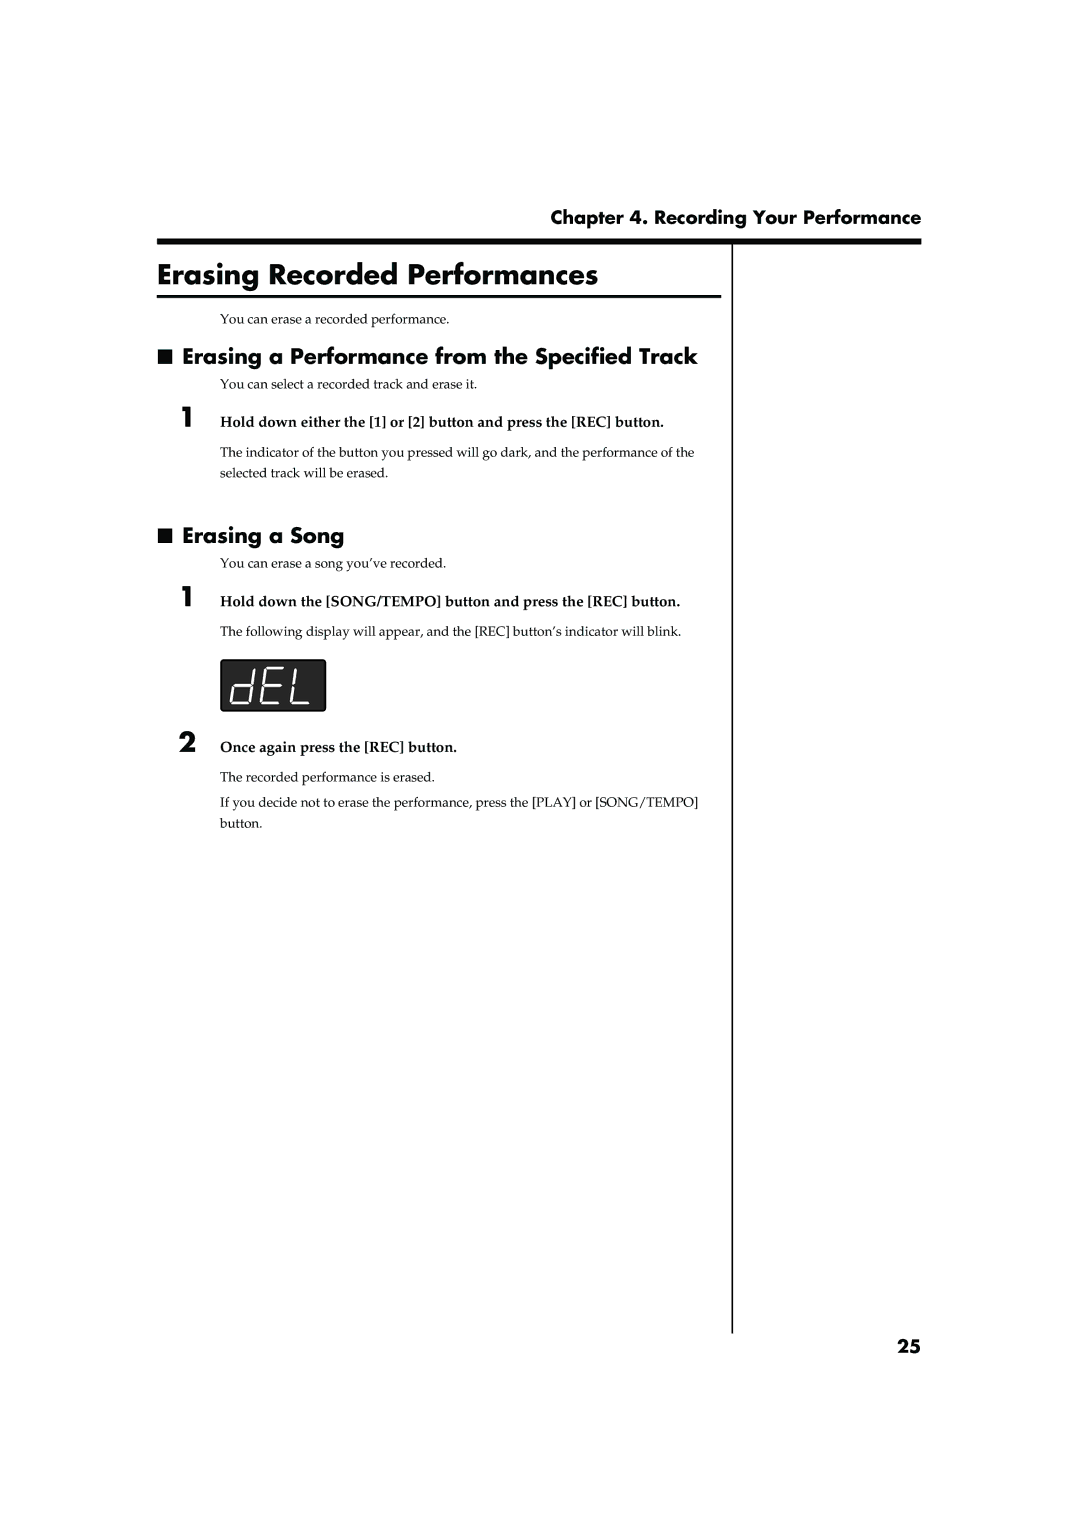
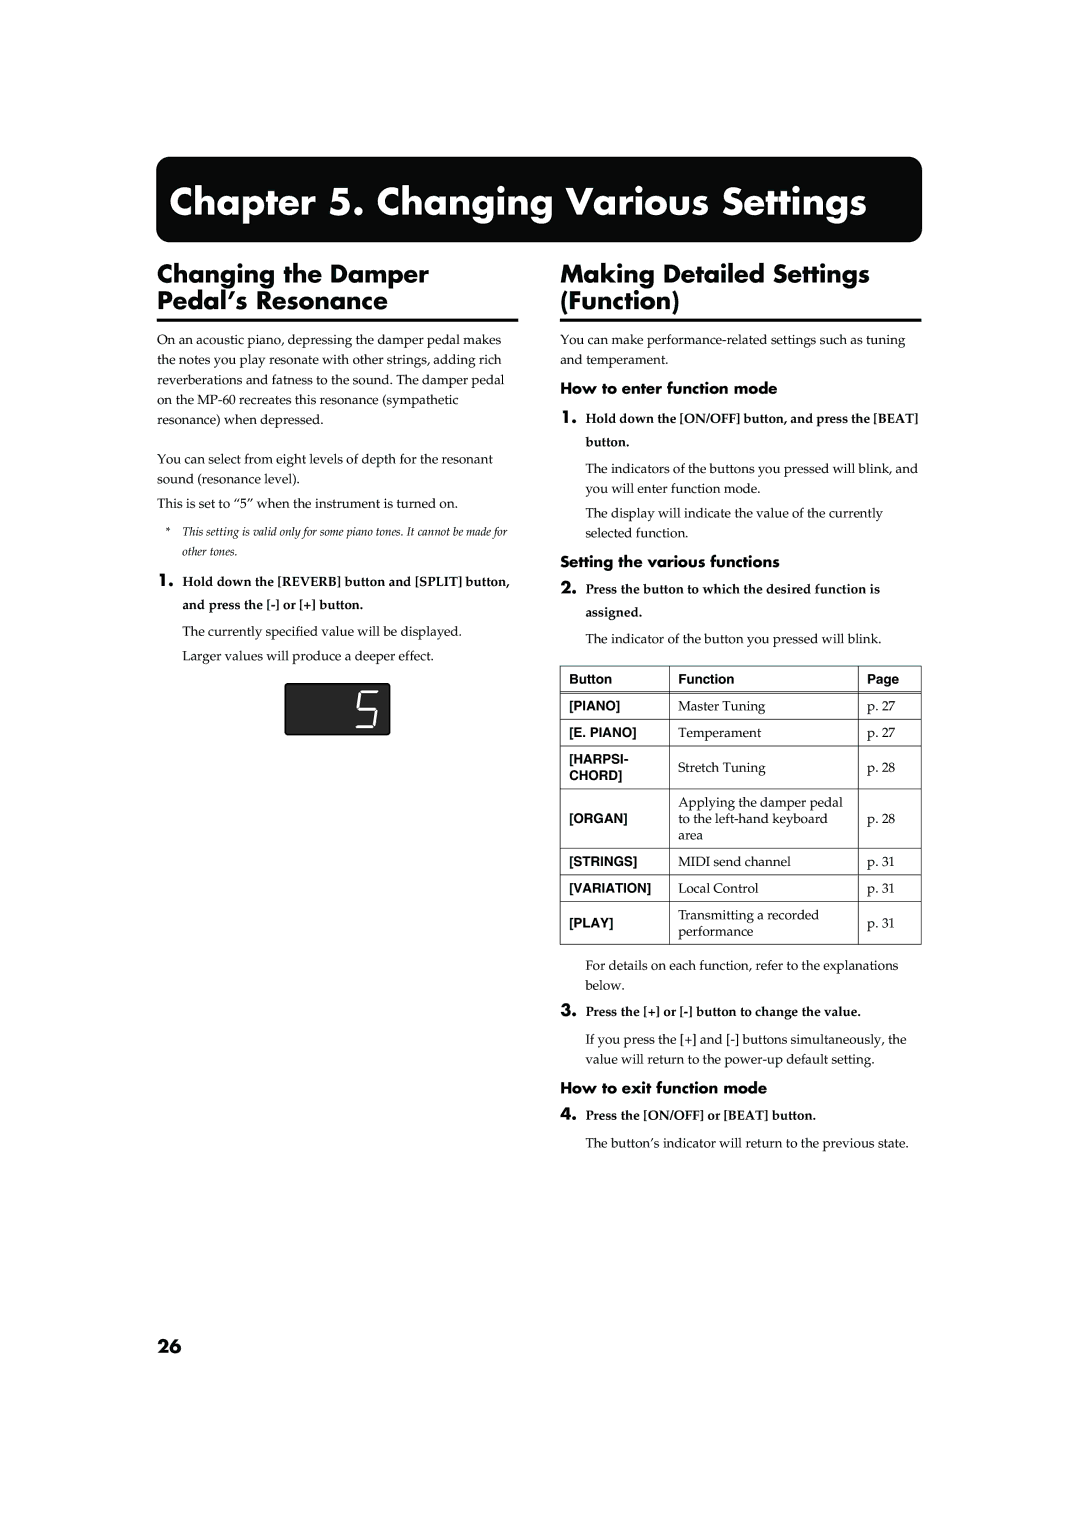
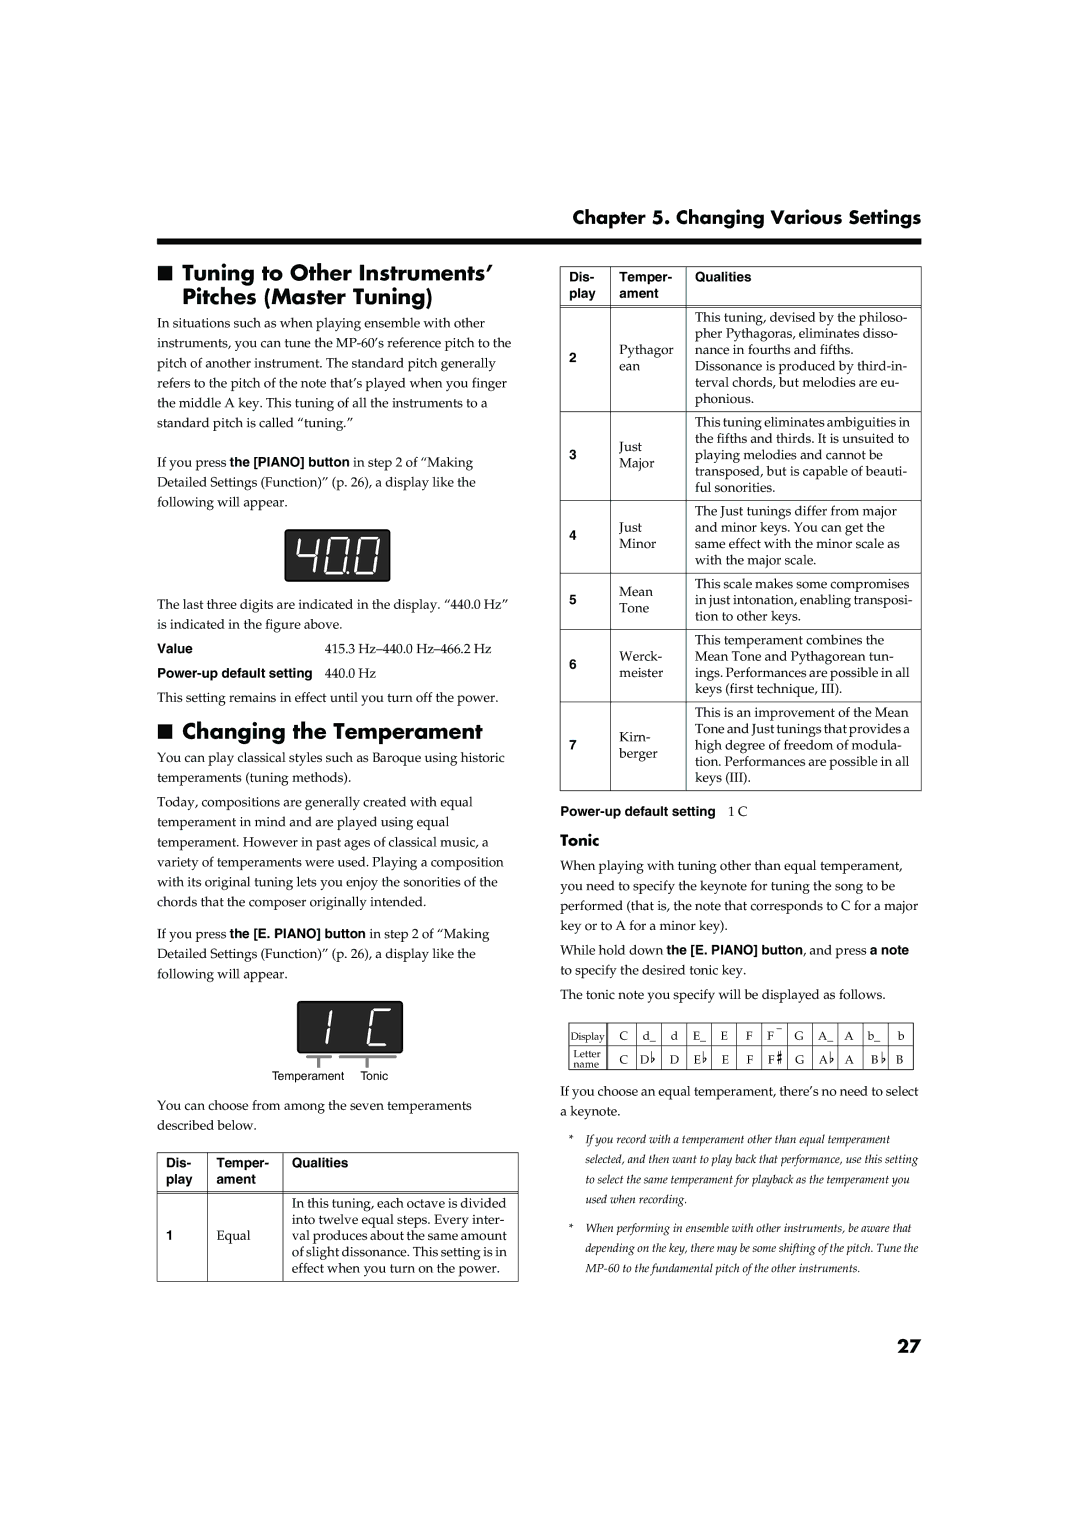
Image 31
Contents Pursuing the Playing Feel of a Grand Piano Main FeaturesPiano Songs Built-In Important Safety Instructions 001 002a Protect the unit from strong impact. Do not drop it Additional Precautions Power SupplyPlacement MaintenanceContents Front Panel Panel DescriptionsRear Panel Before You Start Playing Connect the Power CordSetting Up the Music Stand Connecting HeadphonesAdjusting the Sound’s Volume and Brilliance Turning the Power On and OffAbout the Pedals Choosing the song to play back Listening to Internal SongsSelecting a Song and Playing It Stopping the playbackSelecting variation tones PerformancePerforming with a Variety of Sounds Selecting a tone groupPress the + or button to change the value Adjusting the Volume Balance in Dual Play Dual BalancePlaying Two Tones Together Dual Play Hold down the Transpose button and press the Split buttonPress the Tone Select button Press the Split buttonChanging tone played by the left hand Changing tone played by the right handSounding the Metronome Using Metronome1, 5 Changing the Keyboard’s Split PointChanging the beat of metronome Changing the Metronome VolumeStopping the metronome Changing the Amount of Effect Applied Applying Effects to the SoundChanging the Metronome Sound Adding Reverberation to the Sound ReverbFig.panel2-6 Transposing the Key of the Keyboard TransposeIndicator Settings Off Adjusting the Keyboard Touch Key TouchPress the KEY Touch button Adding a Count-in to Match the Timing Count-In Changing the TempoPlaying back a song Playing Each Hand SeparatelySelecting the part that you yourself will play Press the 1 or 2 buttonIf you see the following Recording Your PerformanceRecording a New Song Selecting the track to record Recording Along with a Song8 4 Selecting the song to recordAs necessary, turn on the metronome p Press the REC button Selecting and Recording the Track for Each Hand SeparatelyErasing a Performance from the Specified Track Erasing Recorded PerformancesErasing a Song Making Detailed Settings Function Changing Various SettingsChanging the Damper Pedal’s Resonance Changing the Temperament Tuning to Other Instruments’ Pitches Master TuningTonic Applying the Damper Pedal to Left-hand Keyboard Area Setting the Tuning Curve Stretch Tuning Disabling Everything Except Piano Play Panel Lock Connection Examples Connecting External DevicesConnecting to a Computer Connecting to Audio EquipmentSetting various functions Connecting Midi DevicesWhat’s MIDI? Transmitting a Performance You Recorded Midi Send Channel SettingsSwitching Local Control on Off Value Power-up default settingCase Cause/Remedy TroubleshootingDisplay Meaning Error Messages/Other MessagesSplit Off Split On Tone ListSong Song Name Composer Copyright Internal Song ListFarewell to the Piano Beethoven Hold down the button and press the or + button Easy Operation ListMidi Implementation Chart Main Specifications Midi IndexMemo Africa InformationAvis Contents Name Qty