Pride Mobility SC100, SC140 manual Driving Surfaces, Normal Driving Position

Page 7

I I . S A F E T Y

These tests were conducted with the Shuttle’s seat in the highest position and adjusted backward on the seat base to its farthest rearward position. Use this information as a guideline. Your Shuttle’s ability to travel up inclines is affected by your weight, your scooter’s speed, your angle of approach to the incline, and your scooter setup.

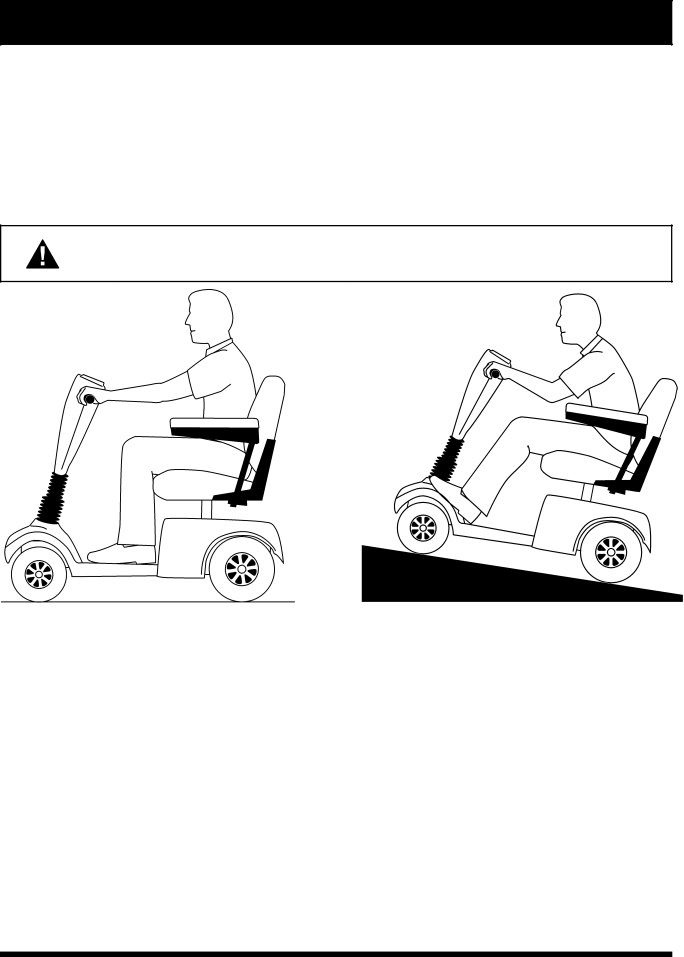
νWhen you approach an incline, it is best to lean forward. See figures 3 and 4. This will shift the center of gravity of you and your Shuttle towards the front of the scooter for improved stability.

WARNING! Do not exceed the incline guidelines or any other specifications presented in this manual.

FIGURE 3. NORMAL DRIVING POSITION

FIGURE 4. INCREASED STABILITY DRIVING POSITION

DRIVING SURFACES

Your Shuttle was designed to provide optimum stability under normal driving conditions; dry, level sur- faces composed of concrete or asphalt. However, Pride recognizes the fact that there will be times when you will operate your Shuttle on surfaces other than concrete or asphalt. So we have also designed your Shuttle to perform admirably on packed soil, grass, and gravel.

νFeel free to use your Shuttle safely on lawns and in park areas.

νAvoid tall grass that can entangle the running gear.

νPacked soil and gravel, such as driveways or roads, will present no problem for your Shuttle.

νAvoid loosely packed gravel and sand.

νIf you feel unsure about a driving surface, avoid that surface.

Shuttle

7

Image 7
Contents Wheel Scooters F E T Y G U I D E L I N E S N T E N T S P Y R I G H T N T R O D U C T I O N Ramps and Other Inclines S a F E T YDoors ElevatorsNormal Driving Position Driving SurfacesSafety Precautions EMI/RFI Warnings EMI/RFI Frequently Asked Questions FaqsWhere do radio waves come from? I . E M I / R FWhat should I do if my Shuttle moves unexpectedly? What is the FDA doing about the problem?Weight Capacity Specification S16.5-18.5 985˚ 34.5 E S C R I P T I O N Control Console AssemblyLight Switch Optional Key SwitchSpeed Adjustment Dial Battery Condition MeterAmmeter and Charger Cord Onboard Battery Charger not shownBattery Charger Fuse Not shown Rear SectionAnti-Tip Wheels Electronic Controller Assembly not shownMainCircuit Breaker Manual Freewheel LeverCan I USE a Different CHARGER? B a T T E R I E S a N D C H a R G I N GFollow these easy steps to charge your batteries safely How does the charger work?Use these specifications to reorder deep-cycle batteries What type and size of battery should I use?How can I get maximum range or distance per charge? Why do my new batteries seem weak? To change a battery in your ShuttleHow should I store my Shuttle and its batteries? How can I ensure maximum battery life?What about public transportation? Operating Your Shuttle PRE-RIDE Adjustments and ChecksI . O P E R a T I O N Getting on Your ShuttleGetting OFF of Your Shuttle I I . C O M F O R T a D J U S T M E N T S Tiller Angle AdjustmentSeat Height Adjustment Electric Seat Height Adjustment OptionalRemove These Bolts to Adjust Seat Position Armrest Width AdjustmentAssembly DisassemblyD I S a S S E M B L Y a N D a S S E M B L Y Frame Lock Lever P T I O N a L a C C E S S O R I E S What if all the systems on my Shuttle seem to be dead? B a S I C TroubleshootingWhat if the motor runs but my Shuttle does not move? I . C a R E a N D M a I N T E N a N C E Storage Axle Bearings and the MOTOR/TRANSAXLE AssemblyTo Replace the Motor Brushes CONSOLE, CHARGER, and Electronic ControllerWarranty Exclusions THREE-YEAR Limited WarrantyTHREE-YEAR Warranty Exceptions ONE Year Limited WarrantyI I . W a R R a N T Y T E S T E S