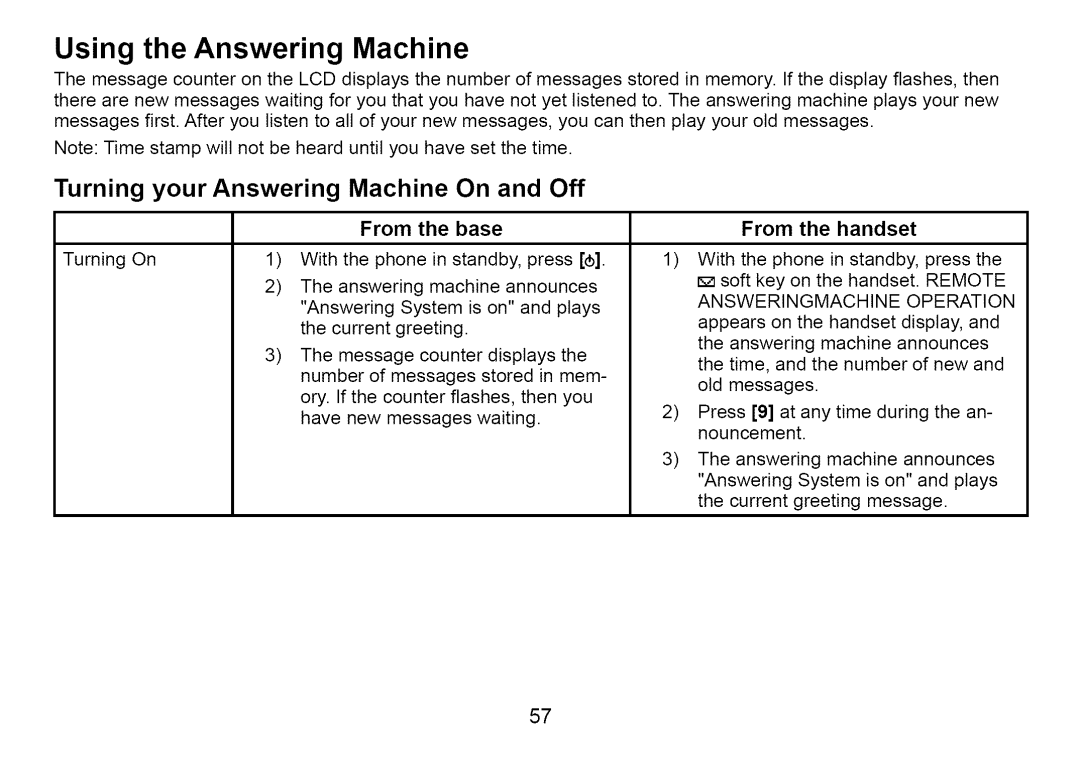
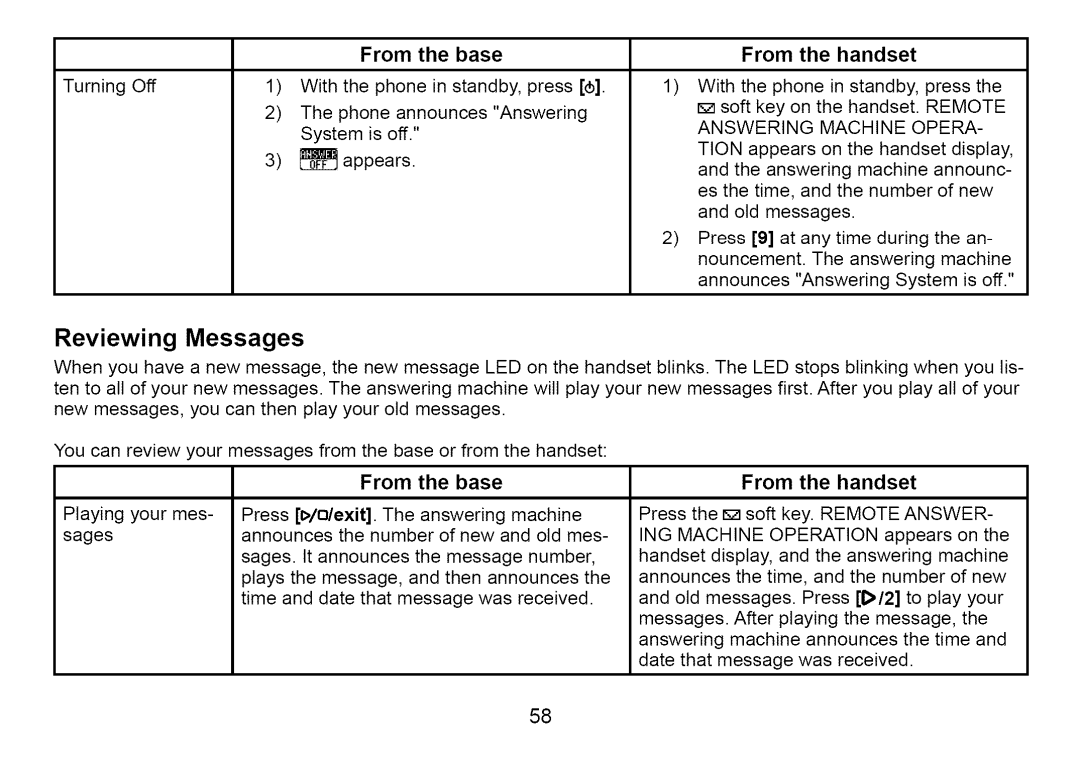
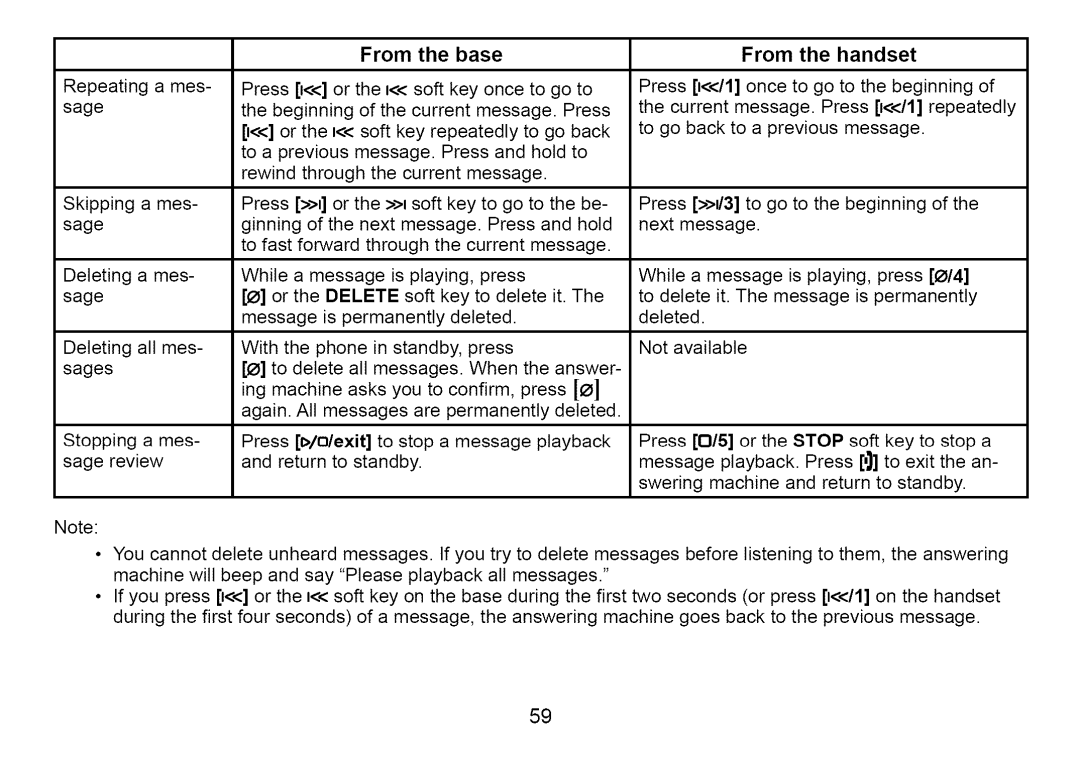
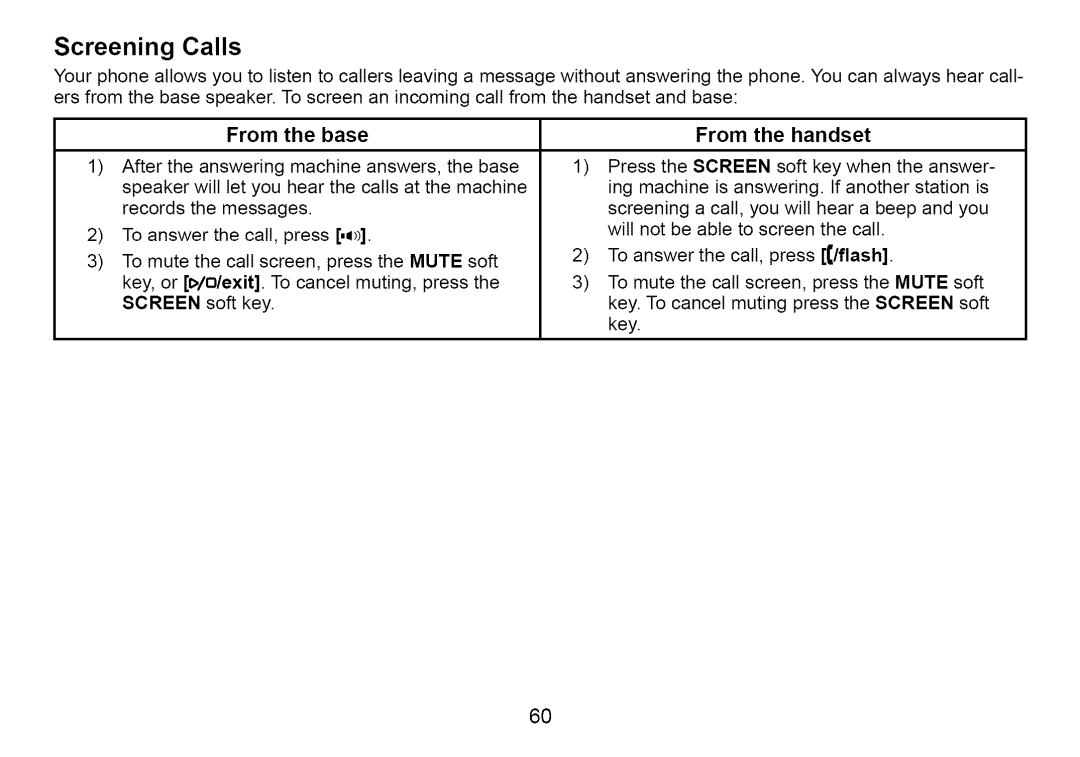
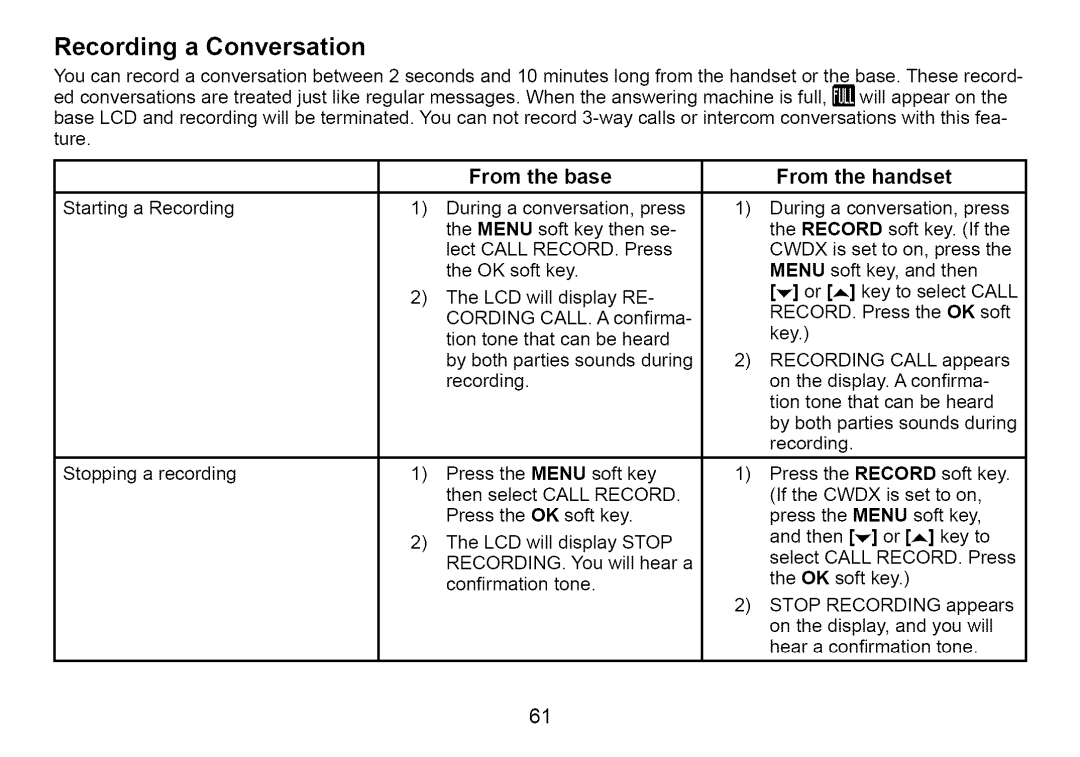
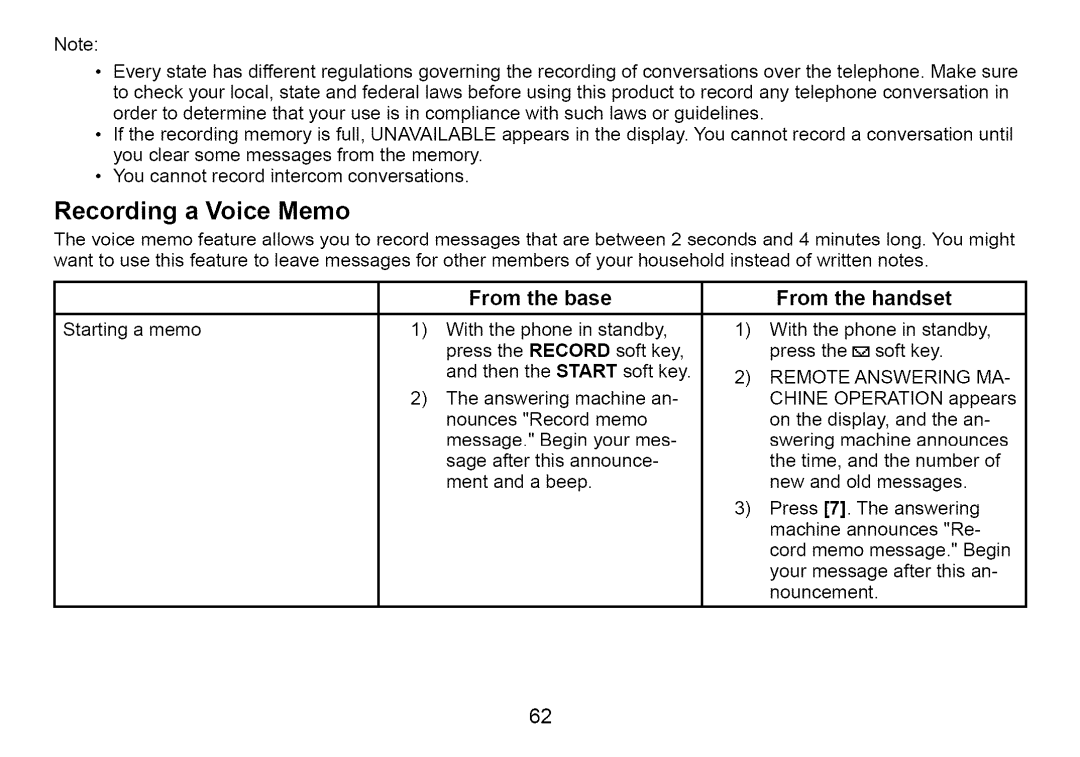
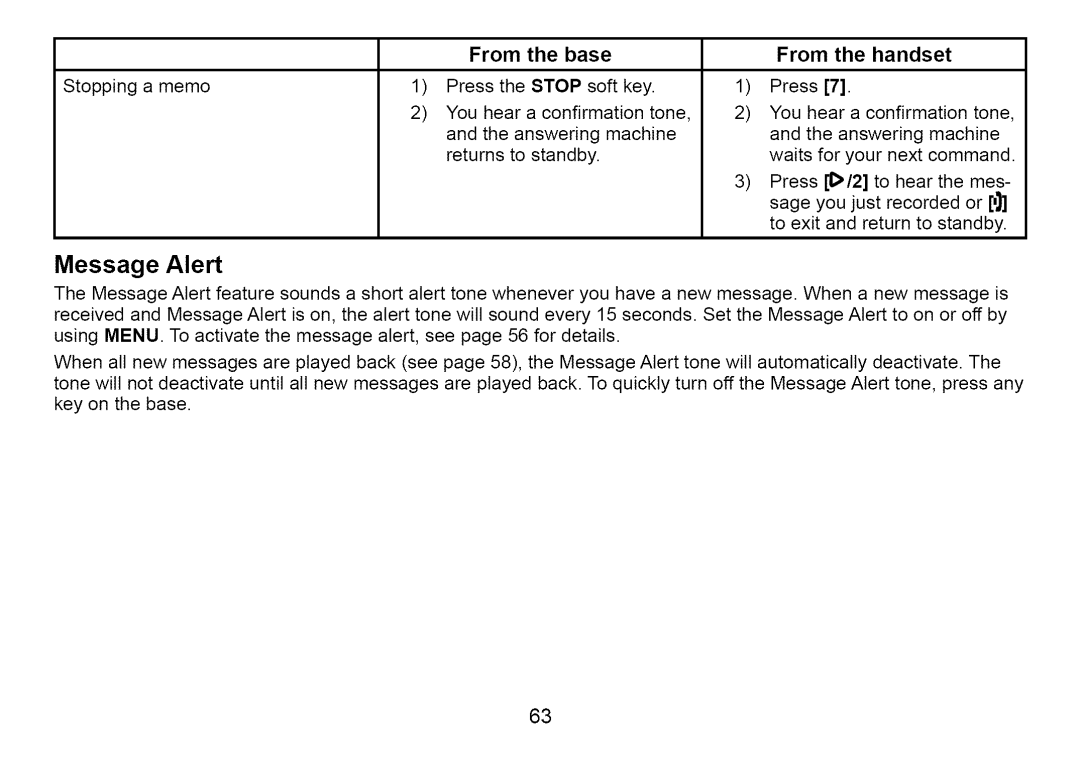
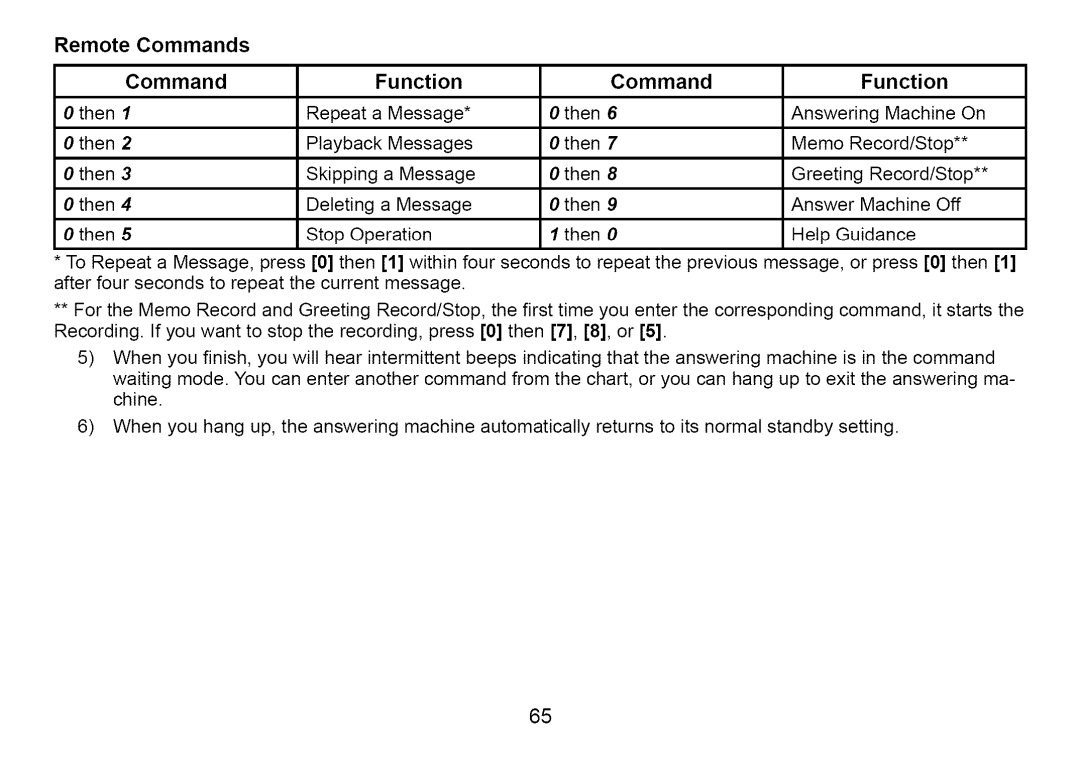
Uniden Cordless Telephone manual Installing the Optional Headset, Inuse Line Setup Base only

Page 50

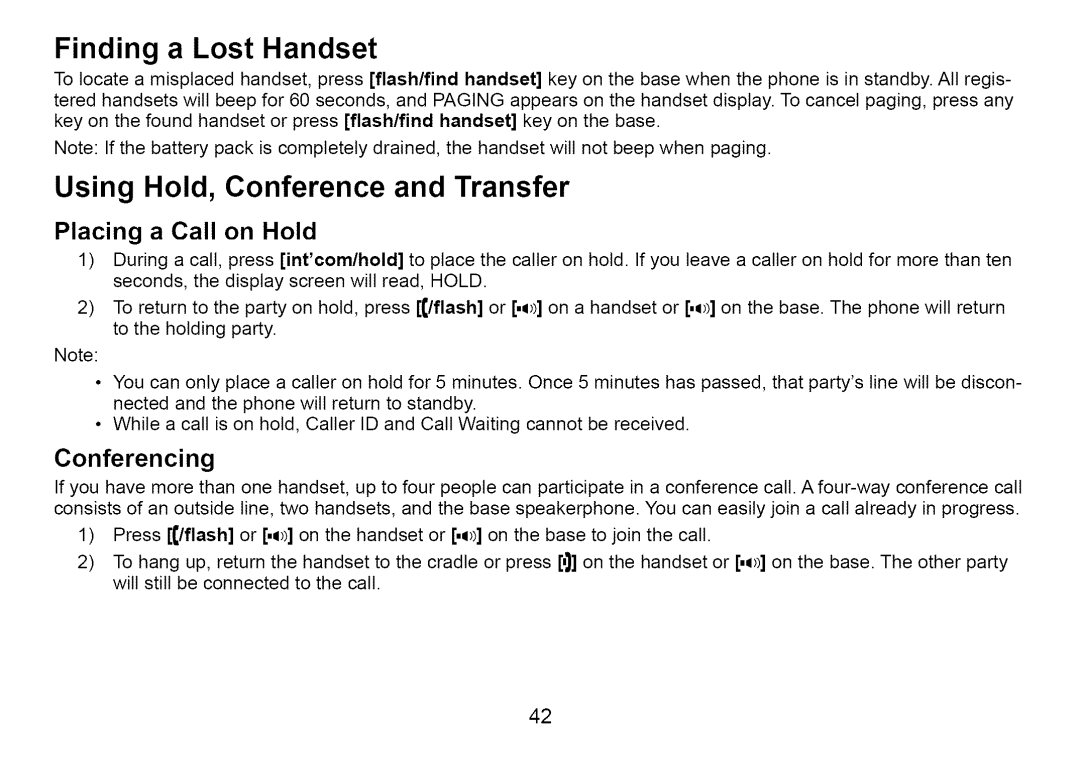
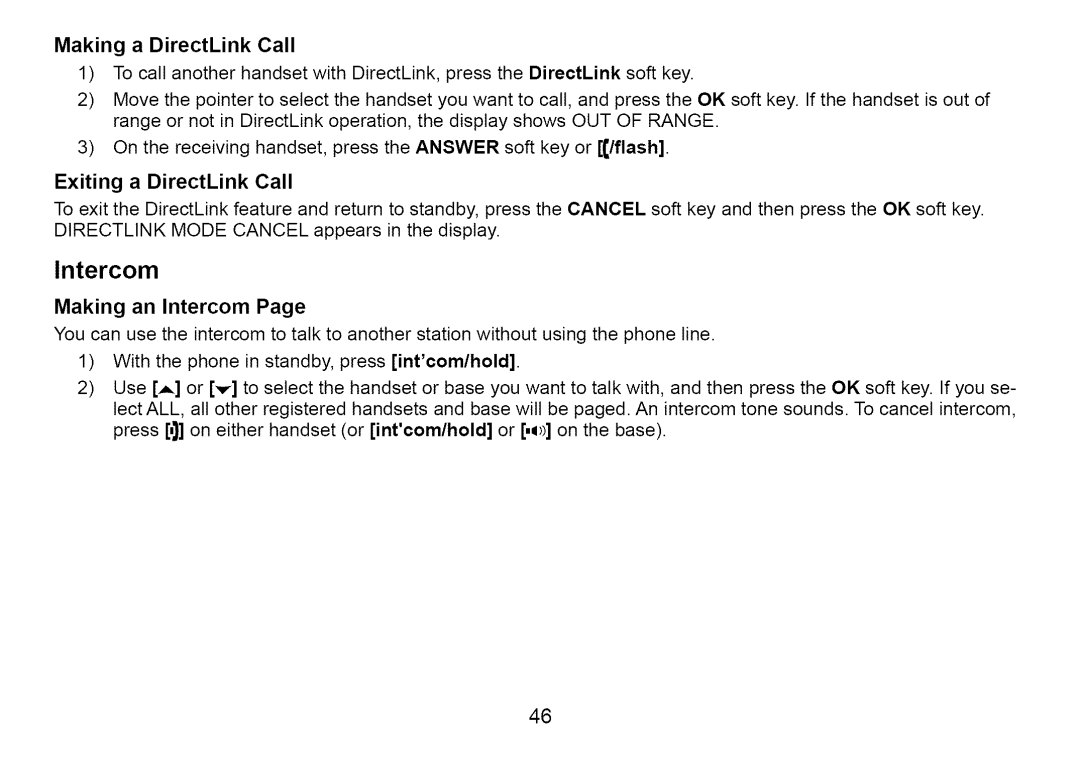
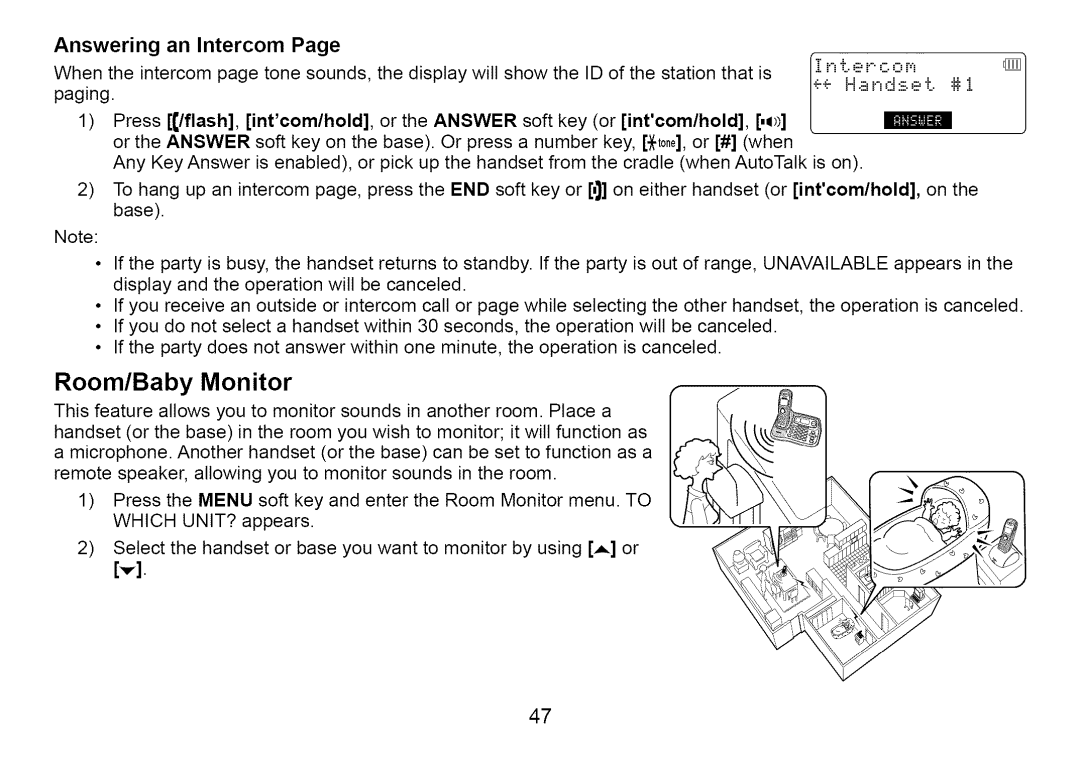
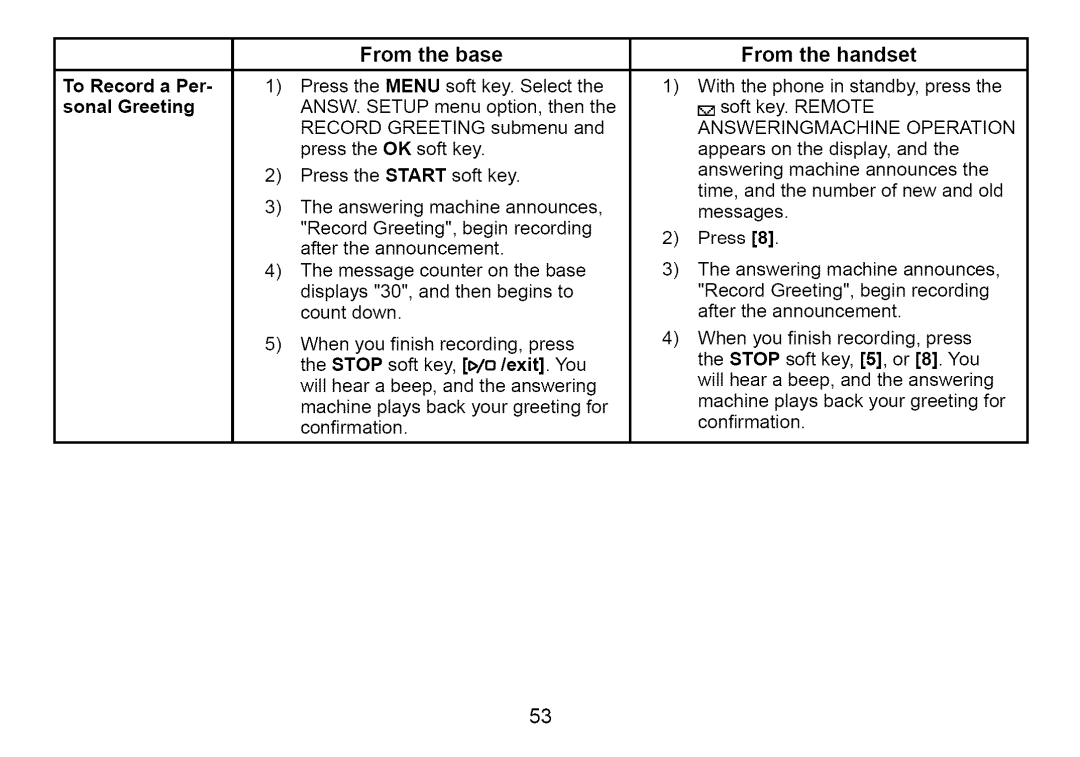
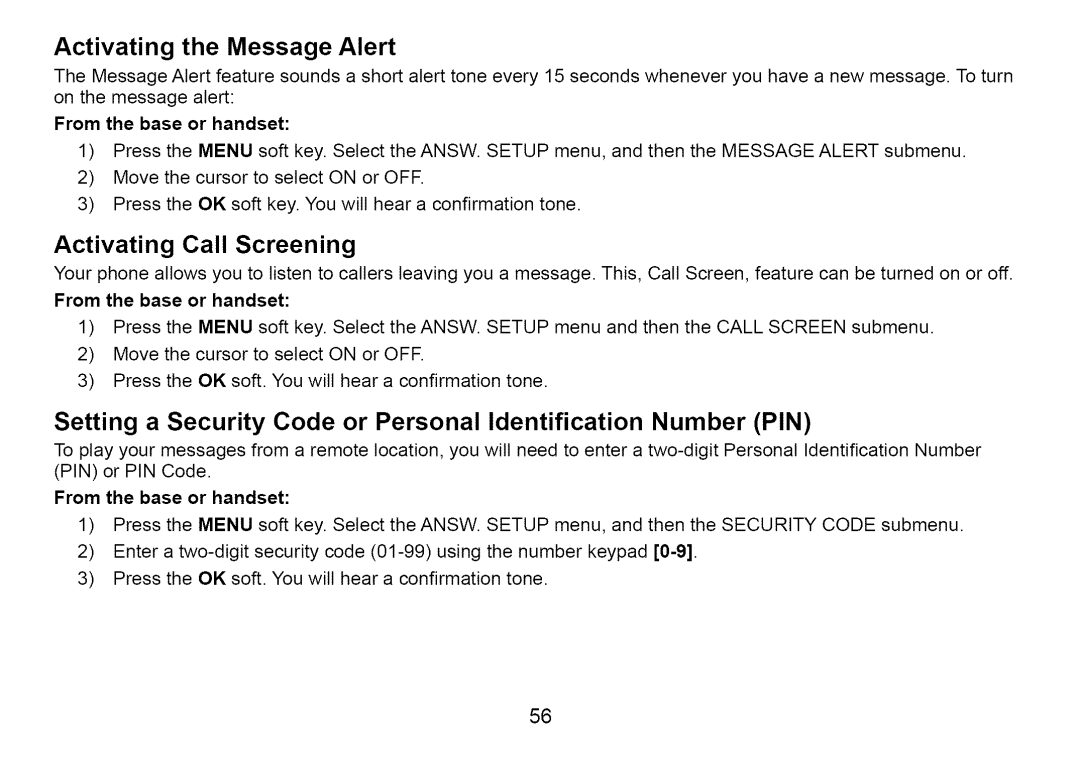
Installing the Optional Headset

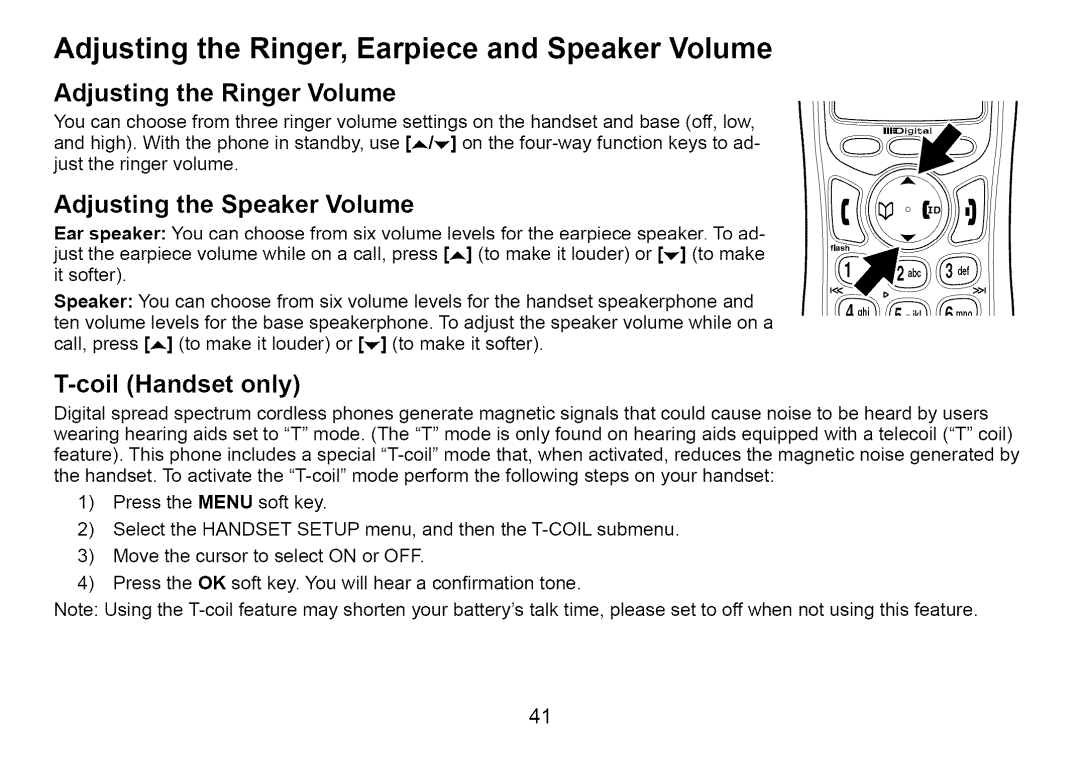
Your phone may be used with an optional headset. To use this feature, insert the head- set plug into the headset jack. Your phone is ready for hands-free conversations. Headsets may be purchased by calling the Uniden Parts Department. See back cover page for contact information.

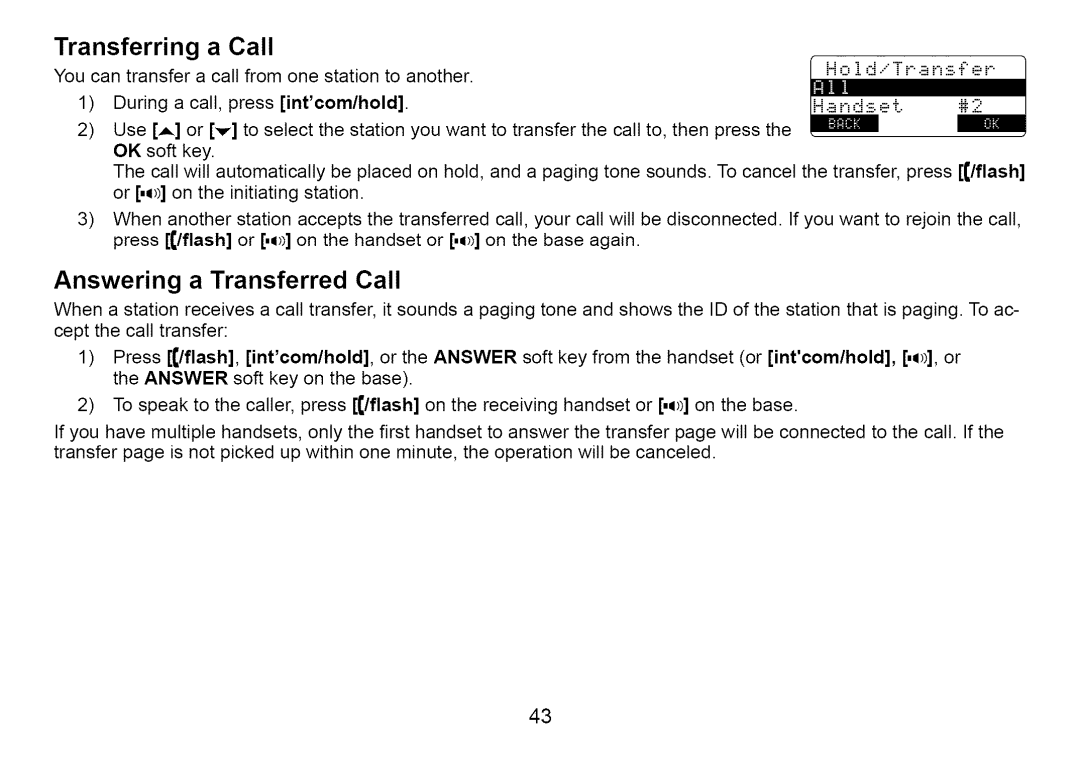
Seven-Digit Dialing

If you can make a local call by dialing only 7 digits (instead of 10), you can program

your local area code into your phone. If you get a call from within your area code, you'll only see the 7-digit phone number. If you get a call from outside your area code, you'll see all 10 digits. To enter an area code, follow the steps below:

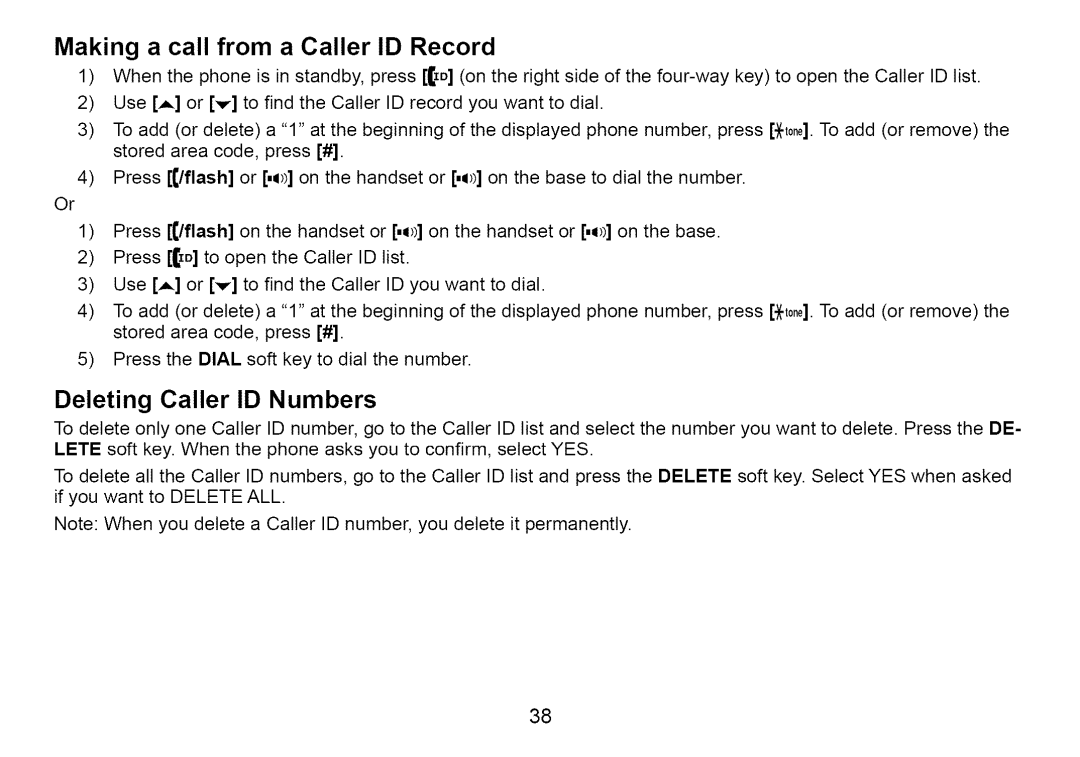
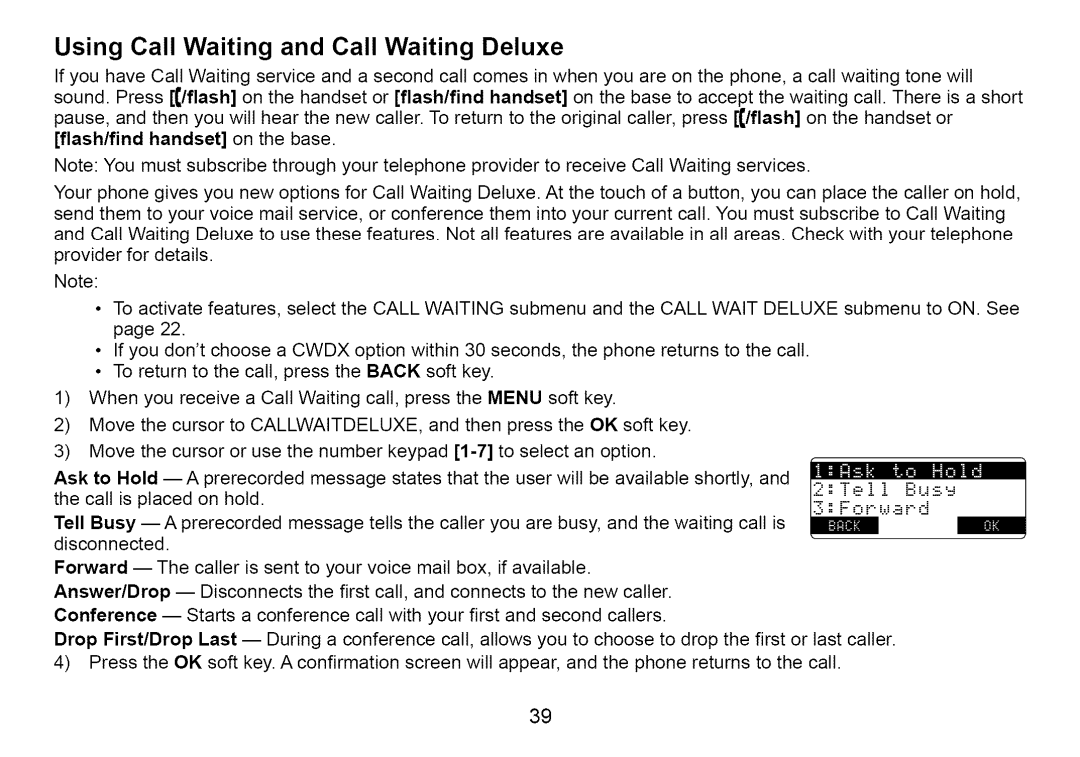
1)Press the MENU soft key. Select the GLOBAL SETUP menu, and then the AREA CODE submenu.

2)Use the number keypad (0-9) to enter a 3-digit area code. If an area code has already been stored, it will ap- pear in the display. Press the DELETE soft key to delete the stored code, and then enter a new one.

3)Press the OK soft key. You will hear a confirmation tone.

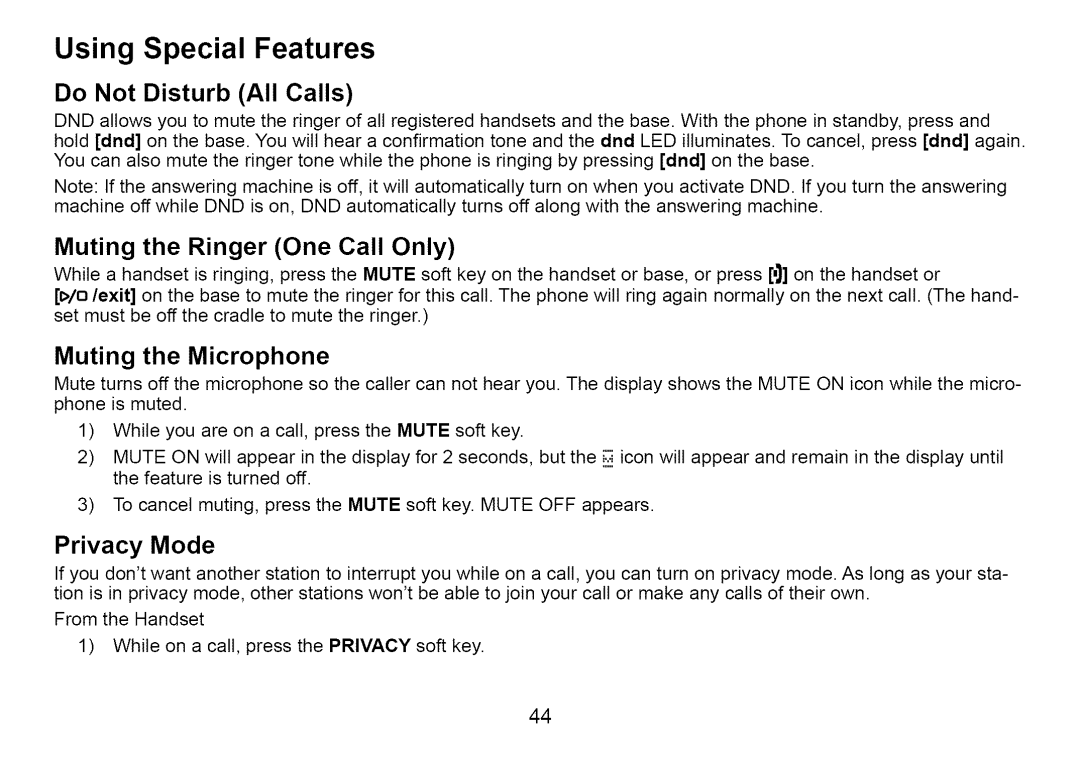
Inuse Line Setup (Base only)

Change this option only when instructed to by customer service. You can choose from TYPE-A, TYPE-B, or OFF. Default is Type-A.

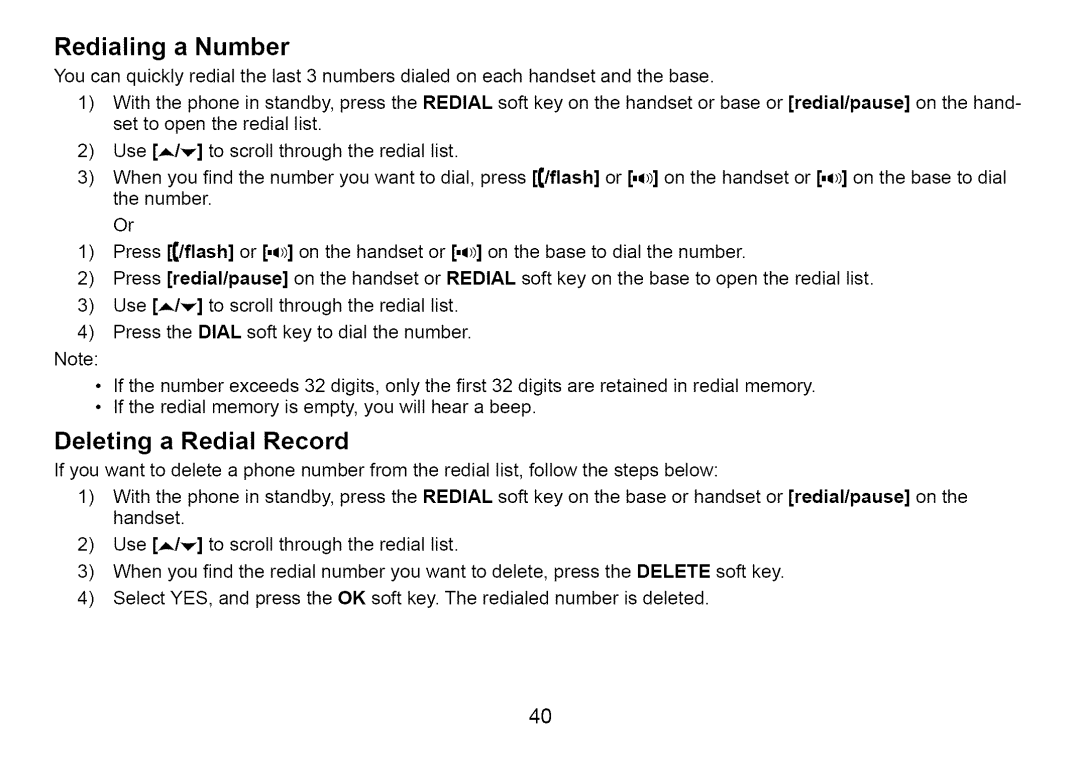
1)Press the MENU soft key. Select the GLOBAL SETUP menu, and then the INUSE LINE SETUP submenu.

2)CHANGE ONLY IF INSTRUCTED BY CUSTOMER SERVICE appears. Press the OK soft key.

3)Move the cursor to select TYPE -A, TYPE - B, or OFF.

4)Press the OK soft key. You will hear a confirmation tone.

49
Image 50
Contents III Contents Inuse Line Setup Base Using Hold, Conference and TransferUsing Special Setting Up the AnsweringSettingaSecurityCodeorPersonalIdentification Accessibility WelcomeIncoming caller information while Terminology used in this ManualClD Deluxe Or ExtraFeatu res Answering Machine FeaturesProduct Overview Parts of the Phone 1218Base Flash/find handset keyIcon Status Description Using the InterfaceReading the Handset Display Reading the Base Display MessrgeStandby Screen Using the Four-way Function Key Using the Handset and Base MenusEntering Text from your Phone Installing the Phone Choosing the Best LocationWall Mounting the Base Wall plate AC outlet AC adapterDirect Wall Mounting Installing the Rechargeable Battery Connecting the Base and Charging the Handset Testing the connection Installing the Belt ClipConnecting to the Phone Line Changing Dial Mode Basic Setup Selecting a LanguageActivating Caller ID on Call Waiting and Call Waiting Deluxe Activating Personal Ring Handset onlyAdjusting the LCD contrast Activating the Key Touch ToneAdding Accessory Handsets Compatible Handsets Charge the Accessory HandsetRegistering TCX905 Accessory or Extra Handsets RegisteringResetting the Handsets Base Unavailable Handset OnlyEnter Name for this entry Edit Name Setting up the PhonebookCreating Phonebook Entries Finding a Phonebook Entry Assign this entry to a Speed Dial number Speed DialEditing Phonebook Entries Storing Caller ID or Redial Numbers in the PhonebookCopying Phonebook Entries to another Station Erasing Phonebook EntriesDeleting All Phonebook Entries Copying all the phonebook entries at once Customizing Your Phone Changing Handset BannerSelecting a Ring Tone Handset only MelodiesActivating AutoTalk Handset only Activating Any Key Answer Handset onlyFrom a cordless handset Using your PhoneFrom the base speakerphone From a handset speakerphoneMaking a call with Speed Dial Making a call from the PhonebookChain Dialing from the Phonebook Using the Caller ID List Using Caller ID, Call Waiting and Redial ListsSwitching to the Handset Speakerphone during a Call Making a call from a Caller ID Record Deleting Caller ID NumbersUsing Call Waiting and Call Waiting Deluxe Redialing a Number Deleting a Redial RecordAdjusting the Speaker Volume Adjusting the Ringer, Earpiece and Speaker VolumeAdjusting the Ringer Volume CoilHandset onlyFinding a Lost Handset Placing a Call on HoldAnswering a Transferred Call Press intcom/holdDo Not Disturb All Calls Using Special FeaturesPrivacy Mode Muting the Ringer One Call OnlyUsing the DirectLink Feature AvailableIntercom Making an IntercomRoom/Baby Monitor Answering an IntercomTone Dialing Switch Over Installing the Optional Headset Inuse Line Setup Base onlySetting Up the Answering Machine FeaturesUsing the Answering Machine Interface Using Handset and Base MenusFrom the base or handset Selecting the LanguageYour Greeting From the base To Record a Per- sonal GreetingDeleting your Personal Greeting Base Only Setting the Number of Rings Setting the Record Time or Announce OnlyActivating the Message Alert Activating Call ScreeningUsing the Answering Machine Turning your Answering Machine On and OffReviewing Messages From the base From the handset Screening Calls Recording a Conversation From BaseRecording a Voice Memo Message Alert Remotely Operating Your Answering Machine Commands Maintenance SpecificationsBattery Replacement and Handling Cleaning the Battery ContactsLow Battery Alert Talk and Standby TimesTroubleshooting Resetting the HandsetResetting the Handset without the Base Changing the Digital Security CodeCommon Issues Symptom SuggestionSymptom May Have to use another phone To access Liquid Damage HandsetPrecautions Rechargeable Nickel-Metal-Hydride Battery WarningPage Page Radio Interference One Year Limited Warranty Index Personal Identification Number Unlden Remote Operation CardCUT Memo Memo At Uniden, well take care of you Hotline at