Changing the player settings
Getting Started
Playing Discs
OK
|
| OK |
| RETURN | RETURN |
|
| |
| SETUP |
|
| SETUP |
|
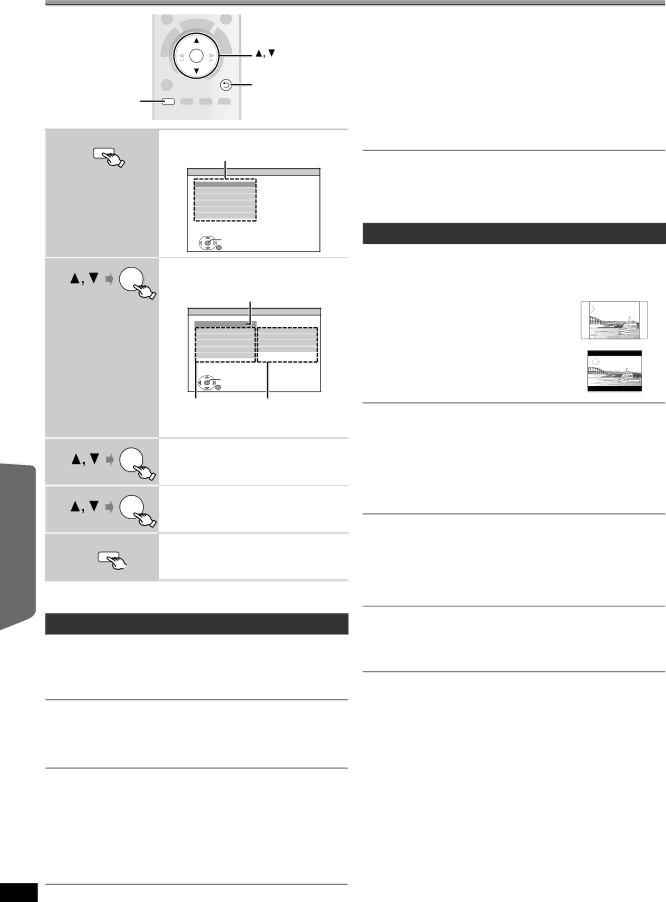
1 | Show the setup menu. | |
SETUP |
| |
| Menu |
|
|
|
|
| MAIN |
|
| DISC |
|
| VIDEO |
|
| AUDIO |
|
| DISPLAY |
|
| HDMI |
|
| OTHERS |
|
| SET |
|
2 | RETURN | EXIT : SETUP |
Select the menu. |
| |
|
| |
OK | Display the current setting |
| |
| of the items below |
RATINGS
Set a rating level to limit
Setting ratings (When level 8 is selected)
≥0 LOCK ALL: To prevent play of discs without rating levels.
≥1 to 7
≥8 NO LIMIT
When you select your ratings level, a password screen is shown. Follow the
Do not forget your password.
A message screen will be shown if a
Follow the
PASSWORD
Change the password for “RATINGS”.
≥SETTING
To change ratings (When level 0 to 7 is selected)
≥CHANGE: Follow the
VIDEO menu
TV ASPECT
Choose the setting to suit your TV.
≥16:9: Widescreen TV (16:9)
≥4:3PAN&SCAN: Regular aspect TV (4:3)
Other Operations
Reference
3
4
5
OK
OK
SETUP
-CH SELECT
DISC |
|
SETTING STATE | ENGLISH |
AUDIO | |
SUBTITLE | AUTO |
MENUS | ENGLISH |
RATINGS | 8 NO LIMIT |
PASSWORD |
|
SET |
|
RETURN | EXIT : SETUP |
Item Setting
≥To return to the previous screen, press [RETURN].
Select the item.
Make the settings.
Exit.
The sides of the widescreen picture are cut off so it fills the screen (unless prohibited by the disc).
≥4:3LETTERBOX: Regular aspect TV (4:3)
Widescreen picture is shown in the letterbox style.
TIME DELAY
When connected with a Plasma display, adjust if you notice the audio is out of sync with the video.
≥0 ms/AUTO | ≥20 ms | ≥40 ms | ≥60 ms |
≥80 ms | ≥100 ms |
|
|
When using VIERA Link “HDAVI Control” with “HDAVI Control 3 or later” compatible TV, select “0 ms/AUTO”.
Audio and video will automatically be set in sync.
STILL MODE
Specify the type of picture shown when paused.
≥AUTO
≥FIELD§: The picture is not blurred, but picture quality is lower.
≥FRAME§: Overall quality is high, but the picture may appear blurred.
≥The settings remain intact even if you switch the unit to standby.
≥Underlined items are the factory settings in the following menus.
§Refer to “Frame still and field still” (B 4, Glossary).
DISC menu
AUDIO
Choose the audio language.
≥ENGLISH ≥FRENCH ≥SPANISH ≥ORIGINAL§1 ≥OTHER – – –
SUBTITLE
Choose the subtitle language.
≥AUTO§3≥ENGLISH ≥FRENCH ≥SPANISH
≥OTHER – – –
BLACK LEVEL
Change the black level of the picture.
≥LIGHTER
≥DARKER
VIDEO OUT (I/P)
Select “PROGRESSIVE” only if connecting to a progressive output compatible TV.
≥INTERLACE
≥PROGRESSIVE:A message screen will appear. Follow the
RQTX0210
MENUS
Choose the language for disc menus.
≥ENGLISH ≥FRENCH ≥SPANISH
≥OTHER – – –
§1 The original language designated on the disc is selected.
§2 Input the appropriate code from the language code list (B 39).
§3 If the language selected for “AUDIO” is not available, subtitles appear in that language (if available on the disc).
28