OPERATION
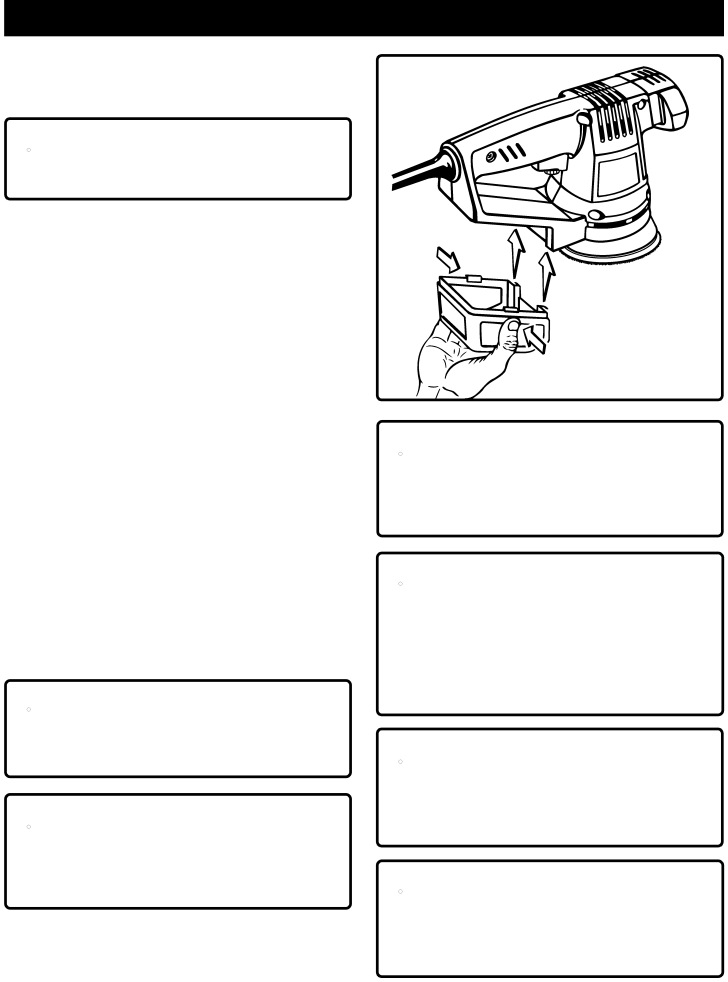
REMOVING DUST BOX
See Figure 4.
■Unplug your sander.
![]() WARNING:
WARNING:
Failure to unplug your sander could result in accidental starting causing possible serious personal injury.
■To release dust box, depress tabs located on each side of dust box.
■Slide dust box down and lift from sander as shown by the arrows in figure 4.
■Do not press on the filter material with your hand or fingers. Filter material can be damaged.
Note: Filter material is located on sides of dust box.
■Do not break tabs that secure dust box to sander.
■Empty dust box.
TO INSTALL DUST BOX
See Figure 5.
■Realign dust box with rear of sander.
■Slide dust box on sander as shown in figure 5. You will feel a soft click as the tab snaps into place.
Note: As mentioned above, be careful not to break the tabs that secure dust box to sander.
EXTENSION CORDS
The use of any extension cord will cause some loss of power. To keep the loss to a minimum and to prevent tool from overheating, use an extension cord that is heavy enough to carry the current the tool will draw.
A wire gage size (A.W.G.) of at least 16 is recommended for an extension cord 100 feet or less in length. When working outdoors, use an extension cord that is suitable for outdoor use. The cord's jacket will be marked WA.
![]() CAUTION:
CAUTION:
Keep extension cords away from the sanding area and position the cord so that it will not get caught on lumber, tools, etc., during sanding.
![]() WARNING:
WARNING:
Check extension cords before each use. If damaged replace immediately. Never use tool with a damaged cord since touching the damaged area could cause electrical shock resulting in serious injury.
TABS
 TO INSTALL
DUST BOX
TABS
Fig. 5
![]() WARNING:
WARNING:
Do not use this product as a component of other products. Also, do not use attachments or accessories not recommended for use with this product. Any such use could result in possible serious personal injury.
![]() WARNING:
WARNING:
To ensure proper brake operation after extended use, periodically check its operation by removing the sanding disc and running your sander without load (off the workpiece). The backing pad should not take longer than 6 seconds to stop. If it takes longer than 6 seconds to stop, return the sander to your nearest RYOBI AUTHORIZED SERVICE CENTER for repair.
![]() WARNING:
WARNING:
Do not wear loose clothing or jewelry when operating sander. They could get caught in moving parts causing serious injury. Keep head away from sander and sanding area. Hair could be drawn into sander causing serious injury.
![]() WARNING:
WARNING:
Before connecting your sander to power supply source, always check to be sure the switch is not in ON position. Failure to do so could result in accidental starting of your sander resulting in possible serious injury.
Page 9