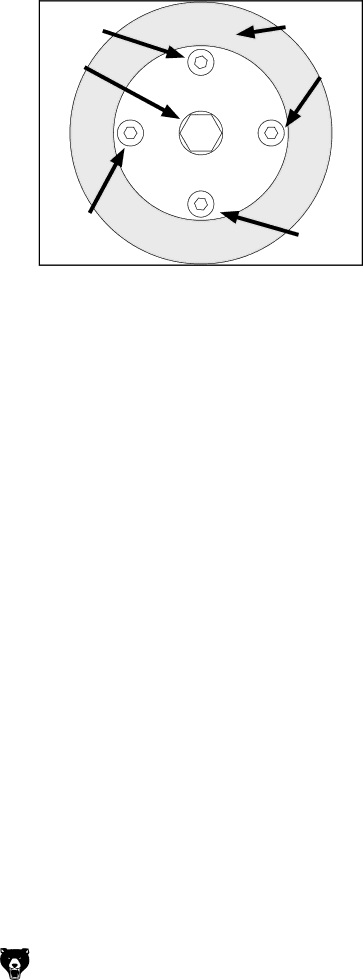
Grizzly owner manual Wheel bolt mounting order H7762 Heavy Duty Tool Grinder

Page 22

5.Slide the new grinding wheel onto the arbor. Be sure not to bump or scratch the wheel as it may dent, crack or otherwise damage the wheel.

6.Align the large holes in the grinding wheel with the screw holes in the connection plate of the grinder.

7.Fasten the wheel to the connector plate with the four bolts. In order to properly balance the wheel, tighten the bolts in the order shown in Figure 9.

8.Run a new wheel for at least one minute while standing clear of the line of rotation. If a wheel does have defects it will generally fail as soon as it gets up to full speed.

-20-

4th

Grinding

Bolt

Wheel

Arbor

2nd


Bolt

1st

Bolt3rd Bolt

Figure 9. Wheel bolt mounting order.

H7762 Heavy Duty Tool Grinder

Image 22
Contents Model H7762 Heavy Duty Tool Grinder Page Table of Contents Foreword IntroductionContact Info Machine Data Sheet Identification Safety Safety Instructions for MachineryAlways Lock Mobile Bases if Used Before Operating Machinery Additional Safety Instructions For Grinders Circuit Requirements 110V OperationItems Needed for Set Up SET UPSet Up Safety UnpackingInventory Figure Qty InventoryHardware and Tools Hardware Recognition Chart Clean Up Site ConsiderationsComponents and Hardware Required Qty MountingMount the grinder as shown below Grinding Wheels To install the grinding wheelsTo install the work tables Work TablesAngle Test Run OperationTo test run the grinder Grinding Tips To grind with the grinding wheelTo properly care for your wheel, follow these tips Wheel CareWheel Dressing To dress the grinding wheelPrefix Abrasive Grit Grade Bond Wheel Selection Wheel InspectionReplacing Wheels To remove/mount a wheelWheel bolt mounting order H7762 Heavy Duty Tool Grinder H1300 H1298 G7984 H2347 H0736 AccessoriesH5946 H5945H5944 General MaintenanceLubrication Service TroubleshootingParts BreakdownParts List DescriptionWarranty and Returns Page Page