AM3-B, AM3 specifications
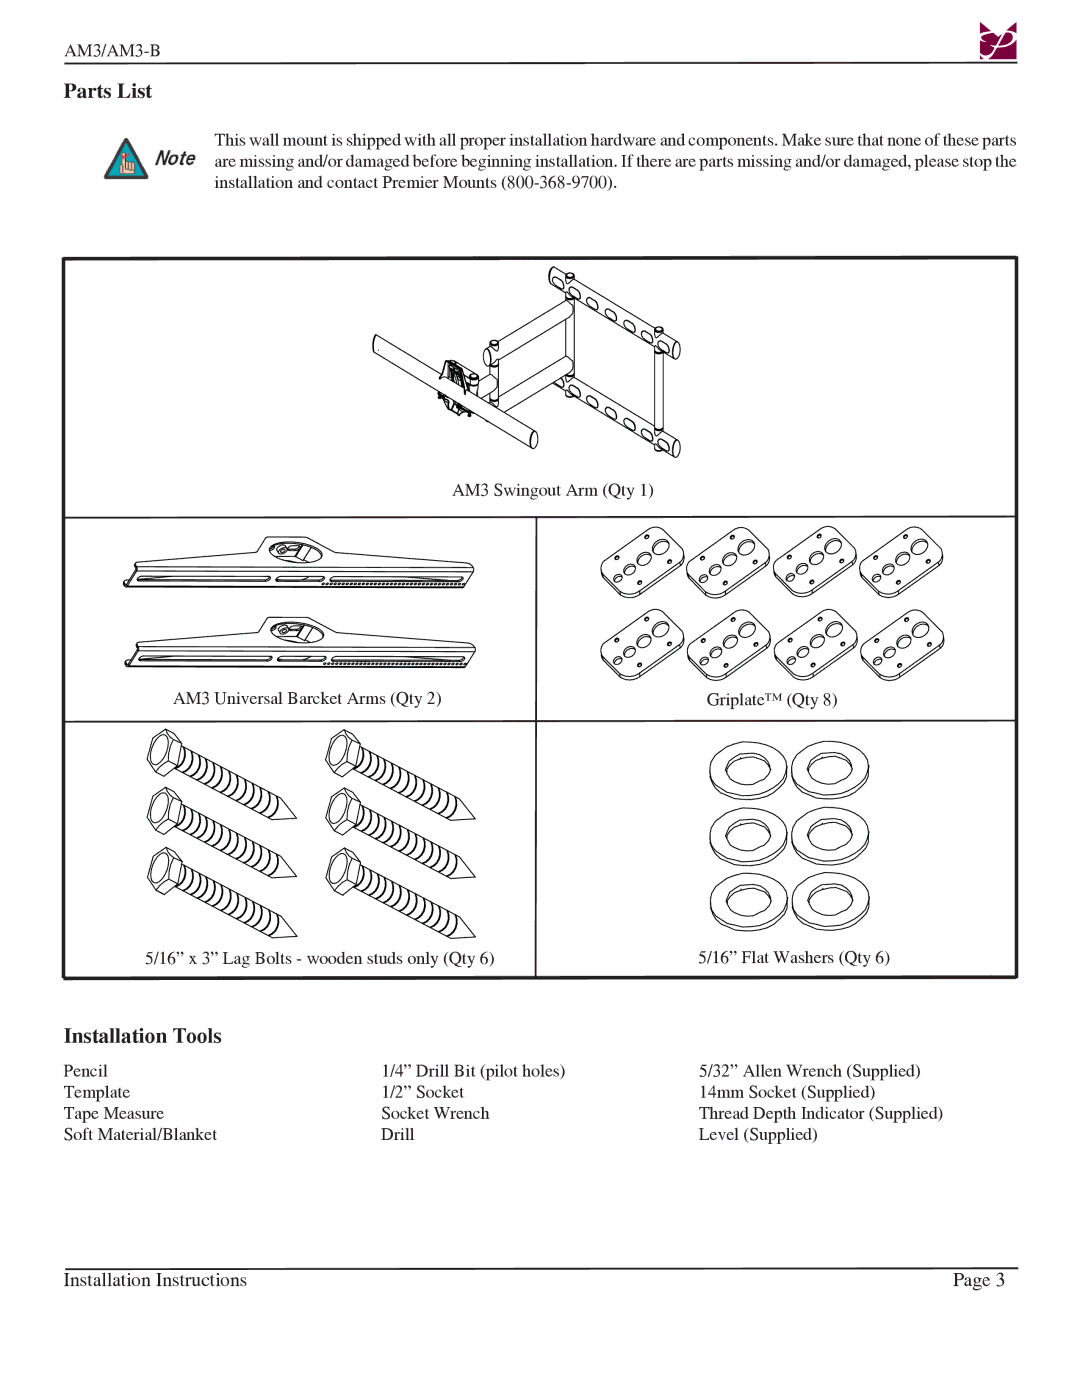
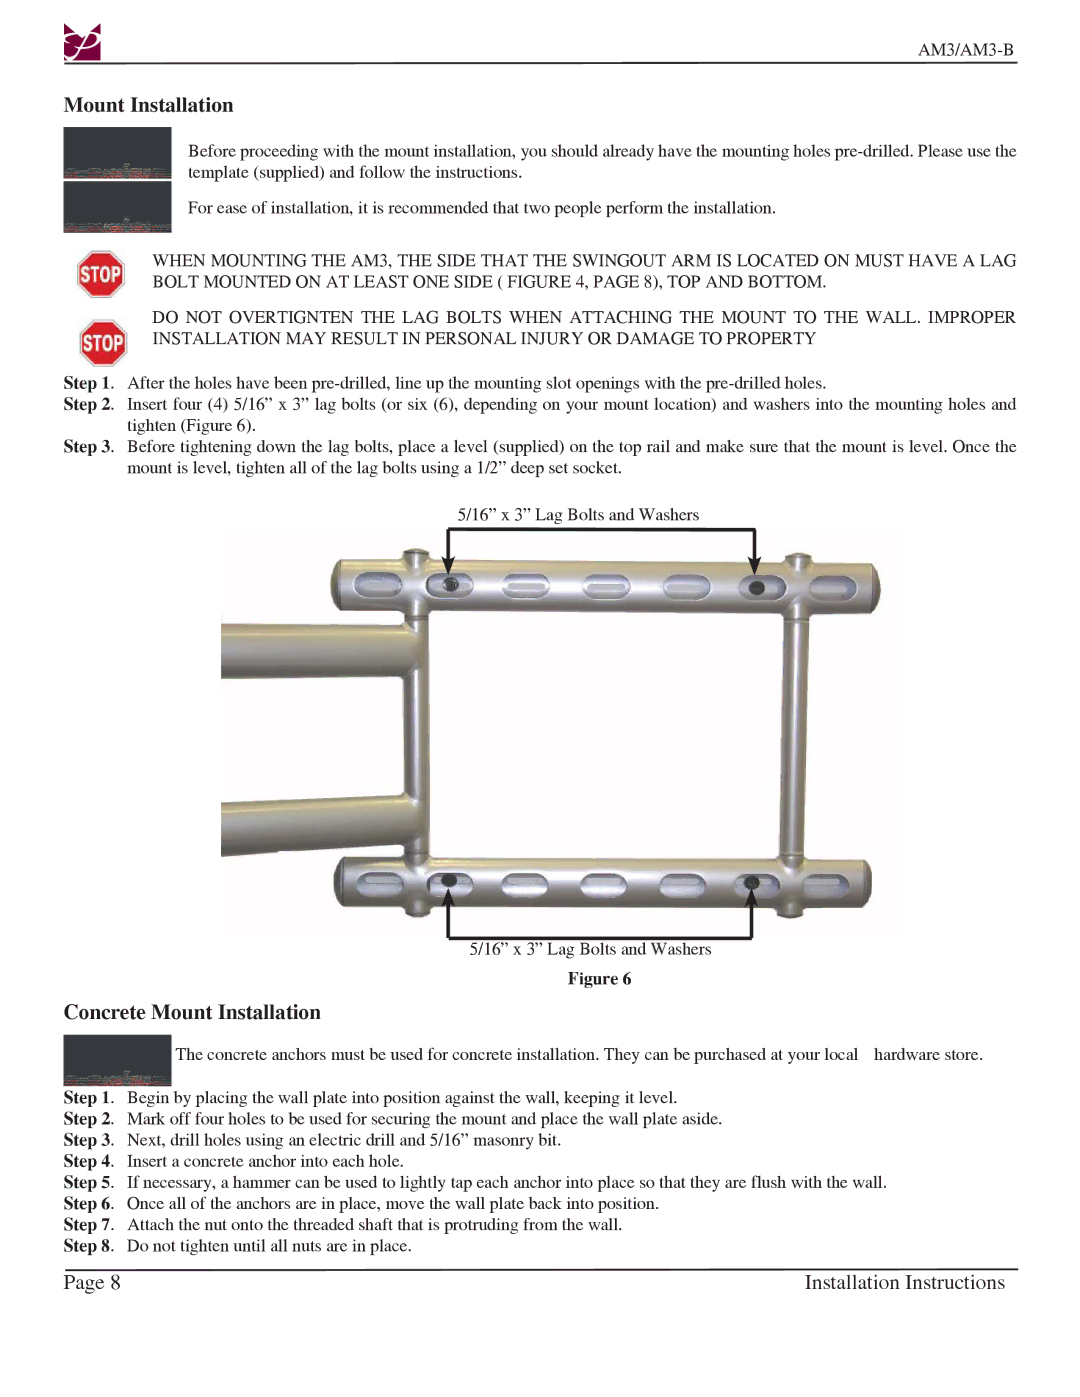
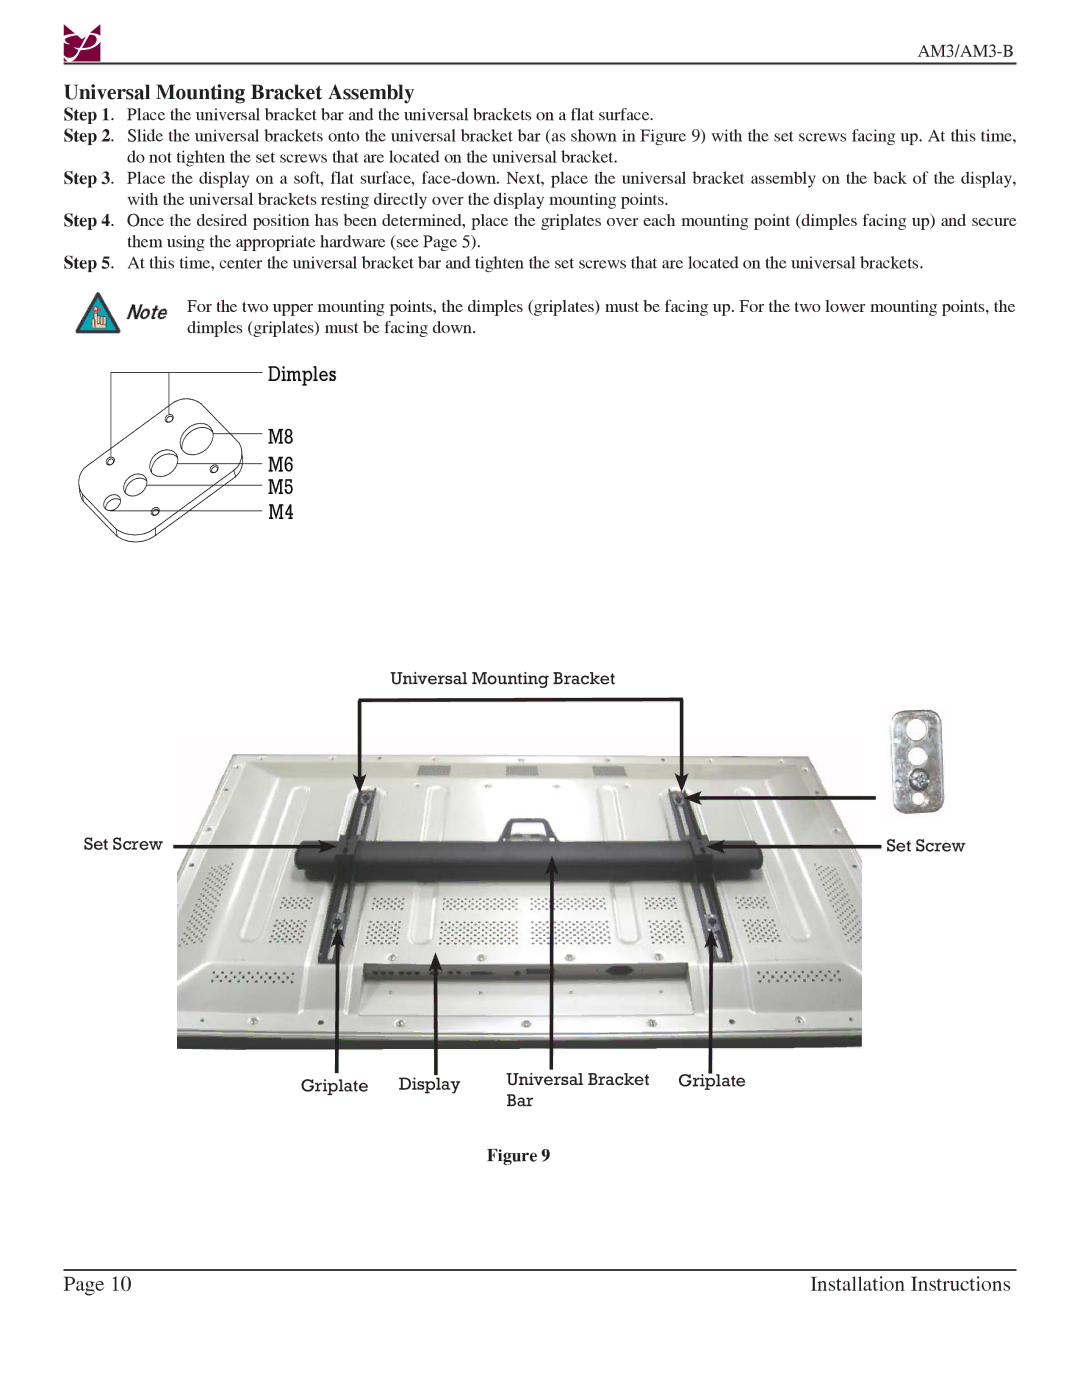
The Premier Mounts AM3 and AM3-B are innovative mounting solutions designed for the seamless integration of technology into various environments. By catering to both commercial and residential settings, these mounts provide a flexible and robust method to display screens securely and effectively.The AM3 is crafted for universal compatibility, accommodating a range of display sizes from 37 to 65 inches. Its exceptional construction ensures durability while maintaining a modern aesthetic. The design features a low-profile configuration, allowing screens to sit close to the wall for a clean look that enhances any space without overwhelming the decor.
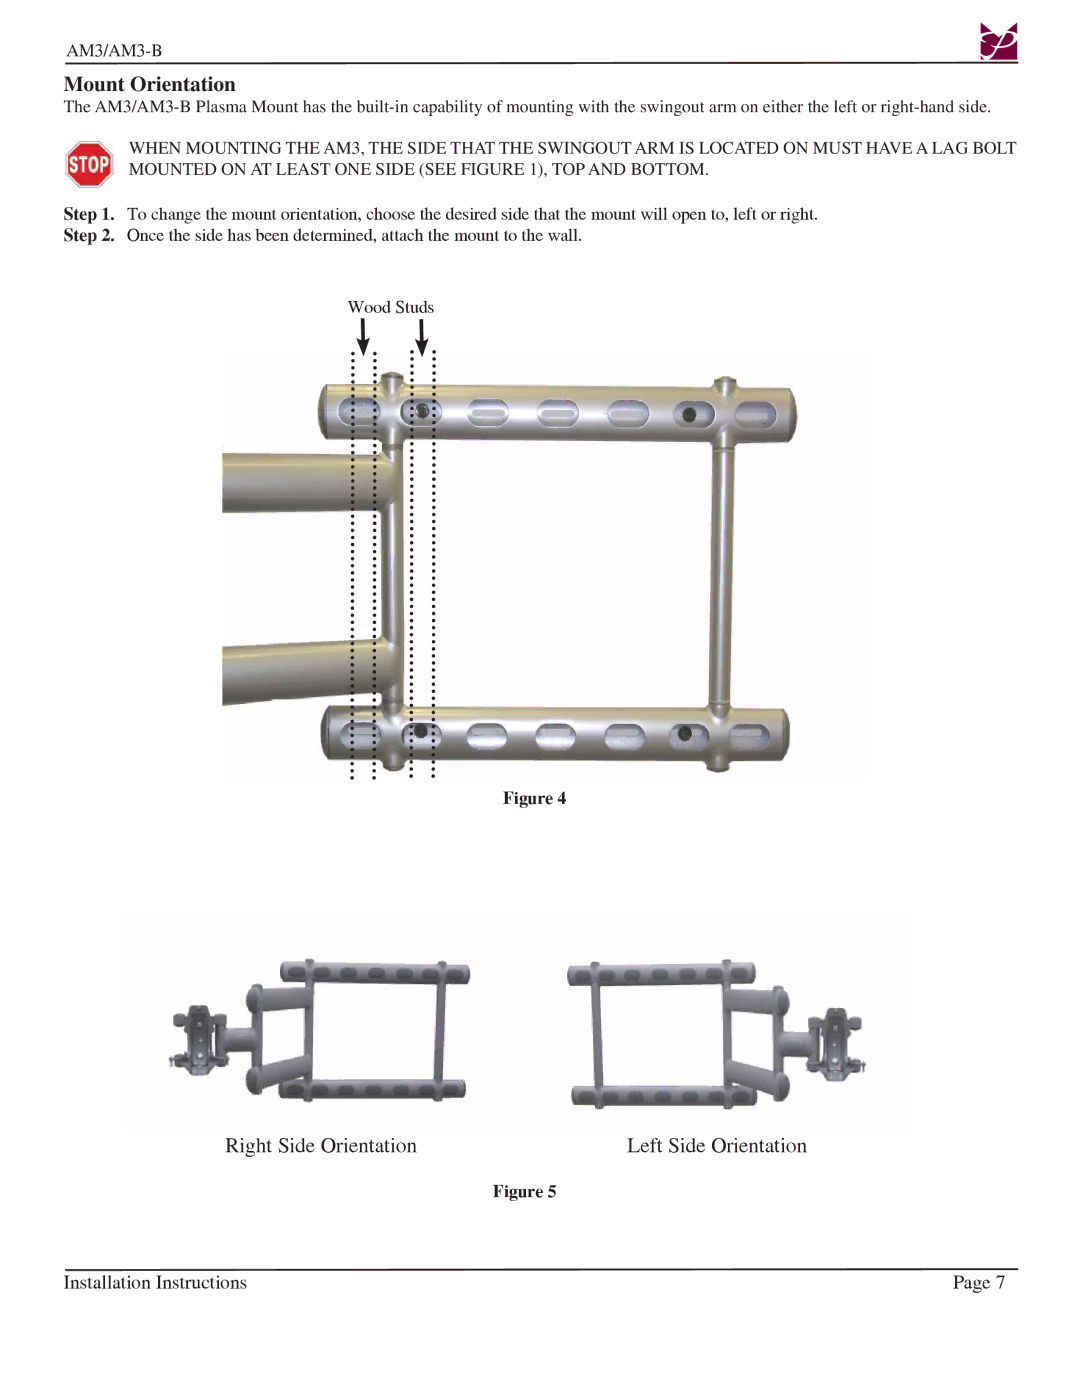
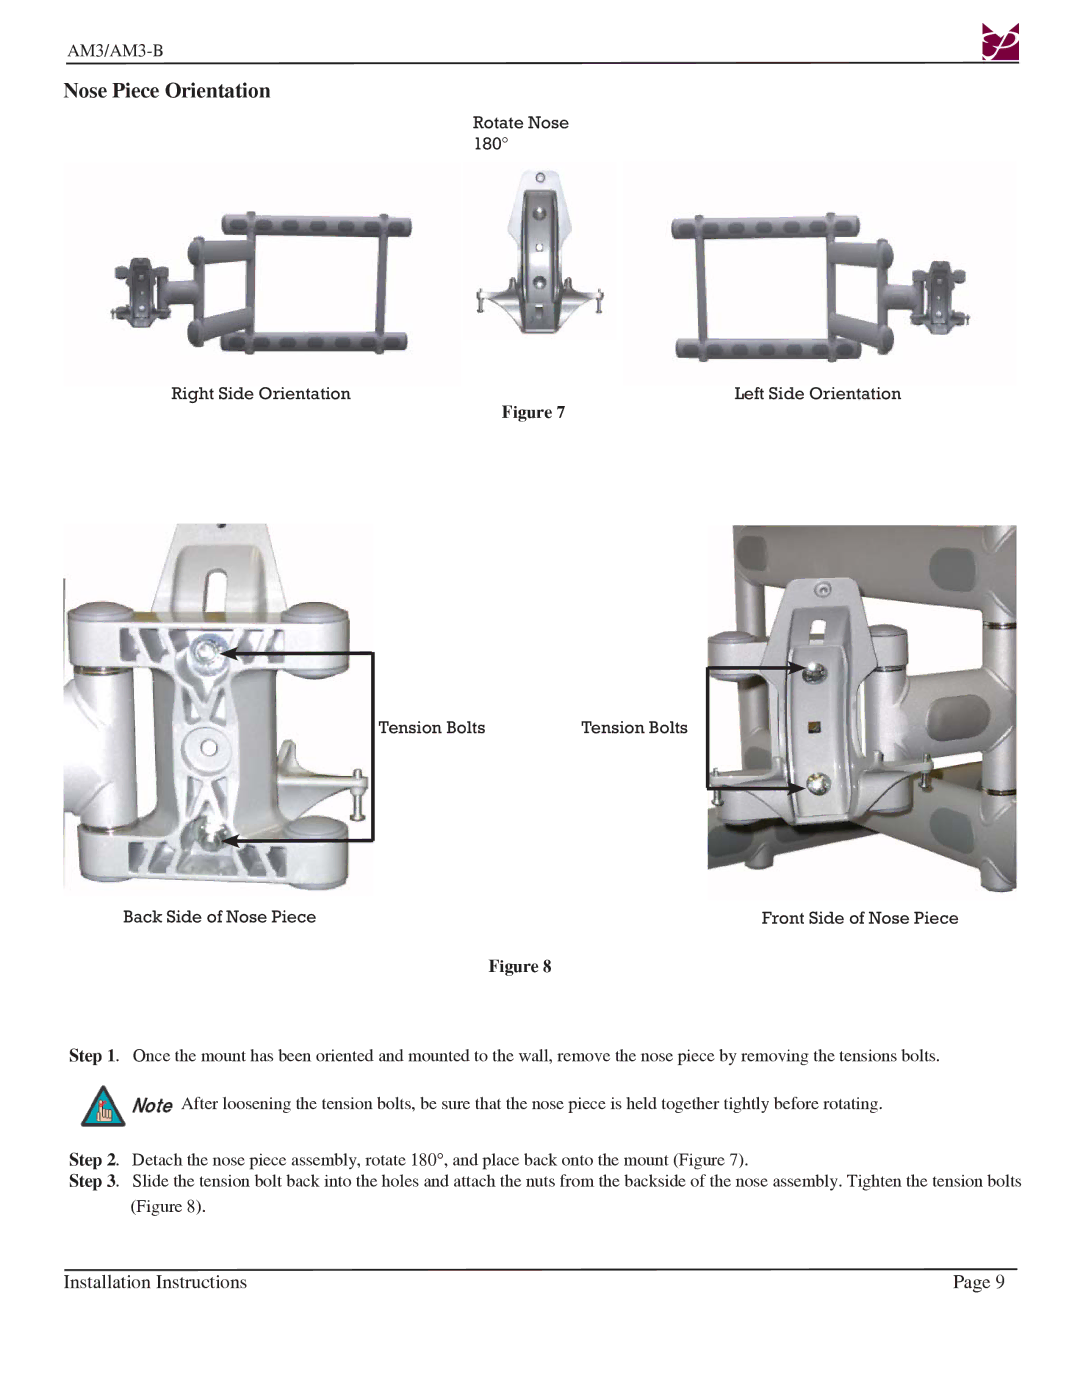
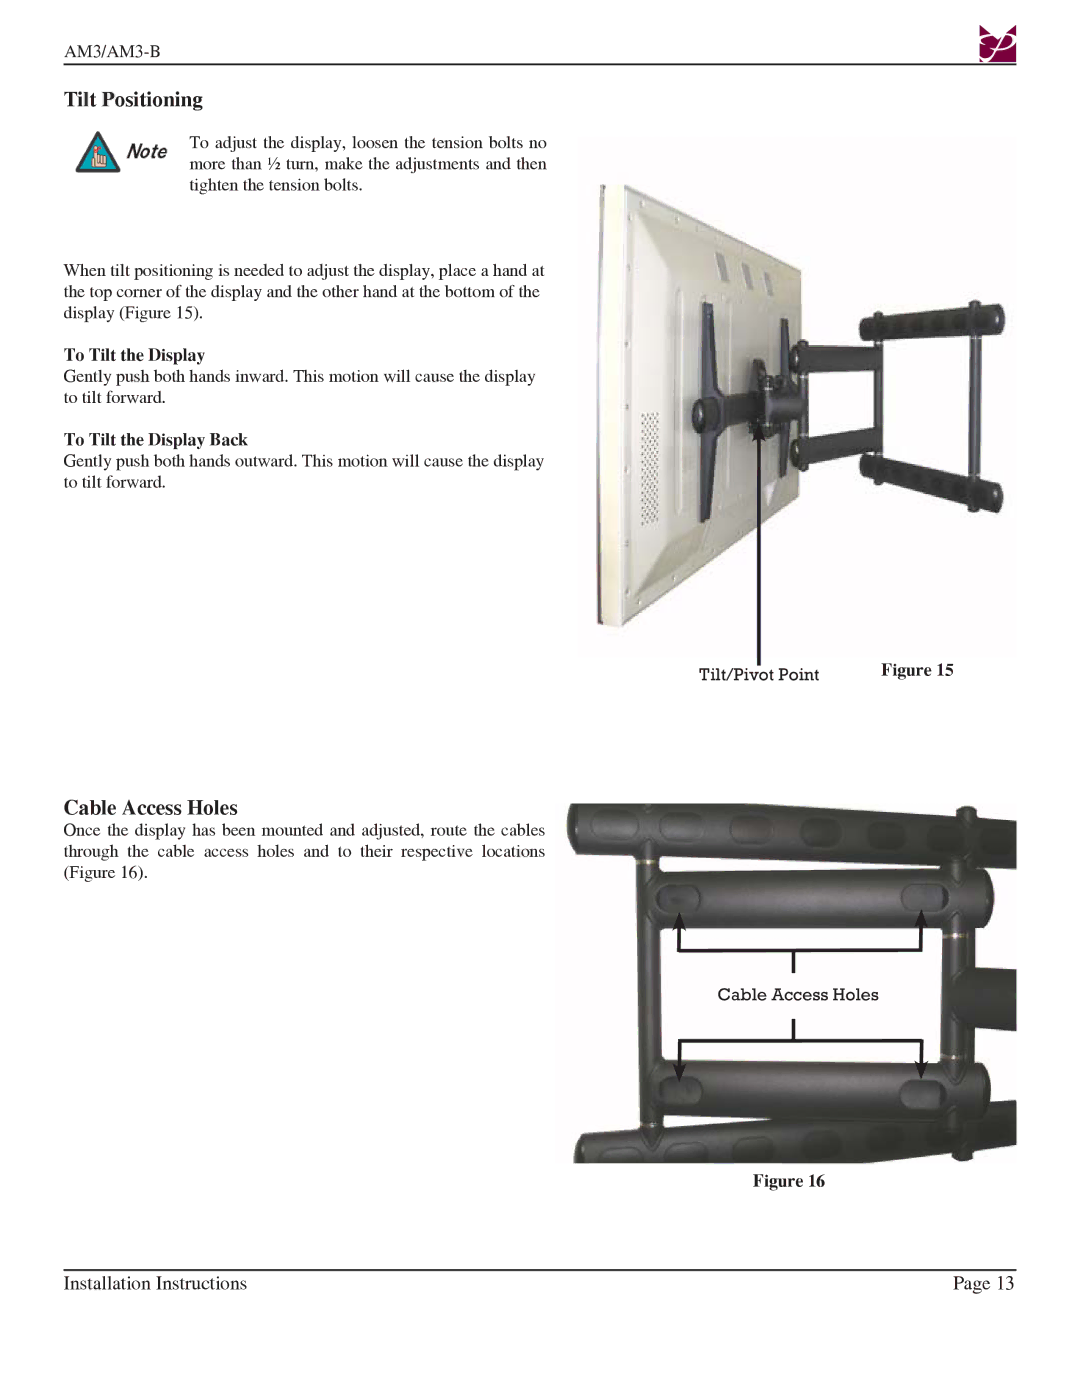
One of the standout features of the AM3 is its adjustable mounting mechanism, which facilitates the tilt and swivel capabilities. Users can easily adjust the angle of their displays, providing optimal viewing experiences whether in a conference room, classroom, or living area. The mount supports a generous tilt range, which helps reduce glare from windows and overhead lighting, making it ideal for various lighting conditions.
The AM3-B variant takes it a step further with a black finish that adds an element of sophistication. The black mount is particularly appealing for modern interiors and environments where subtlety is key. Both models incorporate advanced technology for a straightforward installation process that minimizes the need for extensive tools and expertise.
With a focus on cable management, Premier Mounts designs ensure that wires and cables are organized and concealed, enhancing the overall appearance of the setup. This thoughtful feature helps users maintain a tidy and professional look, whether it’s for a public display or a home theater.
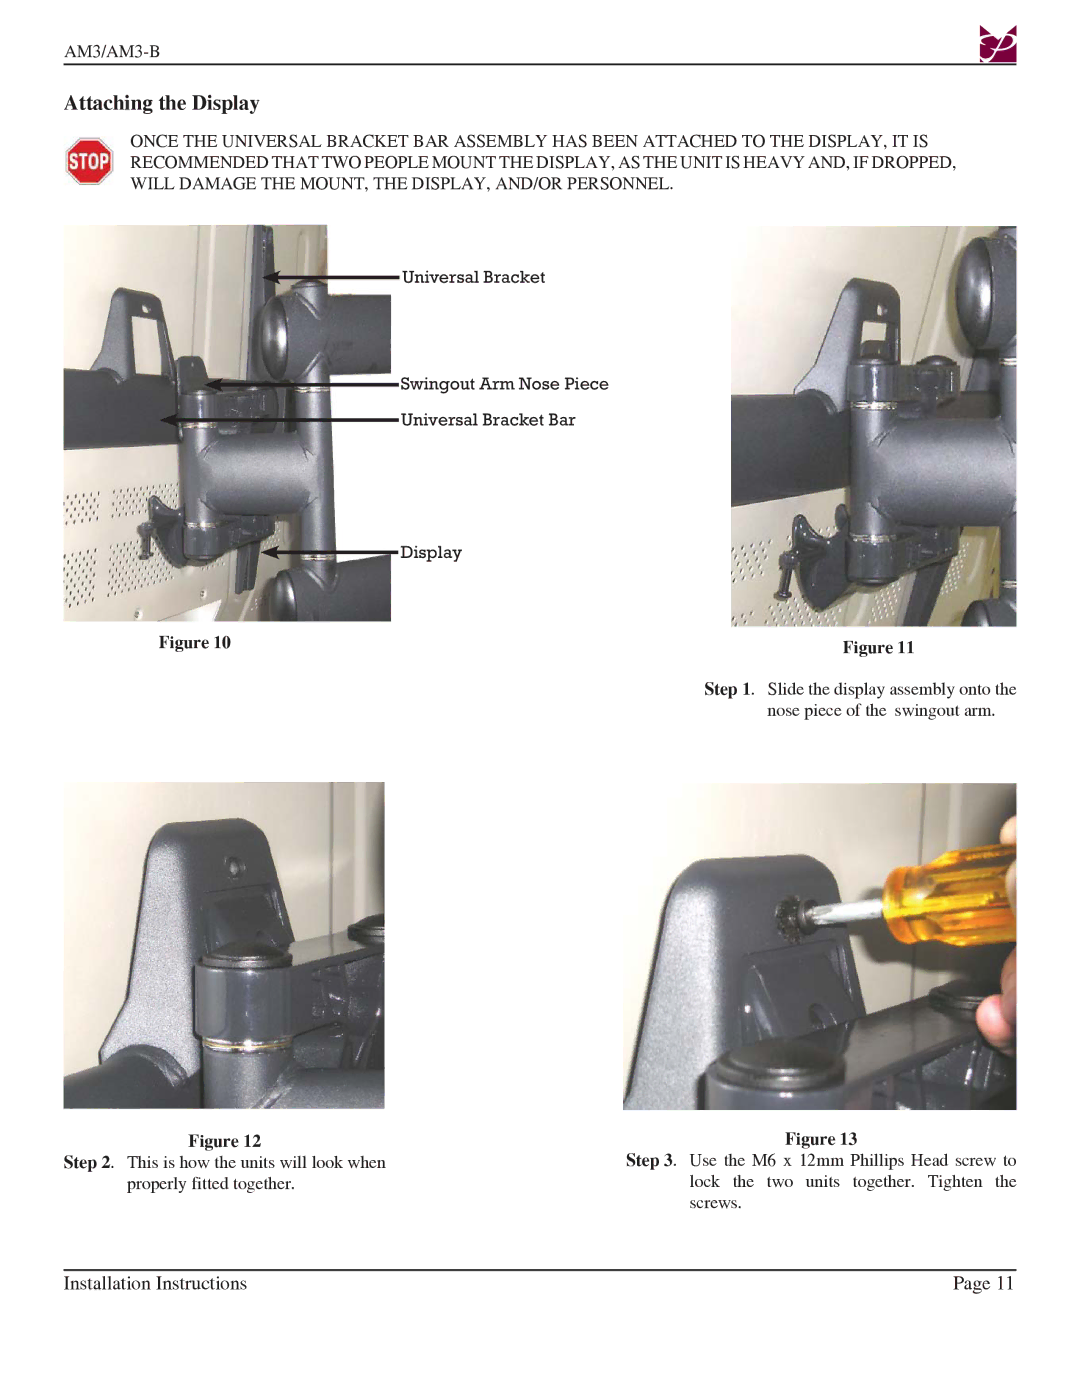
Moreover, safety and stability are paramount in the construction of the AM3 and AM3-B. Built with premium materials, these mounts not only support substantial weight but also adhere to strict safety standards, providing peace of mind that screens are secure.
In summary, the Premier Mounts AM3 and AM3-B are exceptional display mounting solutions characterized by their universal compatibility, adjustable viewing angles, sleek designs, and robust construction. Their focus on practicality, aesthetics, and safety makes them ideal choices for anyone looking to enhance their viewing experience while keeping environments organized and stylish. Whether for business or pleasure, these mounts offer unmatched quality and versatility.


