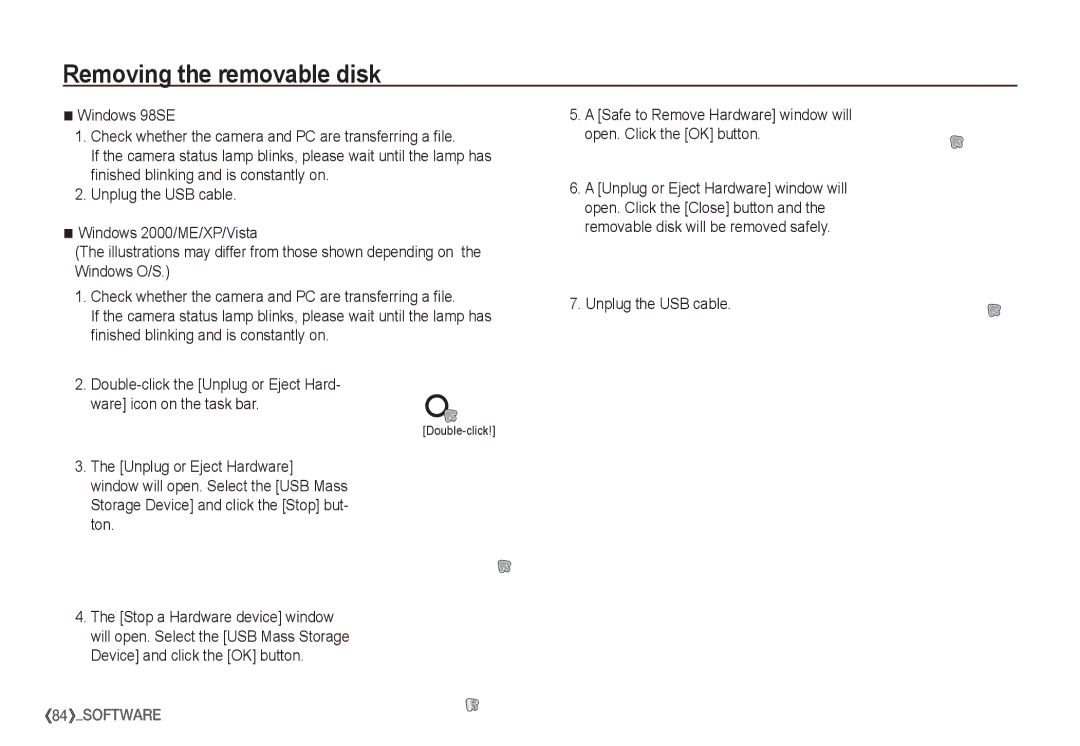
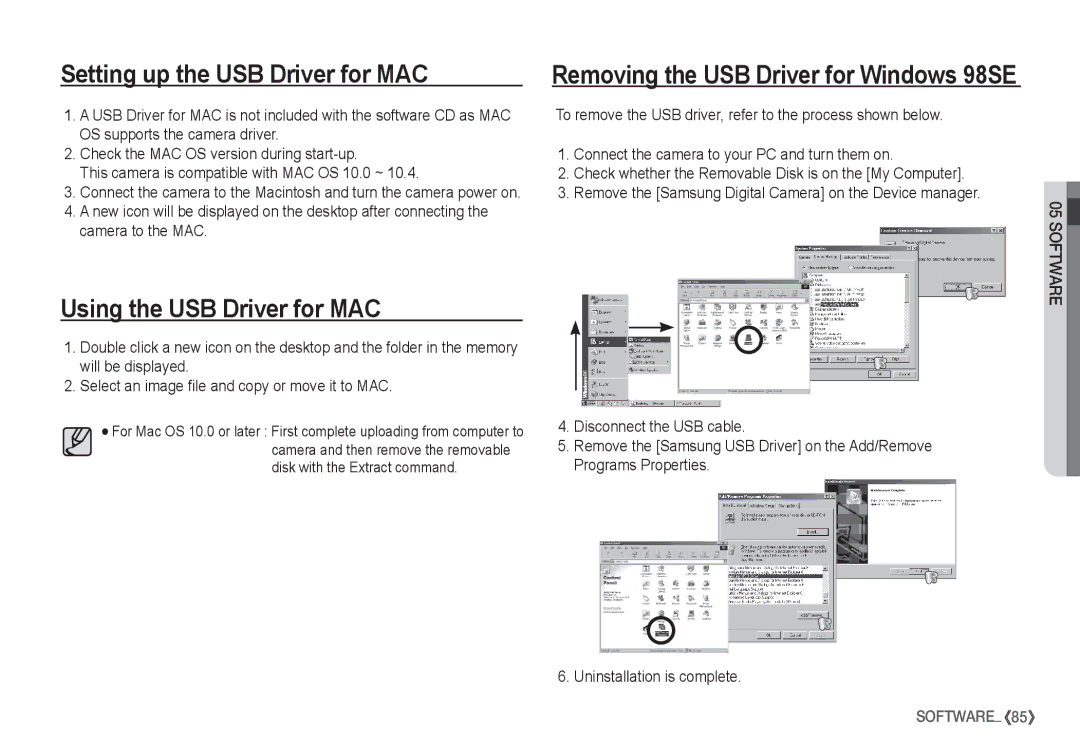
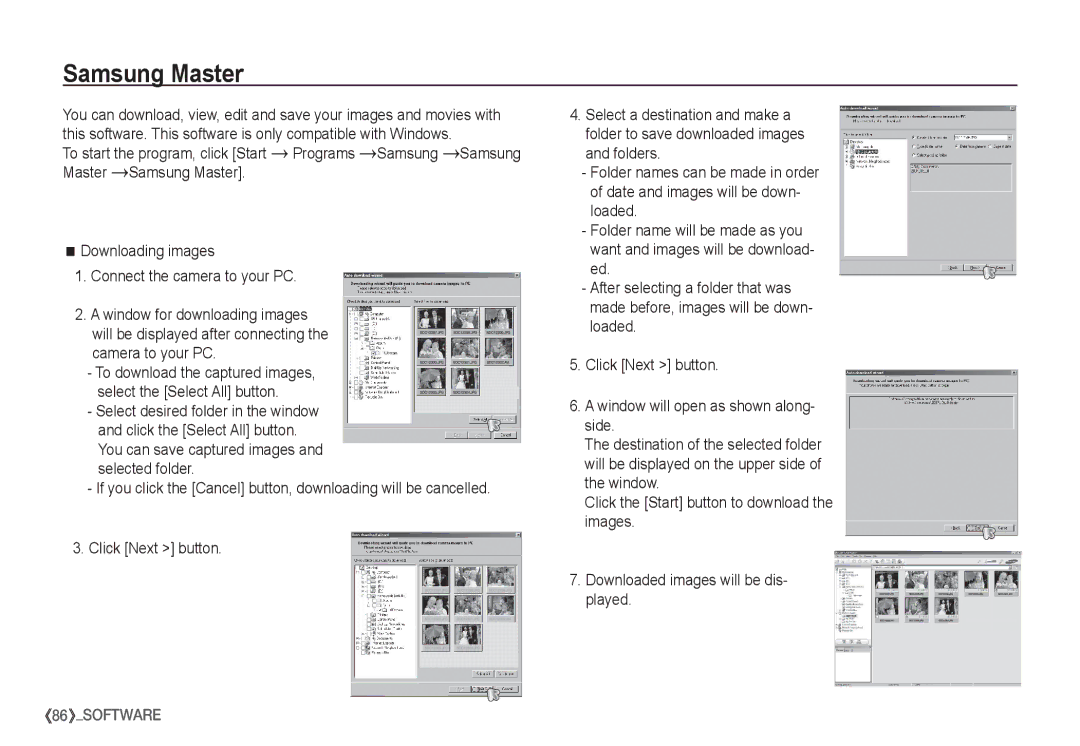
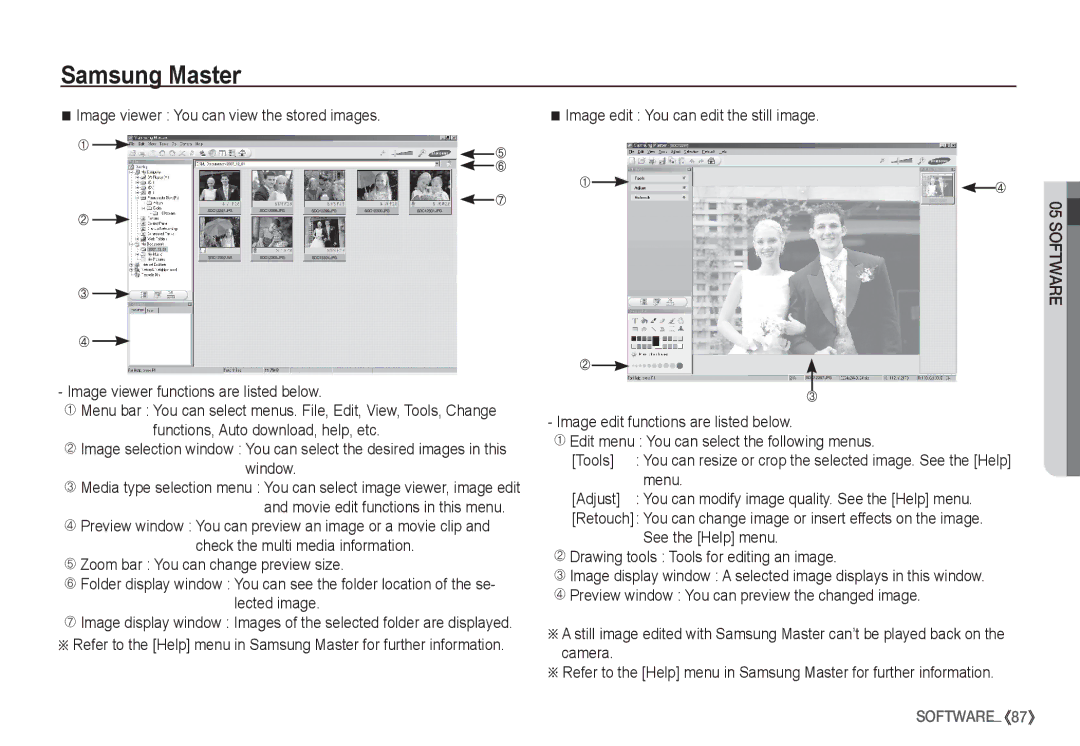
Samsung EC-S1065PBA/FR, EC-S1065SBA/FR manual Correct Disposal of This Product

Page 91

FAQ

When the DirectX 9.0 or later is not installed

Install the DirectX 9.0 or later

1)Insert the CD provided with the camera

2)Run the windows explorer and select the [CD-ROM drive:\ USB Driver\DirectX 9.0] folder and click the DXSETUP.exe file.

The DirectX will be installed. Visit the following site for downloading the DirectX.http://www.microsoft.com/directx

If a PC (Windows 98SE) stops responding while the camera and PC are connected repeatedly

If a PC (Windows 98SE) is turned on for a long time and the cam- era is connected repeatedly, the PC may not recognise the camera. In this case, re-start the PC.

If a PC connected with the camera stops responding while Windows is starting.

In this case, disconnect the PC and the camera and Windows will start. If the problem happens continuously, set the Legacy USB Support to disable and re-start the PC. The Legacy USB Support is in the BIOS setup menu. (The BIOS setup menu differs from the PC manufacturers and some BIOS menus don’t have Legacy USB Support) If you can’t change the menu by yourself, contact to the PC manufacturer or BIOS manufacturer.

If the movie clip can’t be deleted, or the removable disk can’t be extracted or an error message displays during the file transfer.

If you install only the Samsung Master, the problems mentioned above occasionally happen.

-Close the Samsung Master program by clicking the Samsung Master icon on the Taskbar.

-Install all the application programs included in the software CD.

Correct Disposal of This Product

Correct Disposal of This Product (Waste Electrical & Elec- tronic Equipment)

(Applicable in the European Union and other European countries with separate collection systems) This marking

shown on the product or its literature, indicates that it should not be disposed with other household wastes at the end of

its working life. To prevent possible harm to the environment or human health from uncontrolled waste disposal, please separate this from other types of wastes and recycle it responsibly to promote the sustainable re-use of material resources. Household users should contact either the retailer where they purchased this product, or their local government office, for details of where and how they can take this item for environ- mentally safe recycling. Business users should contact their supplier and check the terms and conditions of the purchase contract. This product should not be mixed with other commercial wastes for disposal.

Samsung Techwin cares for the environment at all product manufacturing stages to preserve the environment, and is taking a number of steps to provide customers with more environment-friendly products. The Eco mark represents Samsung Techwin's will to create environment-friendly products, and indicates that the product satisfies the EU RoHS Directive.

90_SOFTWARE

Image 91
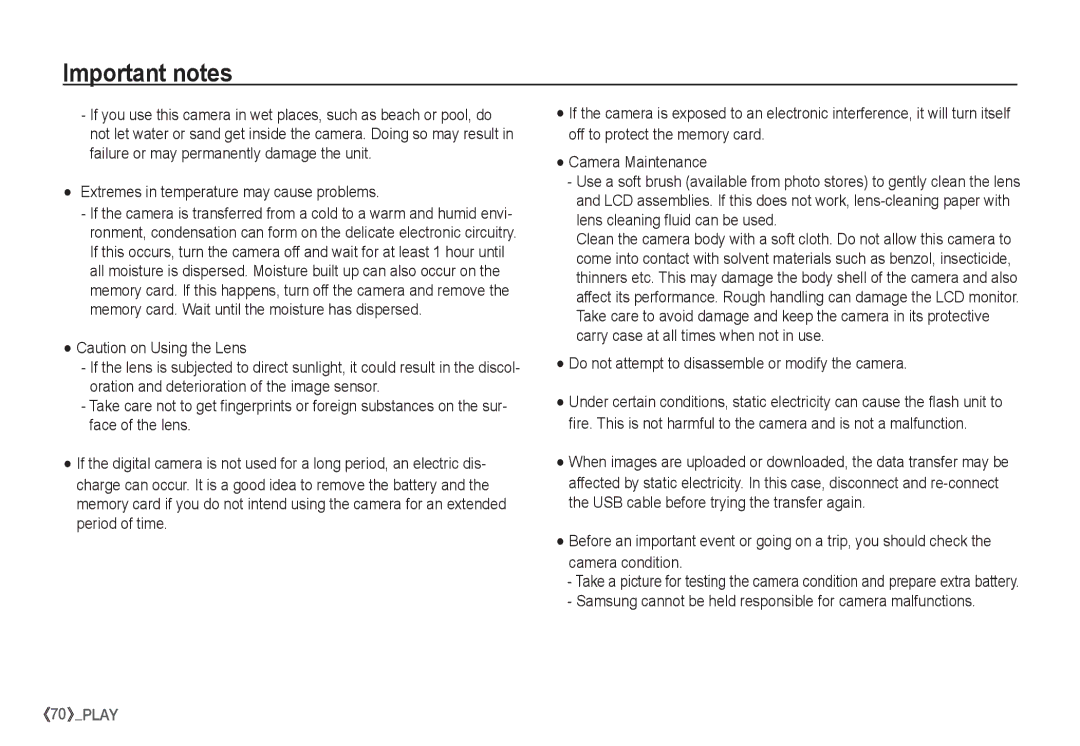
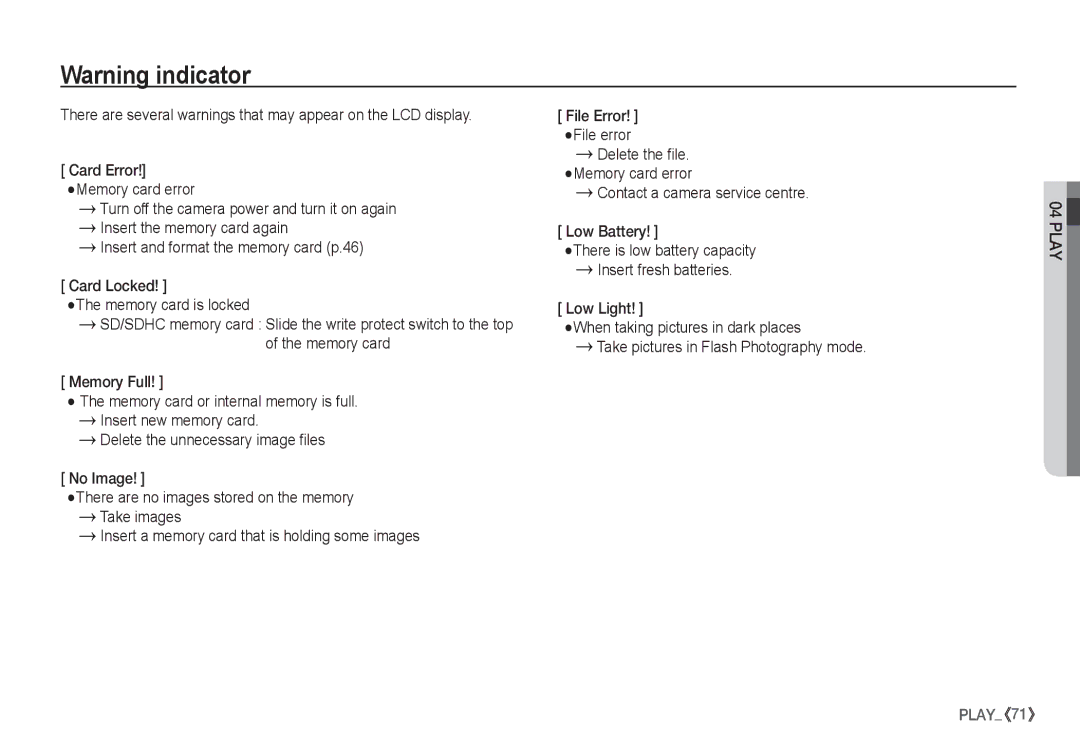
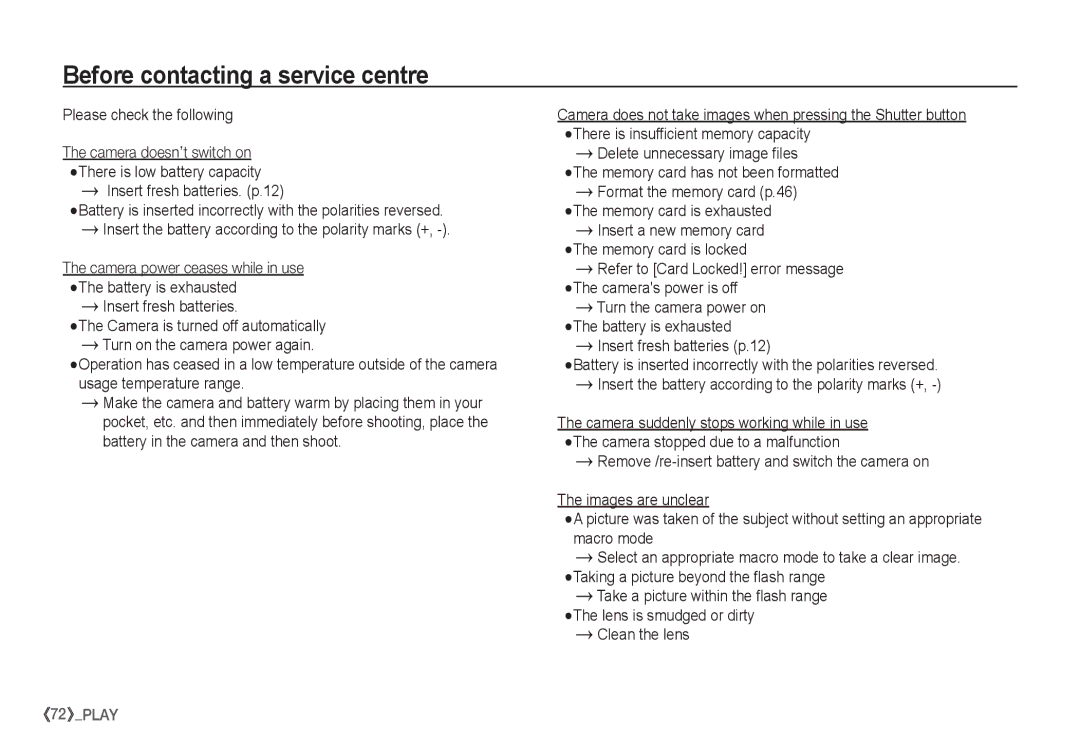
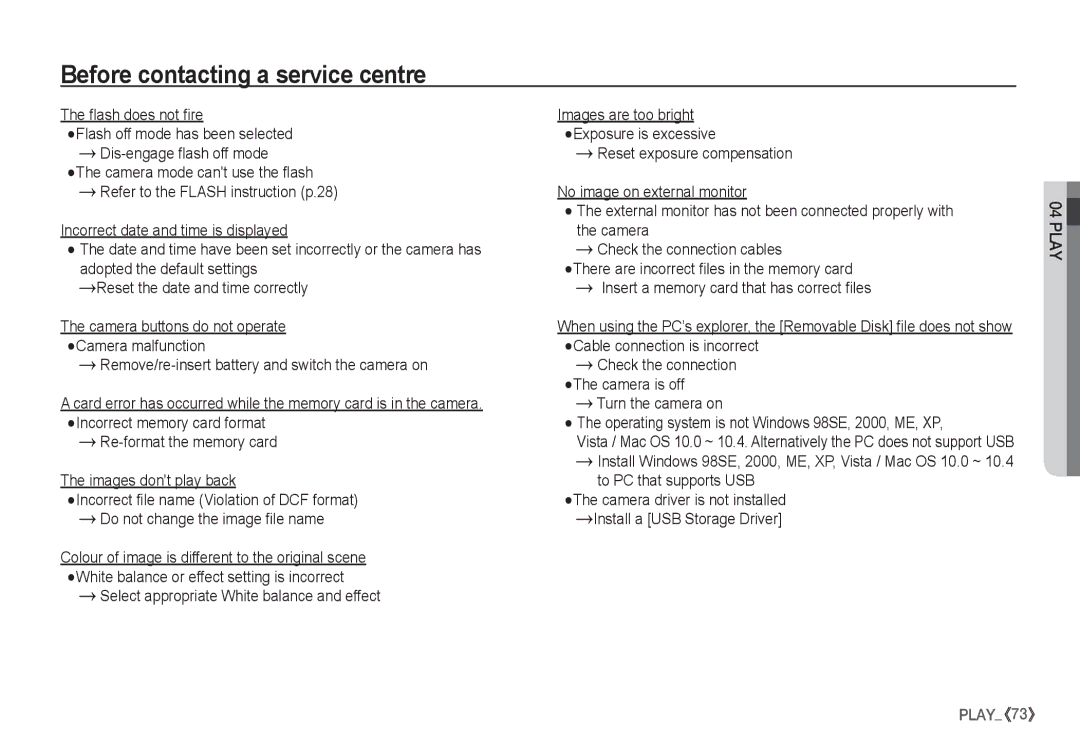
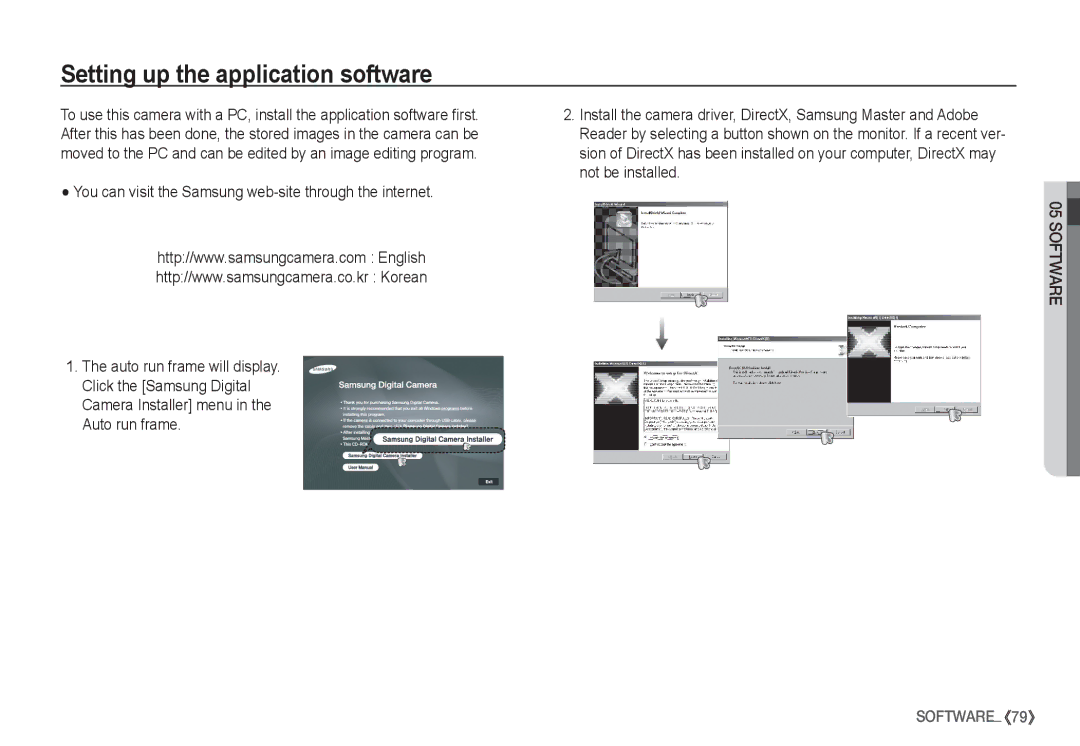
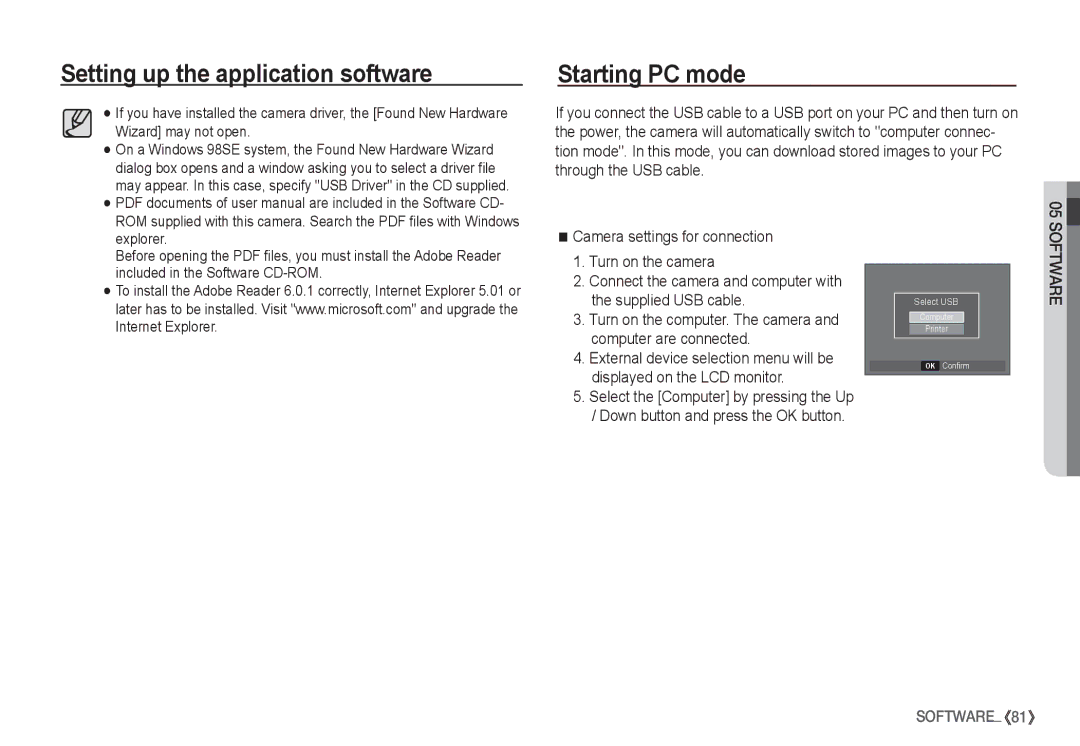
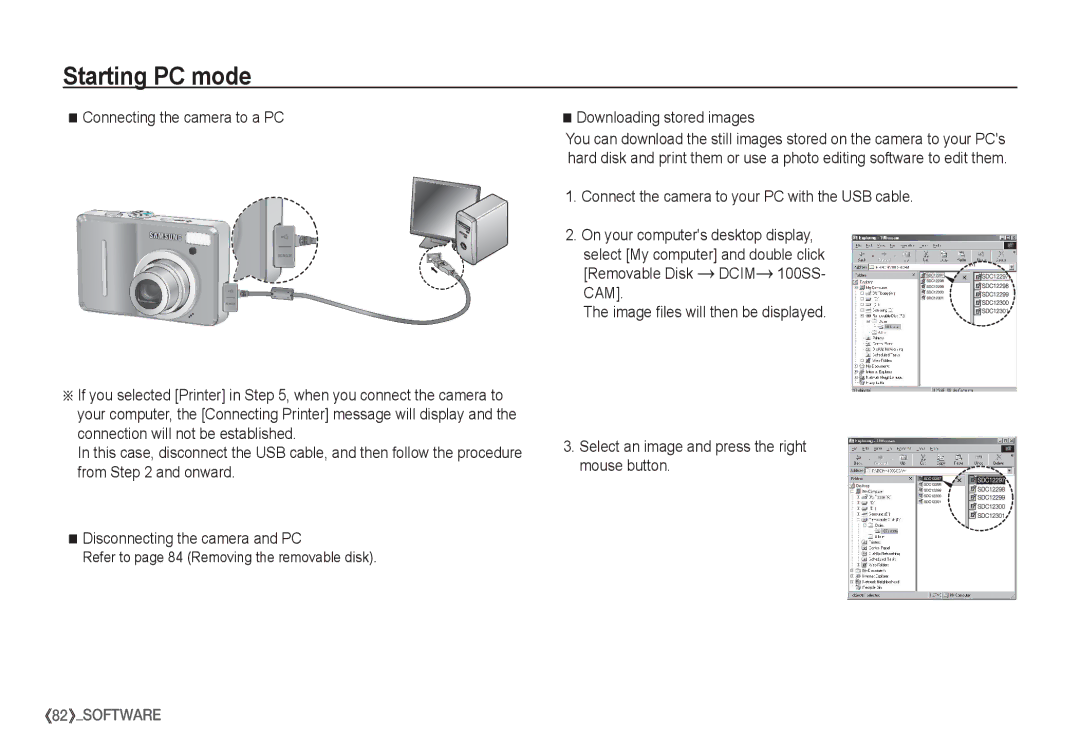
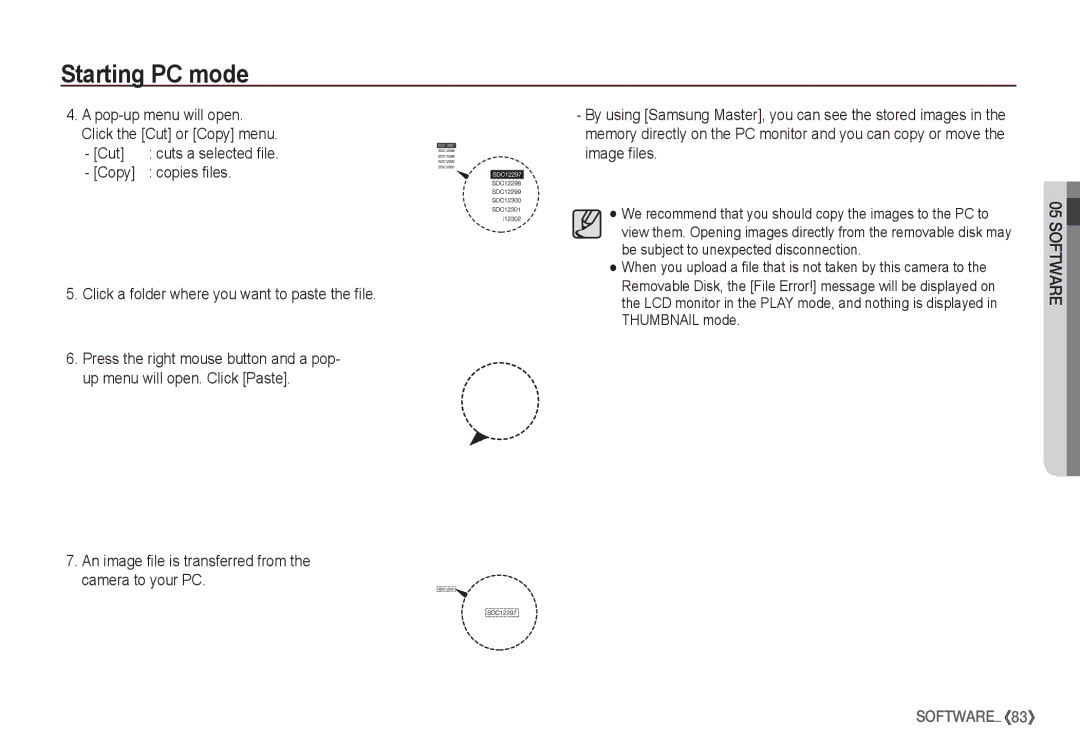
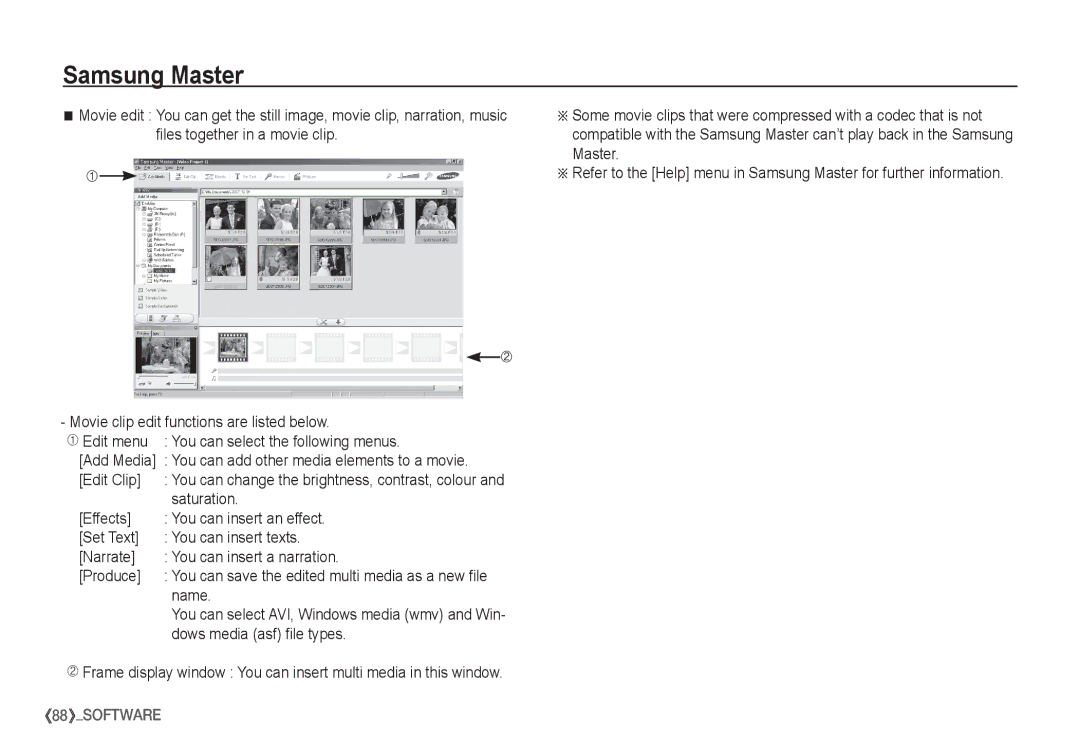
Contents Page Keep this manual in a safe place InstructionsGetting to Know your camera Thank you for buying a Samsung Digital CameraPage Contents Focus lock 041 Scene mode Things to Watch Out for When Taking PicturesUsing the camera buttons to set the camera Camera settings Power button RecordingEffect button Rotating an image 046 Settings 057Configure Multi Slide Show effects 086 Samsung Master 089 Software NotesIncluded items System chartOptional items Shutter button Identification of featuresMode dial Front & TopFace DetectionFD button BackLCD monitor Effects button Strap eyelet Zoom W button ThumbnailBottom / 5 Function button Self-timer lampMode icon Connecting to a Power SourceIncluded battery may vary depending on sales region Inserting the memory card Insert the battery as shownInsert the memory card as shown Instructions on how to use the memory card About Movie Description Icons LCD monitor indicatorImage & Full Status IconsYou do not need to insert the memory Starting the recording modeHow to use the Auto mode μ How to use the Program modeIf the image size is or . ,the DIS mode can’t be selected How to use the Manual mode ¸Pressing Menu button Left/Right button Using the Photo Help guide mode `Function that can be used when focusing is difficult Pressing Left/Right buttonHow to use the Portrait mode Frame Rate How to use the Movie clip mode ´Recording the movie clip without sound Movie clip file type AVI MjpegPressing the shutter button down half way Things to Watch Out for When Taking PicturesZoom W / T button Power buttonShutter button Digital zoom Wide Wide ZoomFace DetectionFD button Button When pressing the Face Detection button again on the faceProgram ‰ DIS Mode ÿMacro e / Down button Auto ŠSelectable Available focusing method, by recording modePress the Shutter button halfway. When the green auto focus Focus lockNormal Macro Auto macro Selecting the flash modeFlash / Left button Flash rangeFlash mode indicator Self-timer mode indecator Self-timer / Right buttonMenu / OK button Effect button Colour Available Effects, by recording mode o SelectableEffect button † Š ‰‰ ÿ How to use the Fn menuPress the Fn button in an available mode Fn buttonQuality / Frame rate SizeImage area. This is suitable For general use Spot Drive modeMetering Towards the centreWhite balance Press the OK or Fn button Exposure compensationMENU/OK button selects previous Compensation icon ÂMenus are subject to change without prior notice Items indicated by are default settingsRecording SharpnessYou can add your voice-over to a stored still image. Max sec Auto Focus type Voice MemoPress the shutter button to record a voice Pausing while recording a voiceVoice Recording Press the Pause button Ø to pauseYou can record the movie without voice Scene modeSound menu Recording the movie clip without voiceStart up sound VolumeSound  Beep SoundWorld Time Setup menuMode Display Settings TashkentDisplay Language Setting up the Date / Time / Date typeLCD save Start up imageQuick view LCD brightnessNo The memory will not be formatted SettingsFormatting a memory InitialisationAn image may not be printed correctly File name Imprinting the recording dateSub menus Off Date Only the Date will beSelecting Video out type Auto power offAuto Focus lamp Selecting a battery typePlaying back a still image Starting play modeSelect the Play mode by pressing the play mode button Î Playing back a movie clipPlaying back a recorded voice Movie clip capture functionPlaying back a voice memo Description Icon Thumbnail º / Enlargement í buttonPress the MENU/OK button and a message Will be displayed An enlarged view, the indicator will not beThumbnail º / Enlargement í button Image enlargementPlay & Pause Ø / Down button Info î / Up buttonDelete Õ button Left / Right / Menu / OK buttonPrinter » button Effect button Resize Changed image is saved as a new file name Effect button Rotating an imageEffect button Colour You can rotate the stored images by various degreesOK button Select / setup the Custom Colour Setting up the play back function using the LCD monitor Start the Multi Slide Show Starting the Multi Slide Show Selecting Images Configure Multi Slide show effects Set the Multi Slide Show play interval Setting play intervalSetting Background Music Playback àProtecting images Deleting imagesPrint is displayed Sub menu will displayPrint Press the Right button again and Index Dpof Size secondary menu Cancel, 3X5, 4X6, 5X7Printed size of the image is displayed Dpof menu tab. And then press the Right PlaybackCopy To Card No Cancels Copy to CardPress the Right button PictBridge Connecting the Camera to a PrinterPress the Up / Down button to select the number of prints PictBridge Picture Selection PictBridge Print SettingMenu will display Press the Menu button and the PictBridge menu will displayImportant notes PictBridge ResetDo not attempt to disassemble or modify the camera Extremes in temperature may cause problemsSamsung cannot be held responsible for camera malfunctions Take pictures in Flash Photography mode Insert fresh batteries. p.12 Before contacting a service centreTurn the camera power on The battery is exhausted Please check the followingCheck the connection The camera is off Specifications DC Adapter Interface Digital output connector USB Audio MonoCapacity 256 MB Size Movie Clip~ 40C Operating TemperatureSystem Requirements Software NotesAbout the software Setting up the application software Setting up the application software Starting PC mode Refer to page 84 Removing the removable disk Connecting the camera to a PCDownloading stored images Connect the camera to your PC with the USB cableCut Removing the removable disk Using the USB Driver for MAC Setting up the USB Driver for MACSamsung Master Will be displayed after connecting the camera to your PCYou can modify image quality. See the Help menu AdjustImage viewer You can view the stored images Image viewer functions are listed belowDows media asf file types Edit ClipSaturation NameCable Install the camera driver correctlyTings Control Panel System HardwareCorrect Disposal of This Product Address FCC noticeDeclaration of Conformity Trade Name Model NoMemo
Related manuals
Manual 114 pages 34.75 Kb Manual 146 pages 20.92 Kb Manual 162 pages 1.72 Kb Manual 94 pages 50.88 Kb

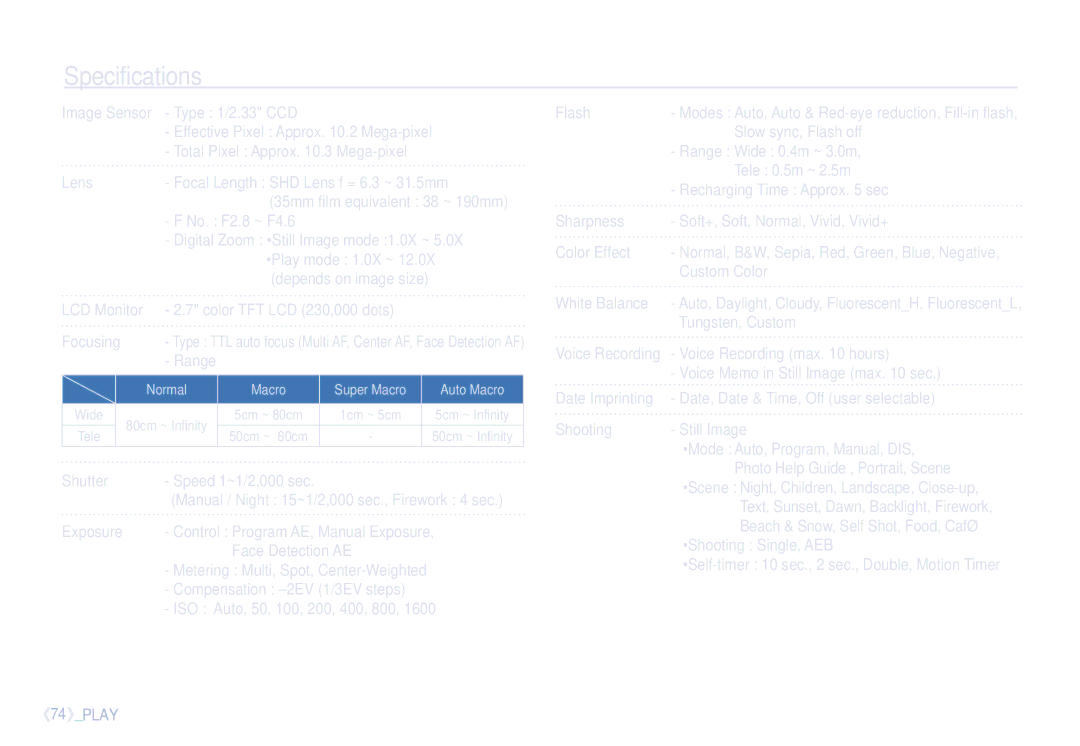
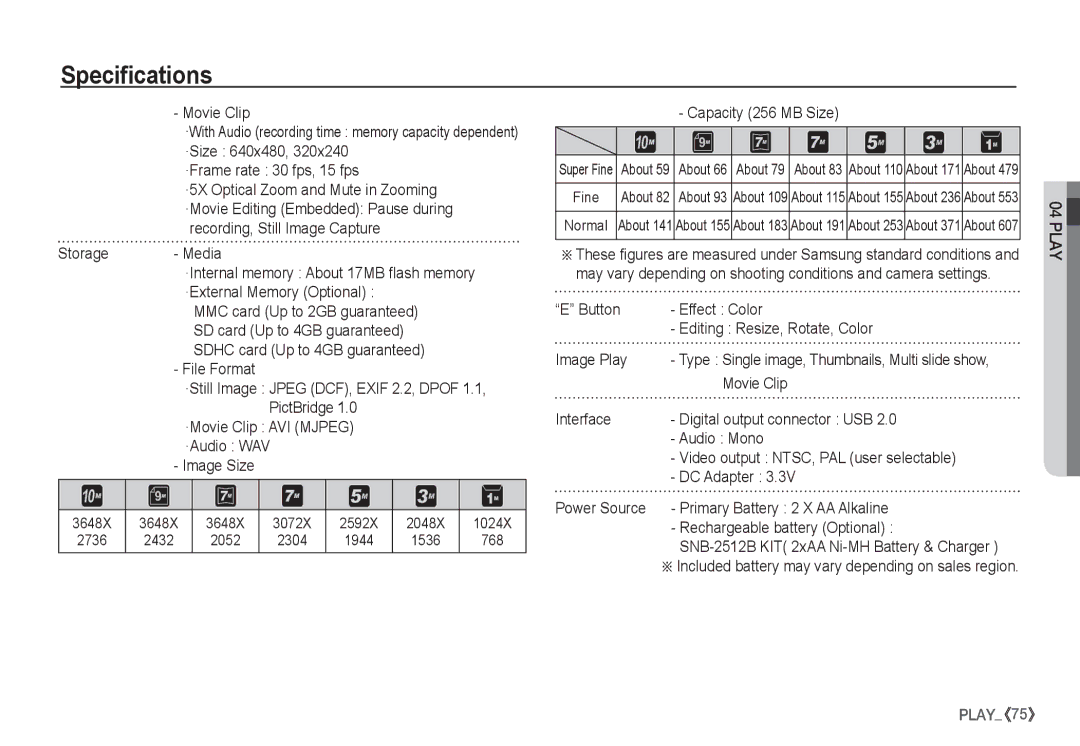
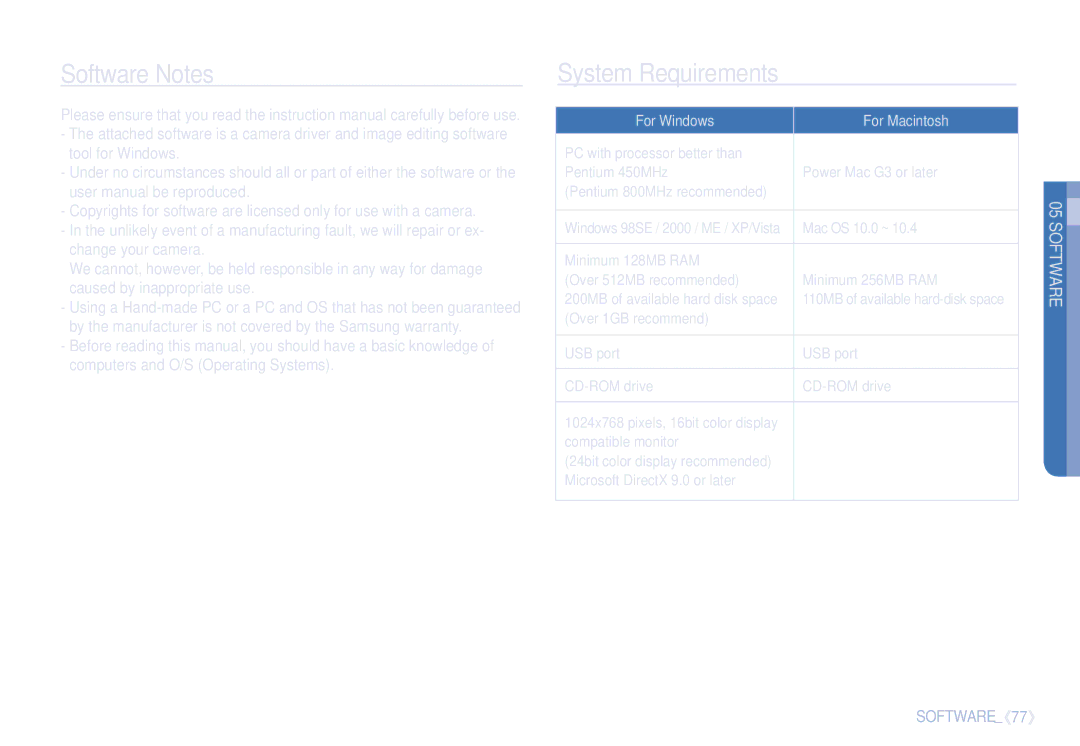
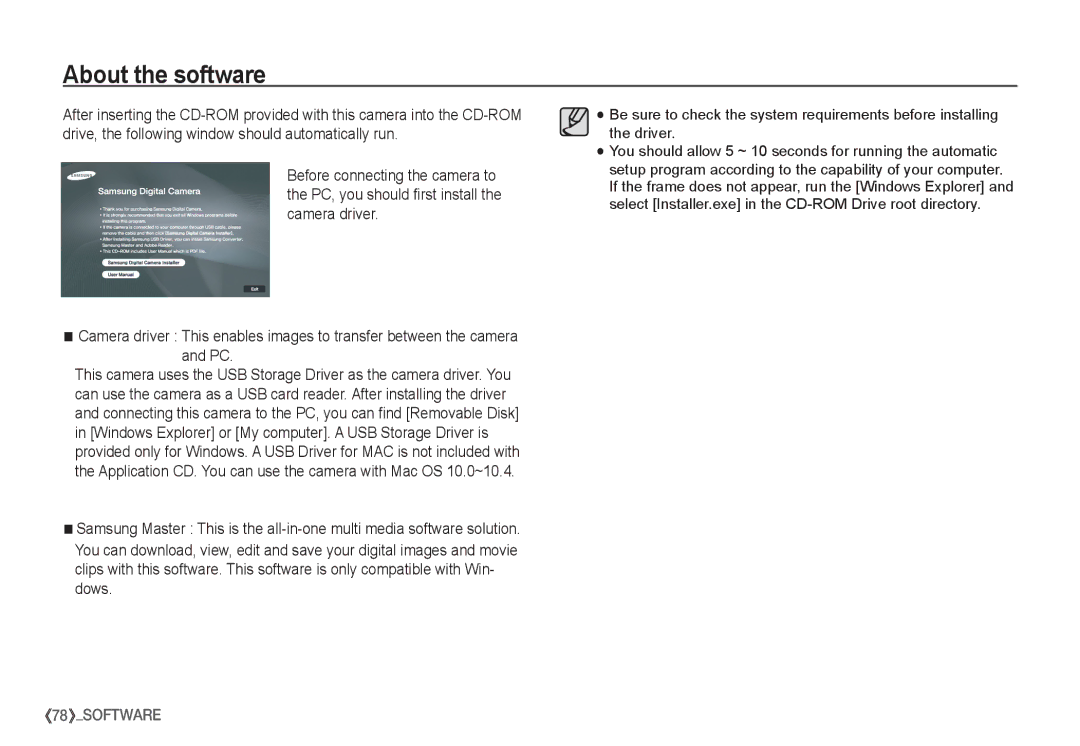
EC-S1065SBA/FR, EC-S1065PBA/FR specifications

The Samsung EC-S1065PBA/FR and EC-S1065SBA/FR are compact yet powerful point-and-shoot cameras that seamlessly blend advanced technology with user-friendly features, making them ideal for both novice and experienced photographers. These models exemplify Samsung's commitment to delivering high-quality imaging experiences in a portable form.

At the heart of the EC-S1065 series lies a 10.2-megapixel CCD sensor, which yields vibrant images with impressive detail. The sensor size also ensures that low-light performance is enhanced, allowing users to capture moments in various lighting conditions without sacrificing image quality. The cameras feature a high-quality 5x optical zoom lens, enabling photographers to zoom in on subjects while maintaining clarity and sharpness.

One of the standout technologies in the EC-S1065 models is Smart Face Recognition. This feature identifies and prioritizes faces in a scene, ensuring that subjects are always in focus and properly exposed. Coupled with the Smile Shot function, this technology guarantees that users can easily capture authentic smiles and candid moments, making it perfect for family gatherings or social events.

Both models are equipped with a range of scene modes, allowing users to optimize their shots based on specific environments or subjects. This includes settings for landscape, portrait, macro, and night photography, ensuring versatility in various shooting conditions. Additionally, the built-in image stabilization technology helps reduce blurriness caused by camera shake, which is particularly helpful for capturing sharp images during handheld shots.

The EC-S1065 series also boasts a user-friendly interface, featuring a wide 2.7-inch LCD screen that provides clear visibility in different lighting situations. This display is part of a sleek and compact design, making the cameras easy to carry and handle. The cameras are lightweight, ensuring that they can be taken along on any adventure without adding bulk.

For those interested in video, the EC-S1065 models offer the ability to record VGA video at a resolution of 640x480 pixels, capturing precious memories in motion. With its battery life supporting extended shooting sessions, these cameras are perfect for day trips or vacations.

Combining high-resolution imaging, innovative technology, and user-friendly features, the Samsung EC-S1065PBA/FR and EC-S1065SBA/FR are excellent choices for capturing life's moments with ease and quality. Whether you’re a casual user or an aspiring photographer, these cameras deliver reliable performance that can meet a variety of photographic needs.