840150800 ENv02.qxd 5/16/06 1:33 PM Page 4
How to Use
1.Unplug from electrical outlet.
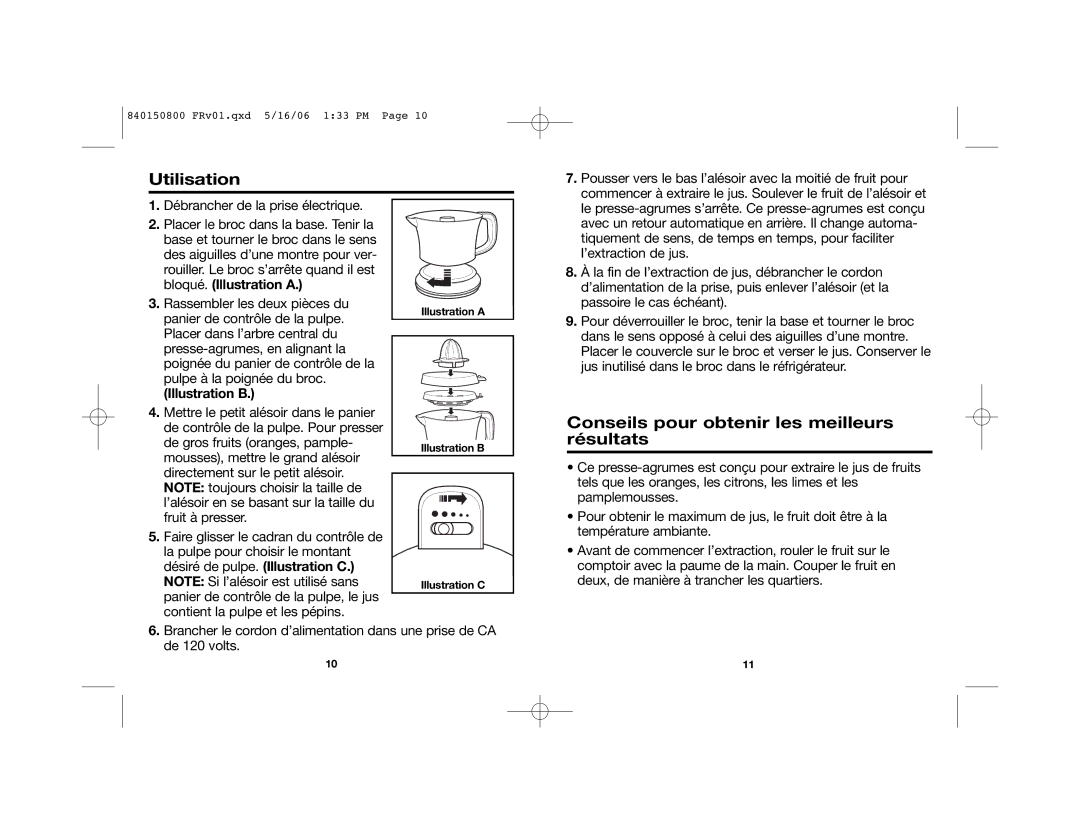
2. Place pitcher onto base. Hold base and turn pitcher clockwise to lock. The pitcher will stop when locked.
(Illustration A.)
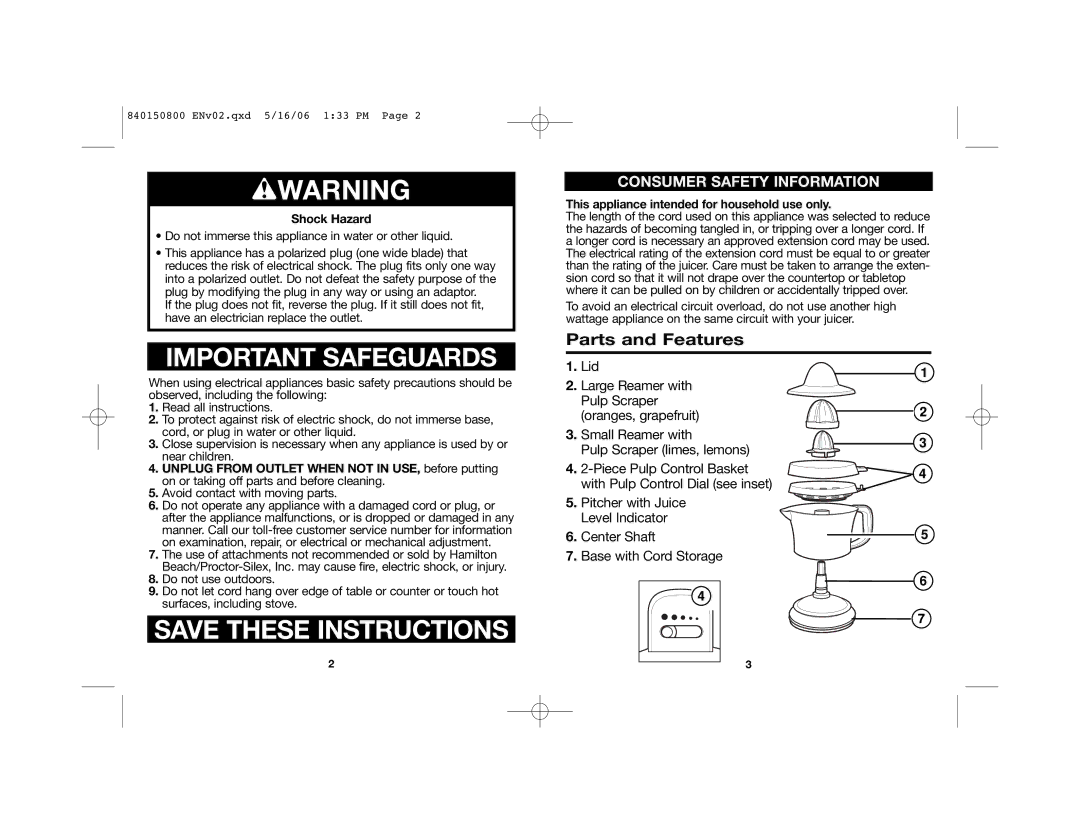
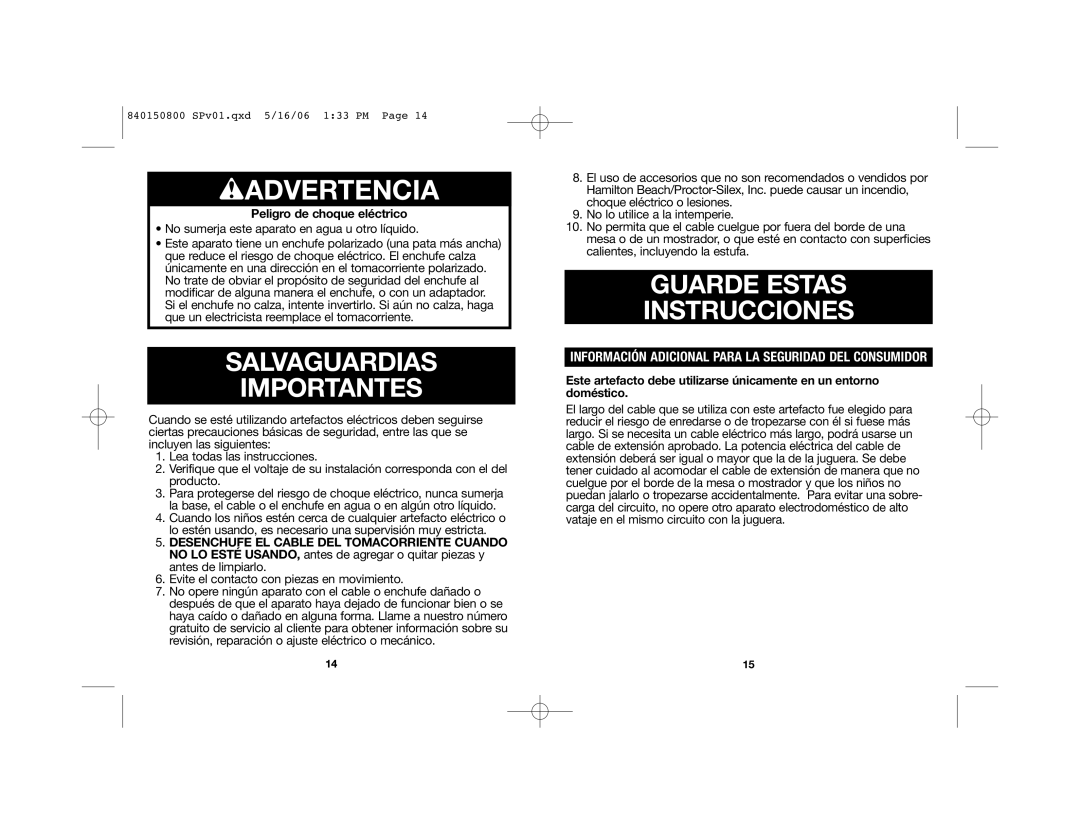
3. Fit the two parts of pulp control bas- ket together. Place onto center shaft of juicer, aligning handle of pulp con- trol basket with handle of pitcher.
(Illustration B.)
4. Snap small reamer onto pulp control basket. If juicing large fruit (oranges, grapefruit) fit the large reamer directly on top of the small reamer.
NOTE: Always select size of reamer based on size of fruit to be juiced.
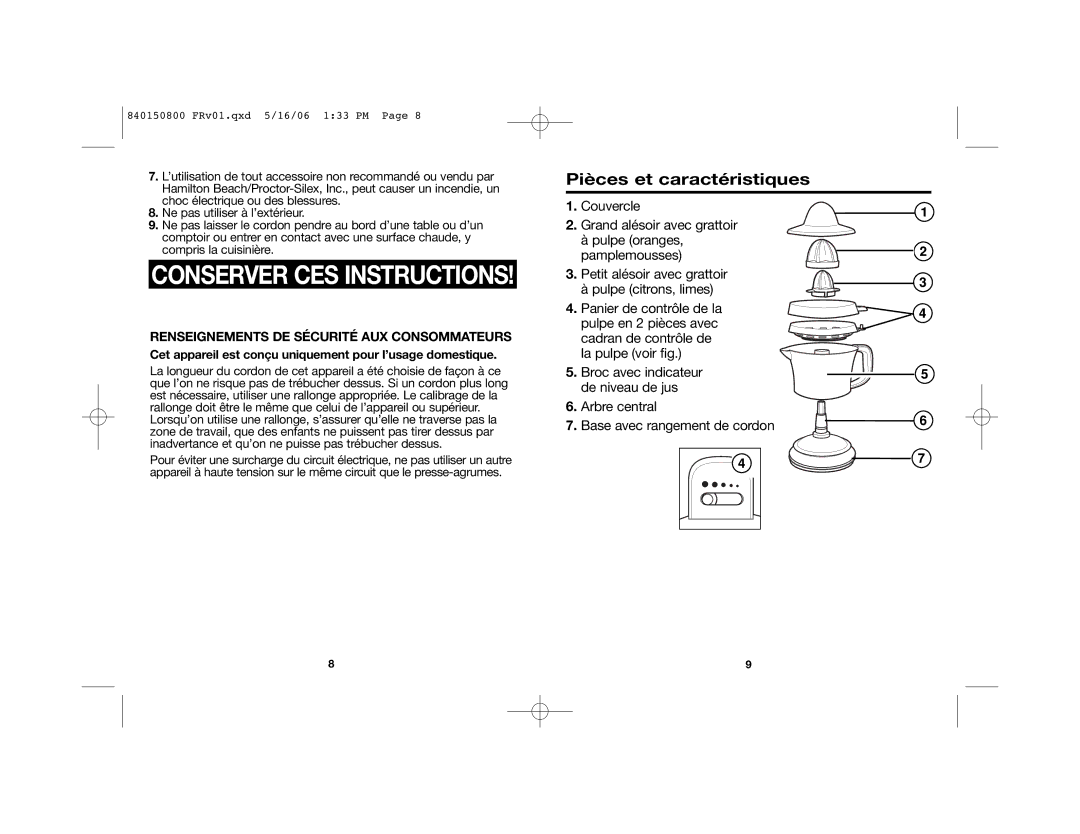
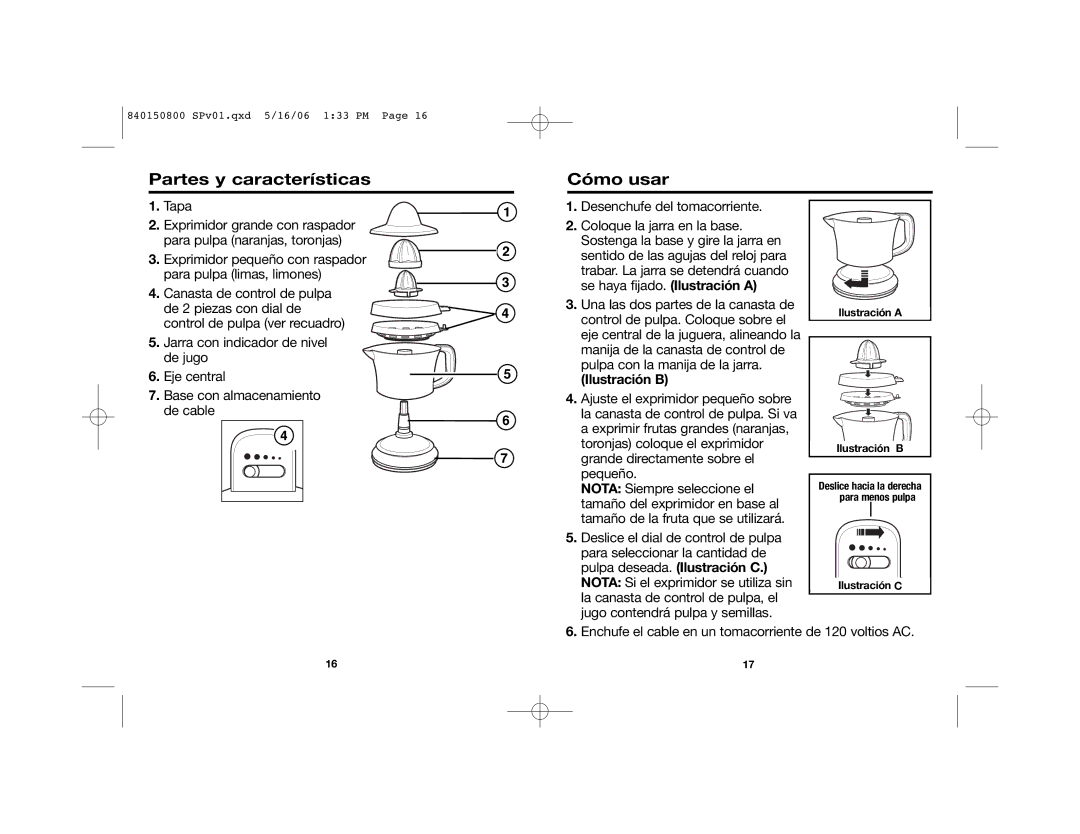
5.Slide the pulp control dial to select the desired amount of pulp.
(Illustration C.)
NOTE: If the reamer is used without the pulp control basket, the juice will contain pulp and seeds.
6. Plug cord into 120 volt AC outlet.
7.Push down on reamer with halved
fruit to start the juicing action. Lift the
fruit up off the reamer and the juicer stops. This juicer is designed with an
8.When finished juicing, unplug from outlet, then remove reamer (and strainer if used).
9.To unlock pitcher, hold base and turn pitcher counterclock- wise. Place lid on pitcher and pour juice. Store unused juice in pitcher in the refrigerator.
Tips for Best Results
•This juicer is designed to juice citrus fruit such as oranges, lemons, limes, and grapefruit.
•For maximum juice, fruit should be room temperature.
•Before juicing, roll fruit between countertop and palm of your hand. Slice fruit in half, cutting across sections.
How To Clean
1.Unplug from electrical outlet.
2. Lift off lid, reamer (and strainer if used).
3. To unlock pitcher, hold base and turn pitcher counterclockwise.
4. Lift pitcher to remove.
5 The lid, reamers, pulp control basket, and pitcher may be washed in hot,
soapy water or on the TOP rack of a dishwasher.
6.Wipe base with a damp cloth.
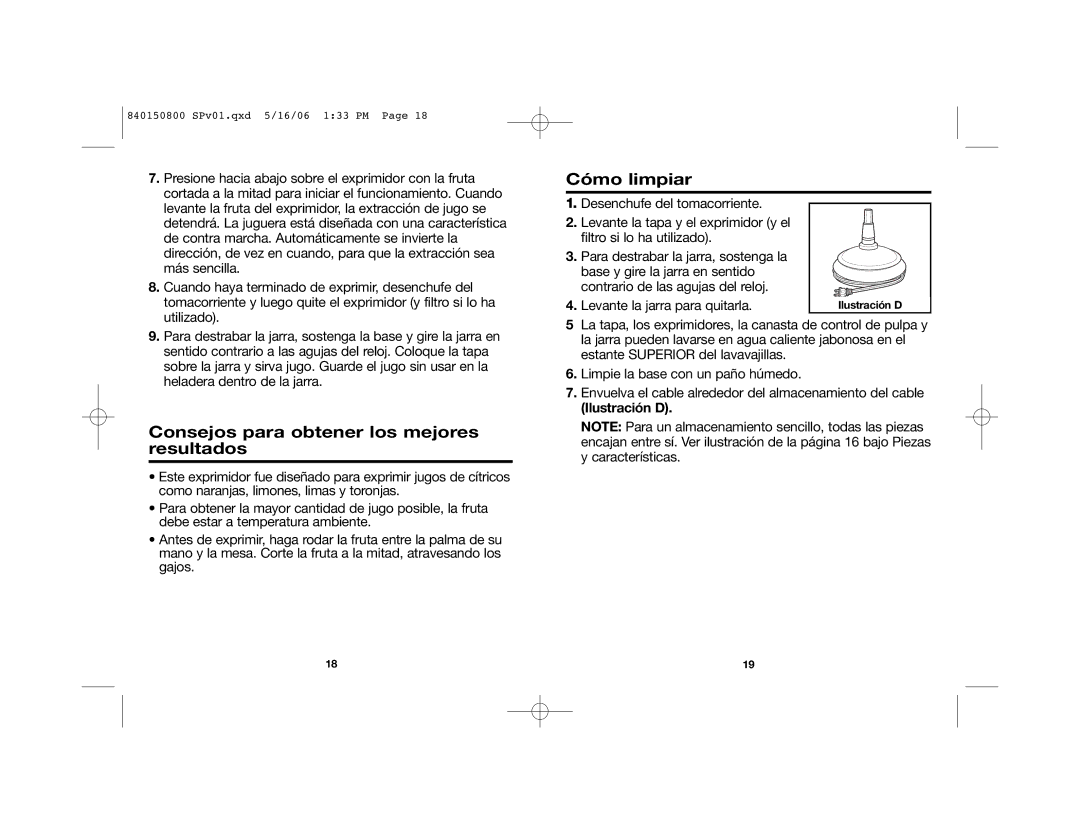
7.Wrap cord around cord storage (Illustration D).
NOTE: All parts fit together for easy storage. See illustra- tion on page 3 under Parts & Features.
4 | 5 |
