Samsung SMH7195, SMH7175, SMH7174 owner manual Appendix Exhaust Feature, Vent Fan Charcoal Filter

Page 30

Appendix

Exhaust Feature


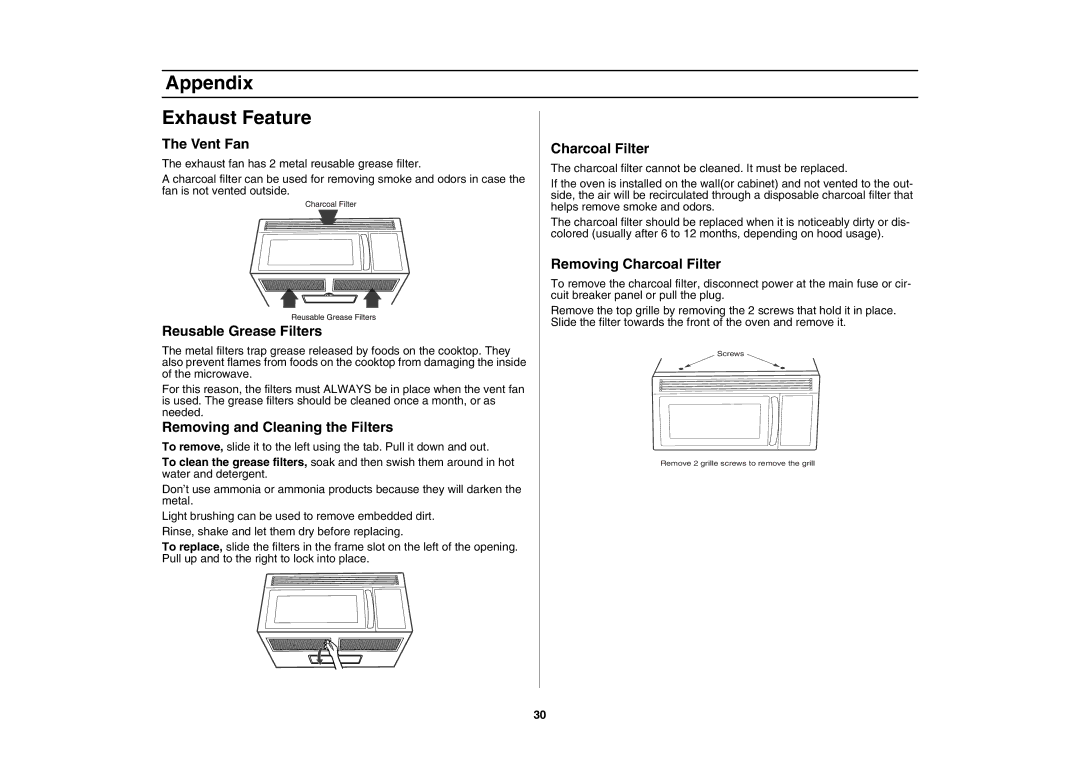
The Vent Fan

Charcoal Filter


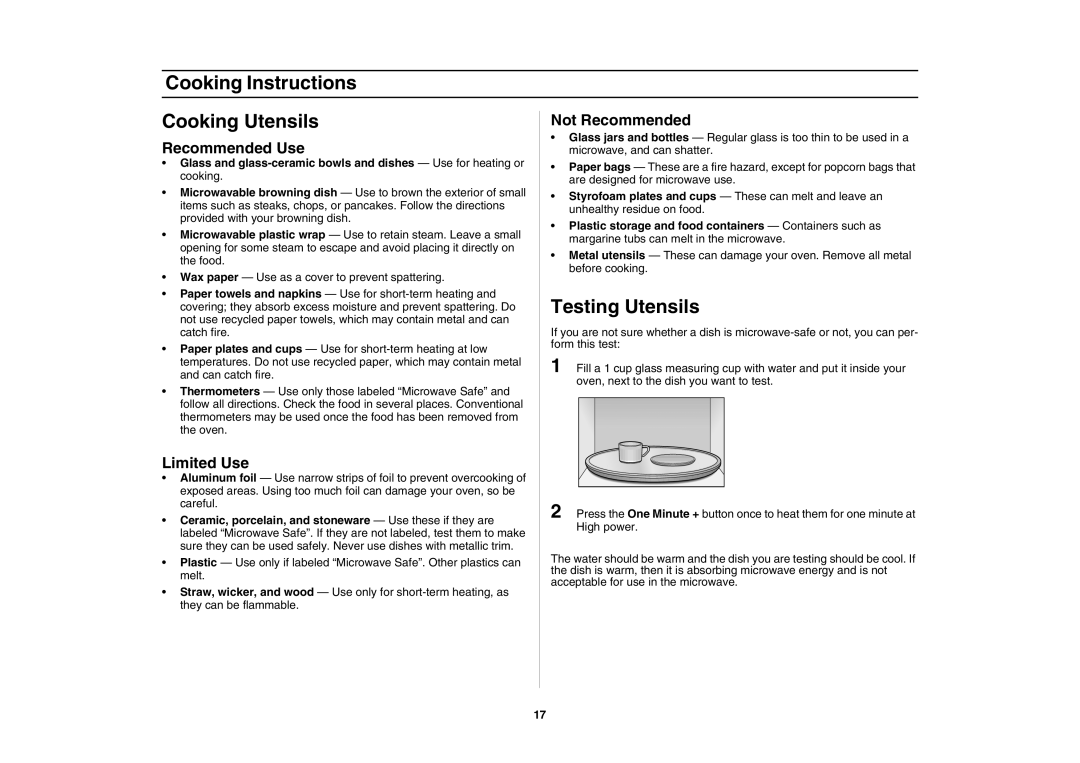
The exhaust fan has 2 metal reusable grease filter.

The charcoal filter cannot be cleaned. It must be replaced.

A charcoal filter can be used for removing smoke and odors in case the

If the oven is installed on the wall(or cabinet) and not vented to the out-

fan is not vented outside.

side, the air will be recirculated through a disposable charcoal filter that


helps remove smoke and odors.


The charcoal filter should be replaced when it is noticeably dirty or dis-


colored (usually after 6 to 12 months, depending on hood usage).


Removing Charcoal Filter


To remove the charcoal filter, disconnect power at the main fuse or cir-


cuit breaker panel or pull the plug.


Remove the top grille by removing the 2 screws that hold it in place.

Reusable Grease Filters

Slide the filter towards the front of the oven and remove it.


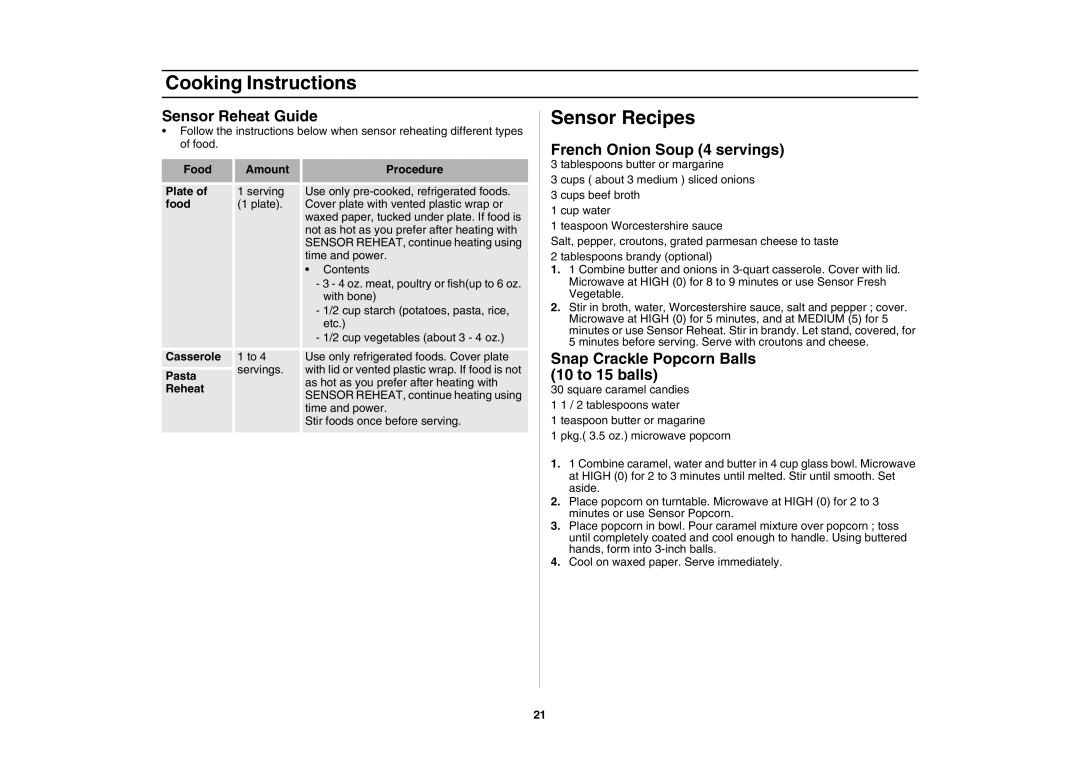
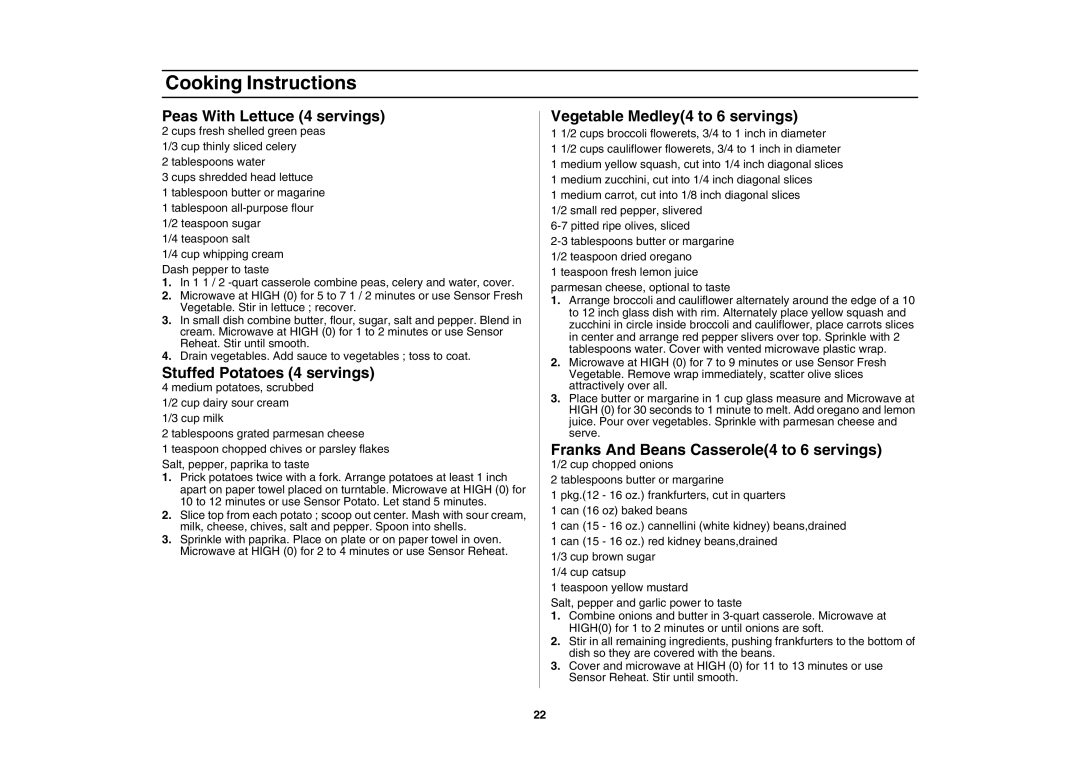
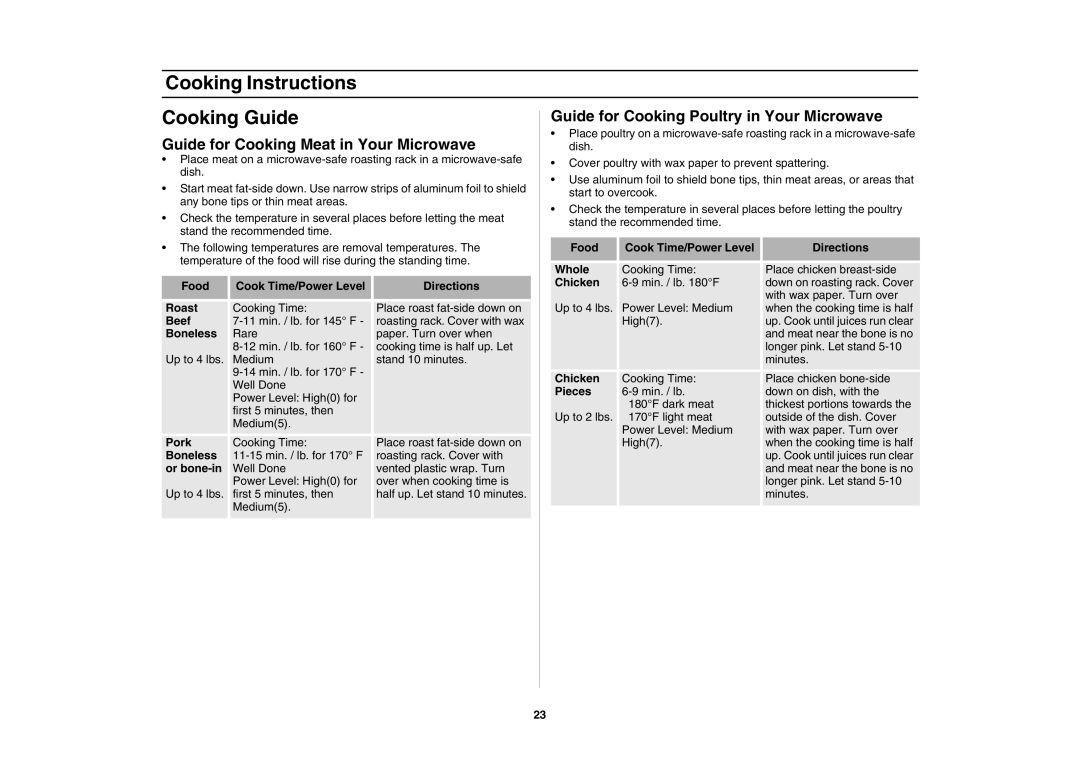
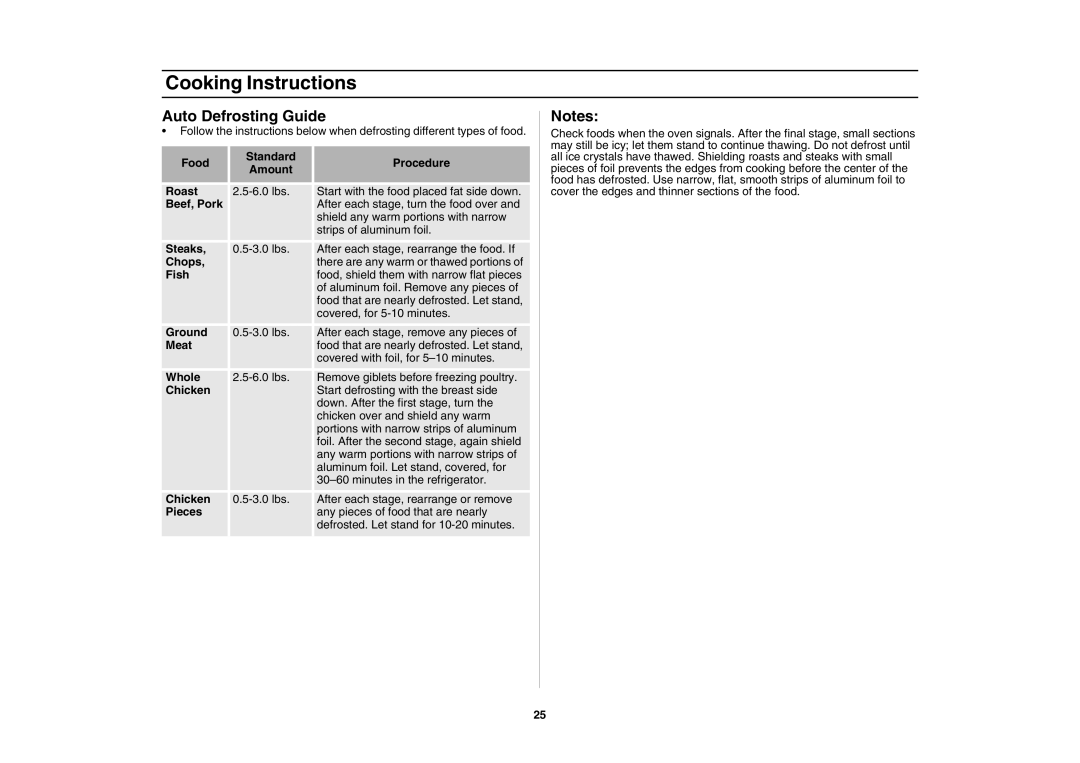
The metal filters trap grease released by foods on the cooktop. They

Screws

also prevent flames from foods on the cooktop from damaging the inside


of the microwave.


For this reason, the filters must ALWAYS be in place when the vent fan


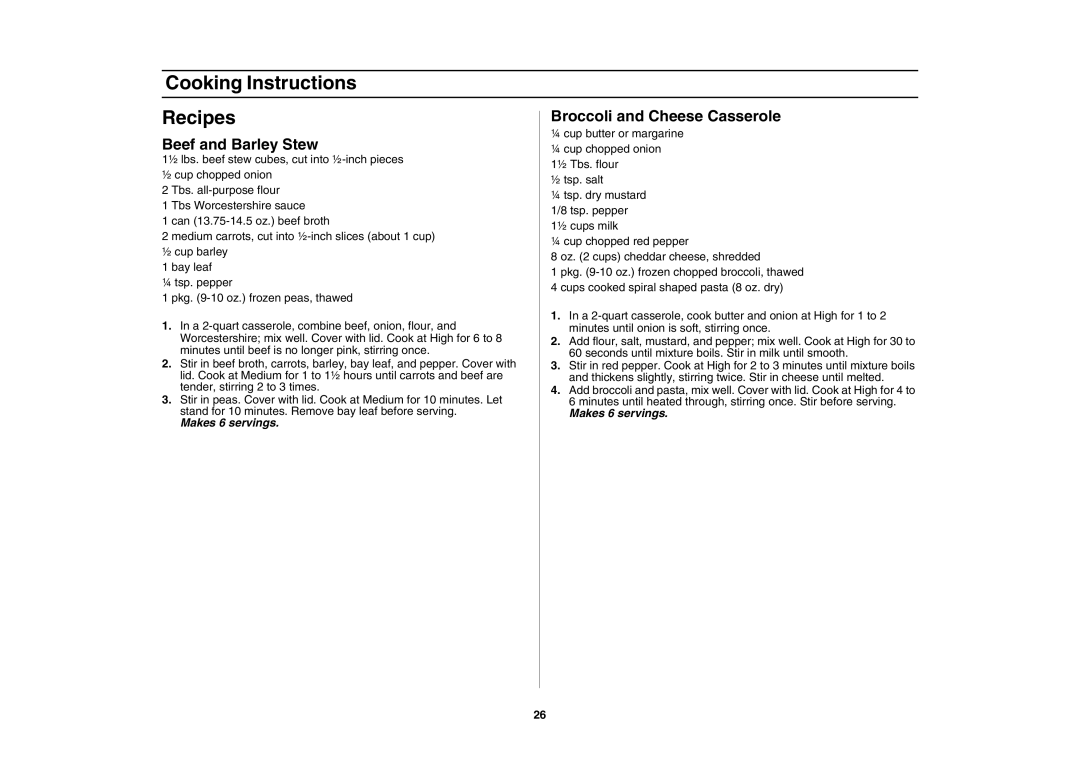
is used. The grease filters should be cleaned once a month, or as


needed.


Removing and Cleaning the Filters


To remove, slide it to the left using the tab. Pull it down and out.


To clean the grease filters, soak and then swish them around in hot

Remove 2 grille screws to remove the grill

water and detergent.


Don’t use ammonia or ammonia products because they will darken the


metal.


Light brushing can be used to remove embedded dirt.


Rinse, shake and let them dry before replacing.


To replace, slide the filters in the frame slot on the left of the opening.


Pull up and to the right to lock into place.


30

Image 30
Contents Microwave Oven Safety Important Safety InstructionsImportant Grounding Instructions Vent FAN Contents Your New Microwave oven Warranty and Service Information Model Number Serial Number Date PurchasedYour New Microwave oven Control Panel Buttons My Choice Description Operation OptionsSetting the Remind End Signal Setting the Daylight Saving TimeAdjustment Using the Help Button Using the Kitchen TimerUsing the Pause/Cancel Button Using the One Minute + ButtonPress Sensor Reheat button Handy Helper Chart Press the Power/Auto Defrost buttonWeight Remarks Using the Snack Bar Button Snack Bar ChartOperation Setting Cooking Times & Power Levels One-stage CookingDisplay shows Press Start or Enter Next Stage Cooking Time Turning the Light On/Night/Off Microwaving Operation How to Use the Shelf WhenSetting the Child Protection Lock Shelf and ReheatingRecommended Use Testing UtensilsCooking Instructions Cooking Utensils Limited UseCooking Instructions Cooking Techniques General Tips Cooking Instructions Auto Sensor Cook Utensils & Cover For Sensor CookingCooking Instructions Sensor Cooking GuideFrench Onion Soup 4 servings Sensor RecipesSensor Reheat Guide Snap Crackle Popcorn BallsVegetable Medley4 to 6 servings Peas With Lettuce 4 servingsStuffed Potatoes 4 servings Franks And Beans Casserole4 to 6 servingsCooking Instructions Cooking Guide Guide for Cooking Poultry in Your MicrowaveGuide for Cooking Meat in Your Microwave Guide for Cooking Seafood in Your Microwave Guide for Cooking Eggs in Your MicrowaveGuide for Cooking Vegetables in Your Microwave Auto Defrosting Guide Cooking Instructions Recipes Broccoli and Cheese CasseroleBeef and Barley Stew Warm Potato Salad Black Bean SoupAppendix Troubleshooting Guide Care and CleaningAppendix How to Clean the Outside Light Bulb Replacement Cooktop LightAppendix Exhaust Feature Vent Fan Charcoal FilterSpecifications AppendixWarranty Samsung OVER-THE-RANGEOTR Microwave OvenOven will start automatically Enter the power levelPress Start to begin cooking Kids MealsMemo Memo SAMSUNG1-800-726-7864