Installation Recommendations
Ceiling Radiation Damper - CRD
1.If fan is to be used in a fire resistive membrane ceiling, a ceiling radiation damper must be used. Otherwise,
proceed to Install the Fan.
2. If the ceiling radiation damper is already mounted to the fan from the factory, proceed to Install the Fan.
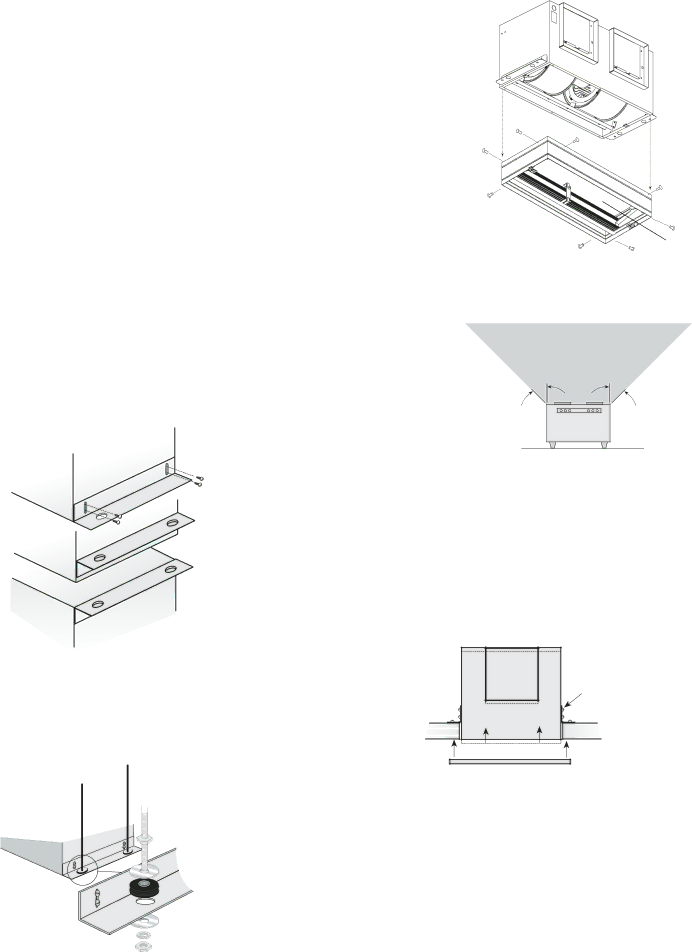
3.To mount the ceiling radiation damper to fan, make sure grille attachment tabs are facing down. Then place the inlet part of the fan into the ceiling radiation damper collar,
and use | Fig. 5 |
| |
screw through the damper collar and into the fan housing, |
|
shown in Fig. 5. |
|
Do not allow
interference in
this area.
Install the Fan
1.For best performance, choose a location with the shortest possible duct run and minimum number of elbows. Do not mount near cooking equipment. Fig. 7 shows the minimum distance these fans should be placed in relation to cooking equipment.
Fig. 7
Brackets can be used in either position to adapt to most mounting
situations
Bottom Mount
Do not install
fan in this area
45º | 45º |
| 2. Attach adjustable mounting brackets to fan, but leave the screws | |
Bottom Mount | loose until proper height is determined, shown in Fig. 8. For fan | |
only opening, cut 233⁄4 x 113⁄4 | inch hole in ceiling. For fan/CRD | |
| combination opening only, cut 241⁄8 x 121⁄4 inch hole in ceiling. | |
Top Mount |
|
|
Fig. 8 |
| Slots in the |
|
| brackets |
|
| allow fine |
|
| adjustment |
|
| for flush |
For Frame Construction: | Position unit between joists. | fit with |
wall/ceiling | ||
Position brackets such that bottom edge of housing will be | opening | |
| ||
flush with finished ceiling, and tighten the adjustable mounting |
| |
brackets, shown in Fig. 9. |
|
|
|
| Fig. 9 |
| For Hanging Installations: Use Greenheck’s optional vibration isolator kit | |
| Part Number VI Kit. Using the fan’s standard adjustable mounting brackets | |
| and 10 by 32 threaded rod (by others), hang unit as shown in Fig. 10. | |
Fig. 10 |
|
|
2