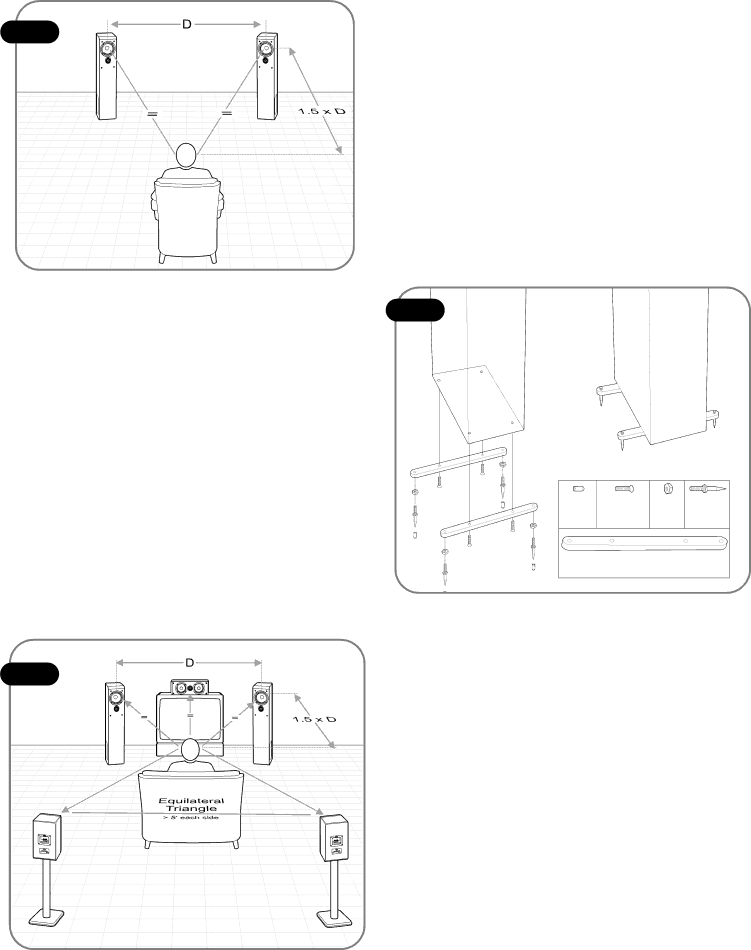
Fig. 1
Taking these steps
For
•The center speaker is right above or below the TV.
•The rear speakers are in an equilateral triangle with the listening position, the speakers at least 5 feet apart.
•The rear speakers are at the same height or slightly higher than the fronts
In many situations, it won't be possible to place the rear speakers in their ideal positions. If this is the case in your room, try to place the rear speakers equidistant from the center of the main seating area. If you must place the rear speakers close to the main seating area, position them so that they are above the ear height of the
Fig. 2
_ | _ |
tallest listener, and toe them in so that imaginary lines coming from the center of each speaker cross in front of the main seating area. You can add time delay to the rear channels with your surround sound processor to make the rear speakers seem farther from the seating area than your room setup will allow.
SpikeKit Installation
Each ST4 loudspeaker is shipped with its own SpikeKit, which both improves their stability and firmly couples the speakers to the floor for improved bass performance.
To begin, unpack the SpikeKit and identify the parts: (2) stabilizer bars, (4) metal spikes, (4) Phillips head machine screws, (4) lock nuts and (4) rubber feet (fig. 3).
Fig. 3
Spike | Machine | Lock | Metal |
Cover | Screw | Nut | Spike |
(8) | (8) | (8) | (8) |
| Stabilizer |
| |
| Bar (4) |
|
|
Start by carefully turning the speaker upside down (or on its back) and installing the stabilizer bars. Attaching them with the Phillips head machine screws, starting with
Next, turn the speakers upright and position them. When you've found the optimum location for each (the speakers can be awkward to move after the spikes are installed), slip the lock nuts onto the spikes, carefully tilt the speakers, and screw in the spikes. Caution: The spikes are very sharp. To avoid injury, use extreme care when handling and installing them.
Adjust the spikes as needed to ensure that the ST4 is level and does not rock in any direction, then tighten the lock nuts against the bottom of the stabilizer bars to lock the spikes in place.