
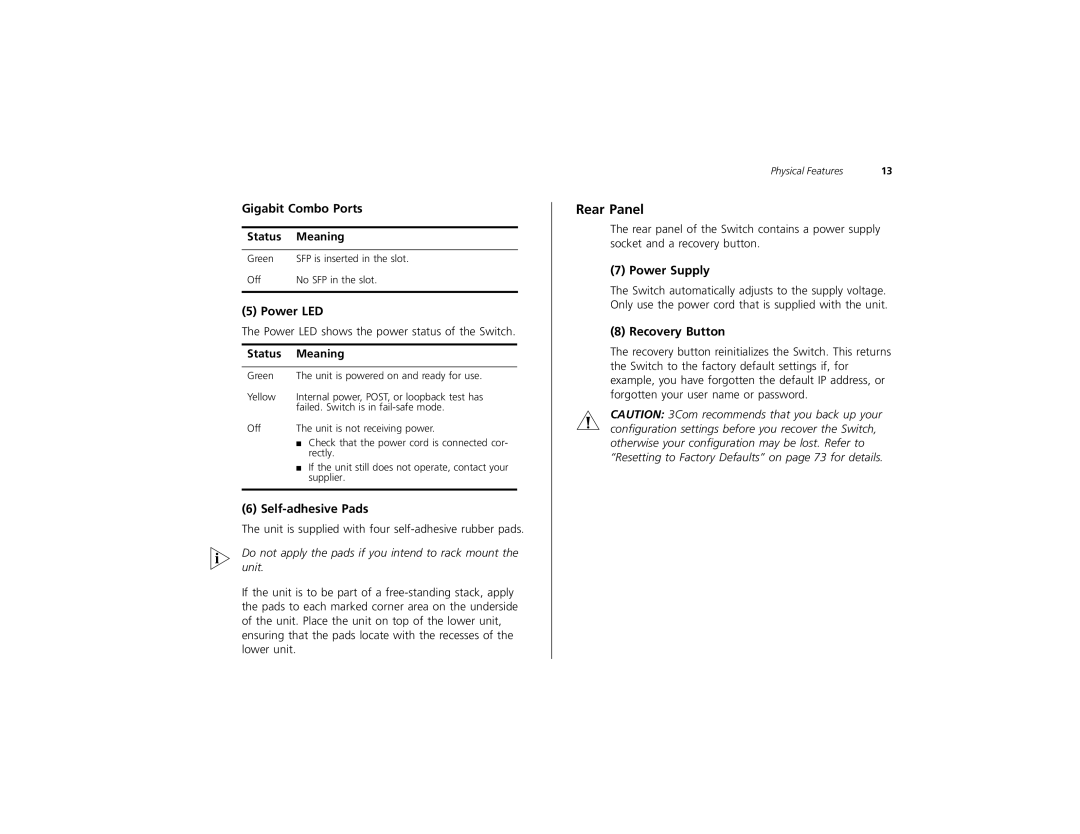
2226 PLUS specifications
The 3Com 2226 PLUS is a robust network switch designed to meet the increasing demands of modern networking environments. Its ability to provide reliable connectivity and support for various technologies makes it an ideal choice for small to medium-sized businesses. This switch features 24 10/100 Mbps Ethernet ports, which allow for fast and efficient data transfer, enabling businesses to enhance their network performance significantly.One of the standout technologies employed in the 3Com 2226 PLUS is its support for auto-negotiation. This feature automatically detects the speed and duplex capabilities of connected devices, ensuring optimal performance and minimizing configuration errors. This capability simplifies network management, allowing IT professionals to focus on other critical tasks rather than troubleshooting connectivity issues.
In addition to its impressive port offerings, the 3Com 2226 PLUS incorporates a range of Layer 2 switching features. These include support for Virtual LANs (VLANs), which enable businesses to segment their networks for improved security and efficiency. By implementing VLANs, organizations can isolate sensitive data traffic from less secure networks, enhancing overall data protection.
The switch also supports Spanning Tree Protocol (STP), which helps prevent loops in network topology. This is crucial in environments with multiple switches, as it maintains a stable network while ensuring redundancy. If a primary link fails, STP allows for a backup path to be automatically activated, ensuring minimal disruption in connectivity.
Power over Ethernet (PoE) capabilities are another significant feature of the 3Com 2226 PLUS. This technology allows the switch to deliver power to connected devices, such as IP cameras and VoIP phones, eliminating the need for additional power supplies and reducing cable clutter.
In terms of management, the 3Com 2226 PLUS supports both simple web-based configuration and SNMP (Simple Network Management Protocol), providing network administrators with flexibility in how they manage their network infrastructure.
Built with reliability in mind, the switch comes equipped with features like store-and-forward switching, error checking, and a sturdy design suitable for deployment in various environments.
Overall, the 3Com 2226 PLUS combines essential features and advanced networking technologies, making it a versatile and dependable solution for businesses looking to upgrade or establish their network infrastructure.