
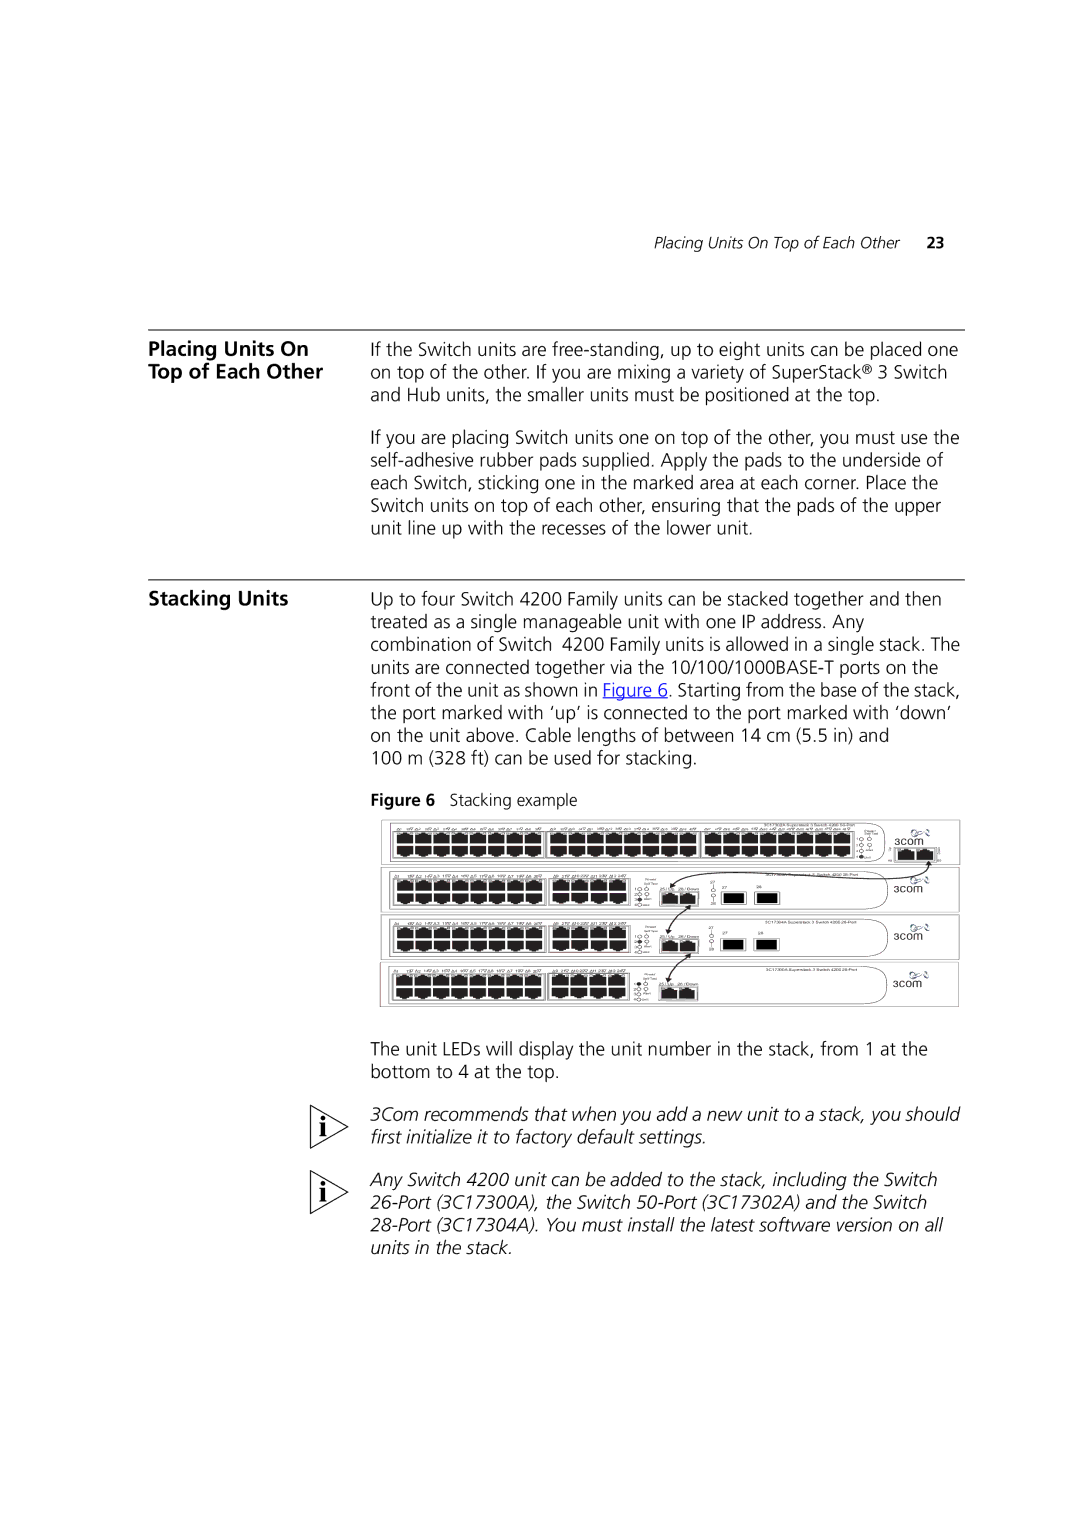
4250T, 4226T, 4228G specifications
The 3Com 4228G, 4226T, and 4250T are professional-grade network switches designed for businesses seeking to enhance their network infrastructure. These models offer robust performance and reliability, catering to various networking needs, from small offices to large enterprise environments.The 3Com 4228G switch is a 28-port gigabit Ethernet switch designed for high-bandwidth applications. It provides 24 Gigabit Ethernet ports with 802.3af Power over Ethernet (PoE) capability, allowing devices such as IP phones and wireless access points to be powered directly through the Ethernet cables. This feature simplifies installation and reduces additional cabling costs. The switch also supports VLAN tagging for network segmentation, improving security and performance. Its advanced traffic management lets IT administrators prioritize network traffic effectively, ensuring critical applications receive the necessary bandwidth.
On the other hand, the 3Com 4226T is a 26-port gigabit Ethernet switch, primarily designed for environments requiring a high level of connectivity without PoE. It offers similar features to the 4228G, such as VLAN support and enhanced traffic management capabilities. The 4226T is ideal for businesses that do not require power over Ethernet yet need reliable, high-speed networking capabilities. With 26 ports, this switch is an excellent choice for medium-sized enterprises looking to upgrade their network infrastructure without overwhelming their existing resources.
The 3Com 4250T is a more advanced switch, offering 48 Gigabit Ethernet ports and a robust feature set suitable for more complex networking environments. It includes Layer 2 and Layer 3 functionality, allowing for advanced routing and switching capabilities, making it highly adaptable to various network designs. The 4250T also simplifies network management through its extensive configuration options and support for IPv6. Moreover, it features an efficient cooling system and reduced power consumption, aligning with today’s growing demand for energy-efficient solutions.
All three models utilize advanced technologies such as Spanning Tree Protocol (STP) for loop prevention, QoS mechanisms to prioritize traffic, and comprehensive security features to protect the network from unauthorized access. With their different port configurations and capabilities, the 3Com 4228G, 4226T, and 4250T switches provide exceptional performance and flexibility, making them ideal for businesses aiming to enhance their networking capabilities.