3M 3M owner manual Contents, General Set Up and Spray Gun Use

Models: 3M

1 22
Download 22 pages 1.88 Kb
Page 5
Image 5

Contents

Unpacking

Remove the components from the box. Inspect for concealed damage and/or missing items. If you discover any damage and/or missing pieces, contact your distributor immediately.

Your 3M™ Series 05-100, 05-300 Spray Gun Kit includes:

3M™ Series 05 Spray Gun

Cup

Care Kit

3M™ Series 05-100 Primer Spray Gun

General Set Up and Spray Gun Use

For additional instructions refer to your cup or fluid source manual.

Note: Flush the spray gun before using

The 3M™ Series 05-100 Primer Spray Gun has an anodized aluminum body construction, 10 cfm air consumption, 4.3:1 reduction ratio, 1/4” air inlet connection and a 43 psi maximum inlet pressure*. This spray gun is for use with compressed air systems only and is economically priced for automotive primers and light general purpose use.

3M™ Series 05-300 Detail Spray Gun

The 3M™ Series 05-300 Detail Spray Gun has a chrome-plated aluminum body construction, 3.5 cfm air consumption, 4.3:1 reduction ratio, 1/4” air inlet connection and a 43 psi maximum inlet pressure*. This spray gun is for use with compressed air systems only and is economically priced for automotive detail and light general purpose touch-ups.

*Maximum inlet pressure will yield approximately 10 psi at the air cap.

Air Regulation

The 3M™ Series 05-100 Spray Gun and the 3M™ Series 05-300 Detail Spray Gun packages both include air regulators. 3M™ Series 05-100 Spray Gun has an external detachable regulator while the 3M™ Series 05-300 Detail Spray Gun has an internal regulator.

The regulator adjustment knob on the 3M™ Series 05-300 Detail Spray Gun is located at the base of the spray gun handle directly next to the air inlet.

Counter-clockwise adjusting will increase airflow, while adjusting clockwise will decrease airflow on either spray gun.

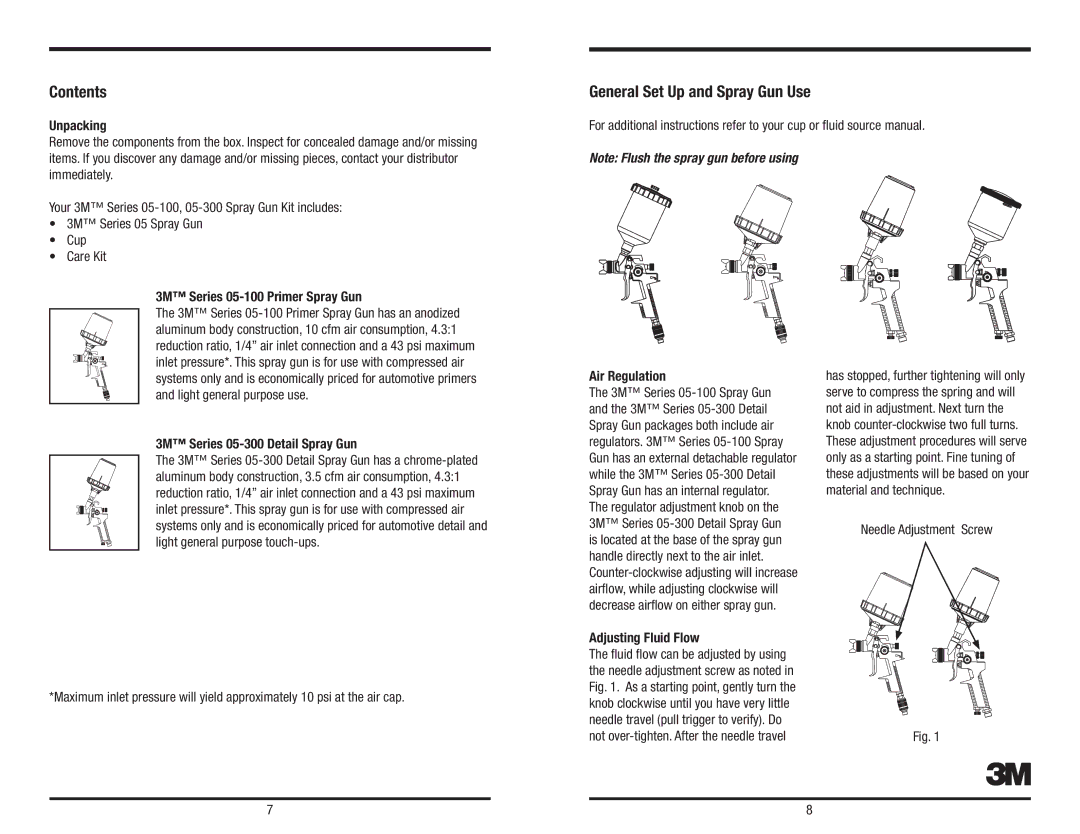
Adjusting Fluid Flow

The fluid flow can be adjusted by using the needle adjustment screw as noted in Fig. 1. As a starting point, gently turn the knob clockwise until you have very little needle travel (pull trigger to verify). Do not over-tighten. After the needle travel

has stopped, further tightening will only serve to compress the spring and will not aid in adjustment. Next turn the knob counter-clockwise two full turns. These adjustment procedures will serve only as a starting point. Fine tuning of these adjustments will be based on your material and technique.

Needle Adjustment Screw

Fig. 1

3

7

8

Page 5
Image 5
3M 3M owner manual Contents, General Set Up and Spray Gun Use