Spray Gun Care and Cleaning cont.
Spray Gun Care and Cleaning cont.
 Clean the air line filters daily.
![]() Check for any fluid leakage from the spray gun and gravity cup.
Check for any fluid leakage from the spray gun and gravity cup.
![]() Flush the spray gun before changing colors and when done operating the spray gun.
Flush the spray gun before changing colors and when done operating the spray gun.
ATTENTION
Solvent left in the spray gun air passages could result in a poor quality paint finish. Do not use any cleaning method which may allow solvent into the spray gun air passages. Do not expose air regulators and gauges to solvent as damage may occur.
Cleaning Process
1.Relieve the pressure.
2.Refer to your cup or fluid source manual for removal and cleaning.
3.To retain unused material or temporarily store mixed material see your Local, State, Federal and OSHA guideline, along with material manufacturer’s recommendations for storage.
4.Flush the spray gun. (To flush, run water or compatible and compliant solvent into the spray gun fluid passage while triggering the spray gun).
5.Remove the air cap.
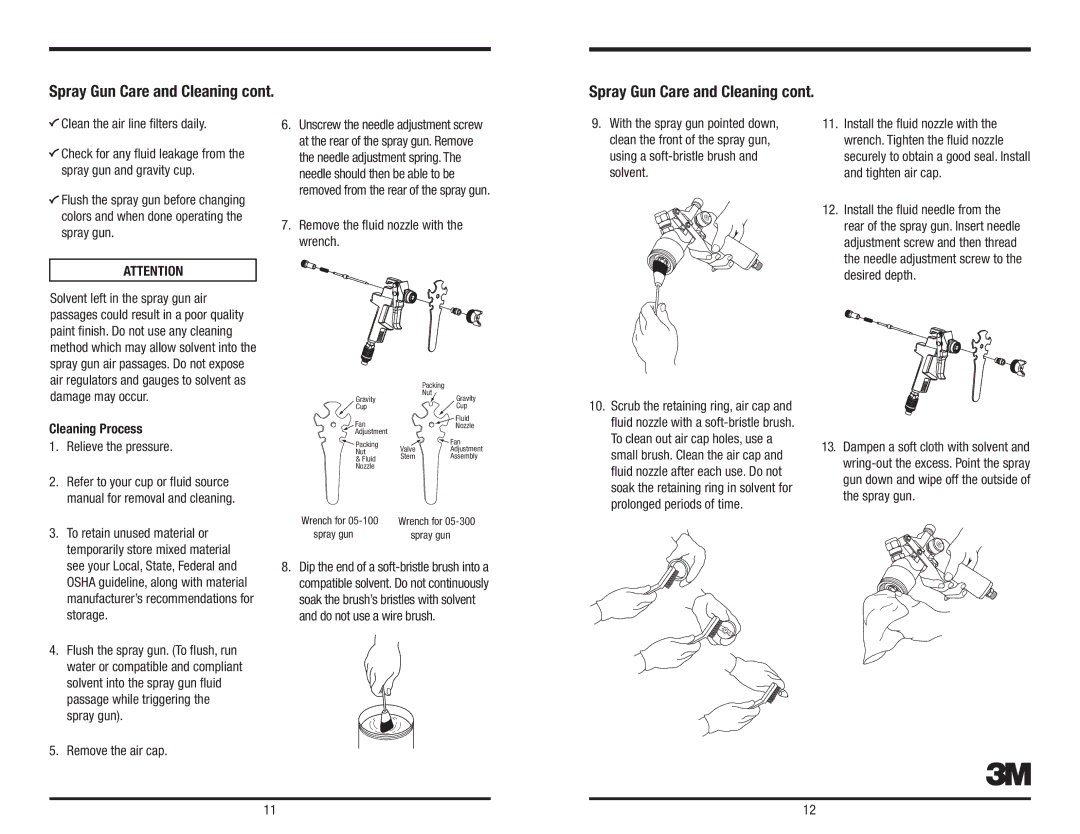
6.Unscrew the needle adjustment screw at the rear of the spray gun. Remove the needle adjustment spring. The needle should then be able to be removed from the rear of the spray gun.
7.Remove the fluid nozzle with the wrench.
|
| Packing |
|
Gravity |
| Nut | Gravity |
|
| ||
Cup |
|
| Cup |
Fan |
|
| Fluid |
|
| Nozzle | |
Adjustment |
|
|
|
Packing |
|
| Fan |
Valve |
| Adjustment | |
Nut |
| ||
Stem |
| Assembly | |
& Fluid |
| ||
Nozzle |
|
|
|
Wrench for | Wrench for |
spray gun | spray gun |
8.Dip the end of a
9.With the spray gun pointed down, clean the front of the spray gun, using a
10.Scrub the retaining ring, air cap and fluid nozzle with a
To clean out air cap holes, use a small brush. Clean the air cap and fluid nozzle after each use. Do not soak the retaining ring in solvent for prolonged periods of time.
11.Install the fluid nozzle with the wrench. Tighten the fluid nozzle securely to obtain a good seal. Install and tighten air cap.
12.Install the fluid needle from the rear of the spray gun. Insert needle adjustment screw and then thread the needle adjustment screw to the desired depth.
13.Dampen a soft cloth with solvent and
3
11 | 12 |
