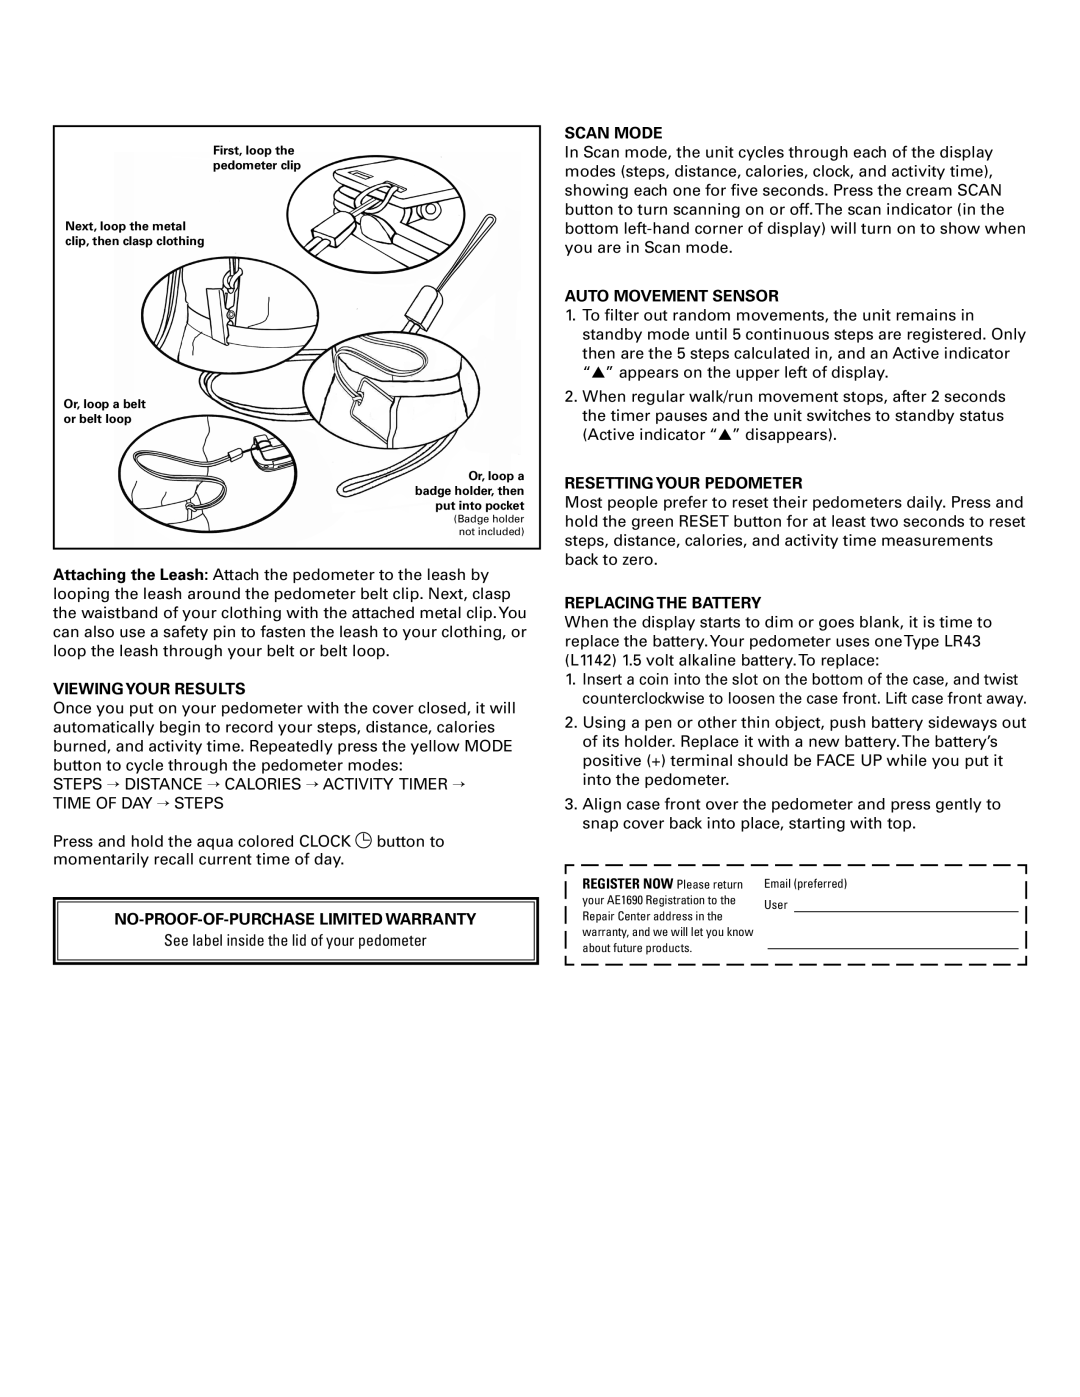
First, loop the pedometer clip
Next, loop the metal clip, then clasp clothing
Or, loop a belt or belt loop
Or, loop a badge holder, then put into pocket
(Badge holder not included)
Attaching the Leash: Attach the pedometer to the leash by looping the leash around the pedometer belt clip. Next, clasp the waistband of your clothing with the attached metal clip.You can also use a safety pin to fasten the leash to your clothing, or loop the leash through your belt or belt loop.
VIEWING YOUR RESULTS
Once you put on your pedometer with the cover closed, it will automatically begin to record your steps, distance, calories burned, and activity time. Repeatedly press the yellow MODE button to cycle through the pedometer modes:
STEPS → DISTANCE → CALORIES → ACTIVITY TIMER → TIME OF DAY → STEPS
Press and hold the aqua colored CLOCK ![]() button to momentarily recall current time of day.
button to momentarily recall current time of day.
NO-PROOF-OF-PURCHASE LIMITED WARRANTY
See label inside the lid of your pedometer
SCAN MODE
In Scan mode, the unit cycles through each of the display modes (steps, distance, calories, clock, and activity time), showing each one for five seconds. Press the cream SCAN button to turn scanning on or off.The scan indicator (in the bottom
AUTO MOVEMENT SENSOR
1.To filter out random movements, the unit remains in standby mode until 5 continuous steps are registered. Only then are the 5 steps calculated in, and an Active indicator “▲” appears on the upper left of display.
2.When regular walk/run movement stops, after 2 seconds the timer pauses and the unit switches to standby status (Active indicator “▲” disappears).
RESETTING YOUR PEDOMETER
Most people prefer to reset their pedometers daily. Press and hold the green RESET button for at least two seconds to reset steps, distance, calories, and activity time measurements back to zero.
REPLACING THE BATTERY
When the display starts to dim or goes blank, it is time to replace the battery.Your pedometer uses oneType LR43
(L1142) 1.5 volt alkaline battery.To replace:
1.Insert a coin into the slot on the bottom of the case, and twist counterclockwise to loosen the case front. Lift case front away.
2.Using a pen or other thin object, push battery sideways out of its holder. Replace it with a new battery.The battery’s positive (+) terminal should be FACE UP while you put it into the pedometer.
3.Align case front over the pedometer and press gently to snap cover back into place, starting with top.
REGISTER NOW Please return | Email (preferred) |
| |||
your AE1690 Registration to the | User |
| |||
Repair Center address in the |
| ||||
|
|
|
|
| |
warranty, and we will let you know |
|
|
|
|
|
about future products. |
|
|
|
|
|
|
|
|
|
| |
|
|
|
|
|
|
