Disassembling the logic lower assembly
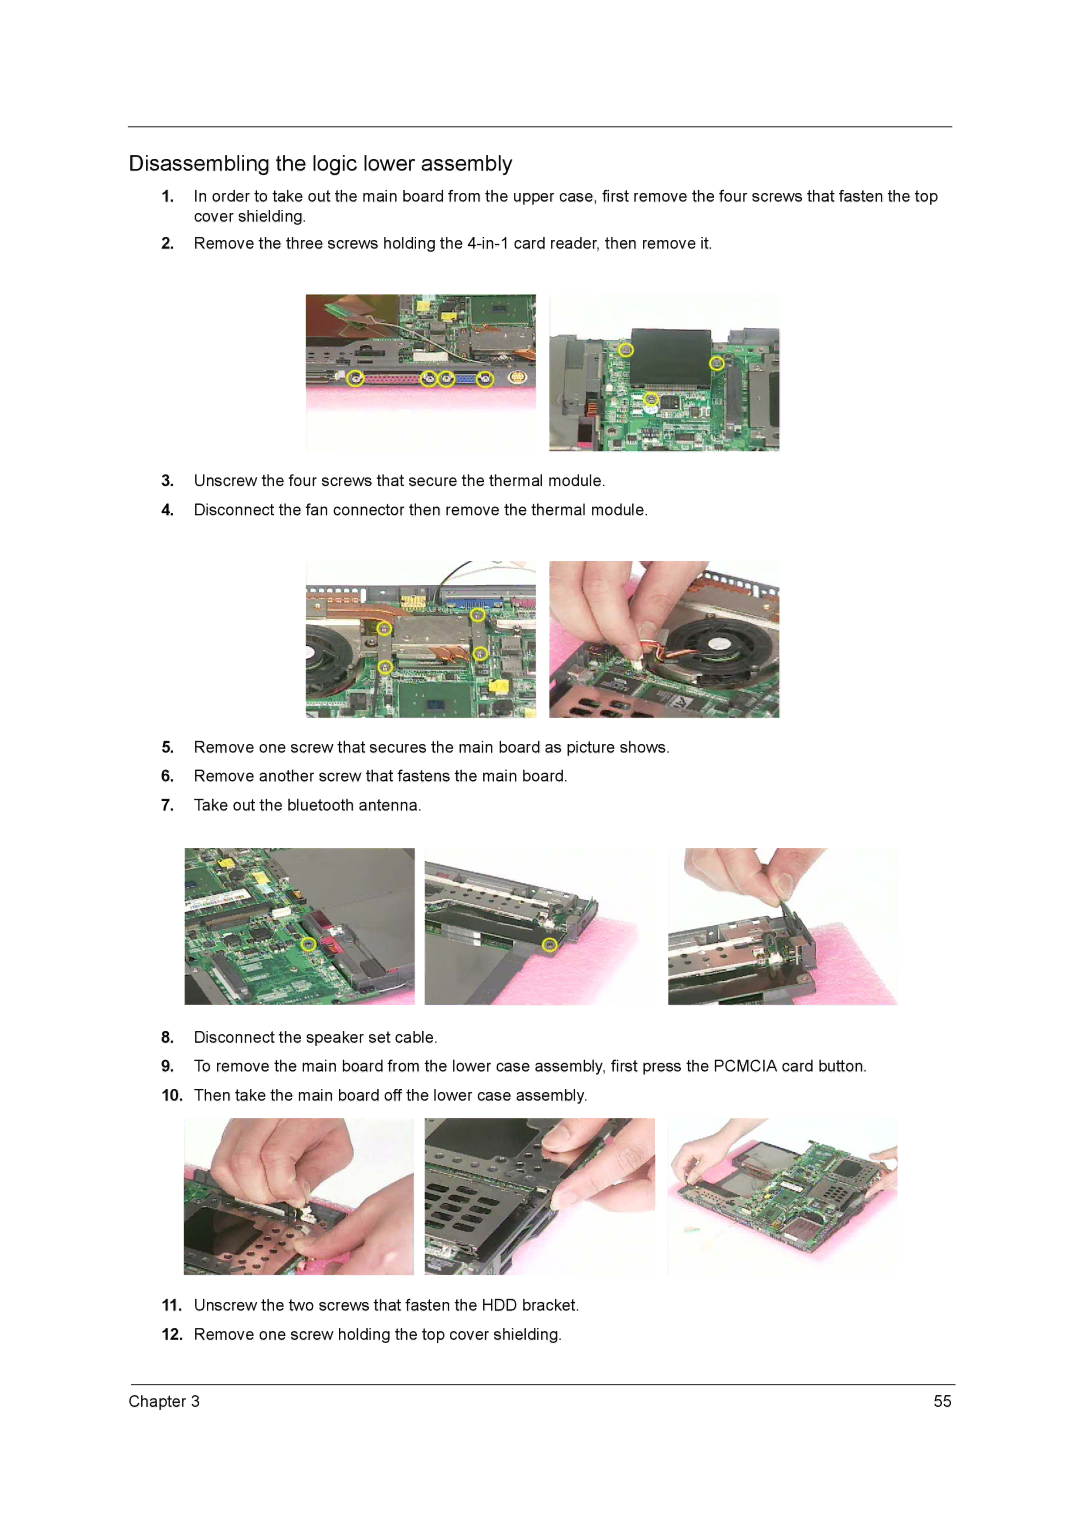
1.In order to take out the main board from the upper case, first remove the four screws that fasten the top cover shielding.
2.Remove the three screws holding the
3.Unscrew the four screws that secure the thermal module.
4.Disconnect the fan connector then remove the thermal module.
5.Remove one screw that secures the main board as picture shows.
6.Remove another screw that fastens the main board.
7.Take out the bluetooth antenna.
8.Disconnect the speaker set cable.
9.To remove the main board from the lower case assembly, first press the PCMCIA card button.
10.Then take the main board off the lower case assembly.
11.Unscrew the two screws that fasten the HDD bracket.
12.Remove one screw holding the top cover shielding.
Chapter 3 | 55 |
