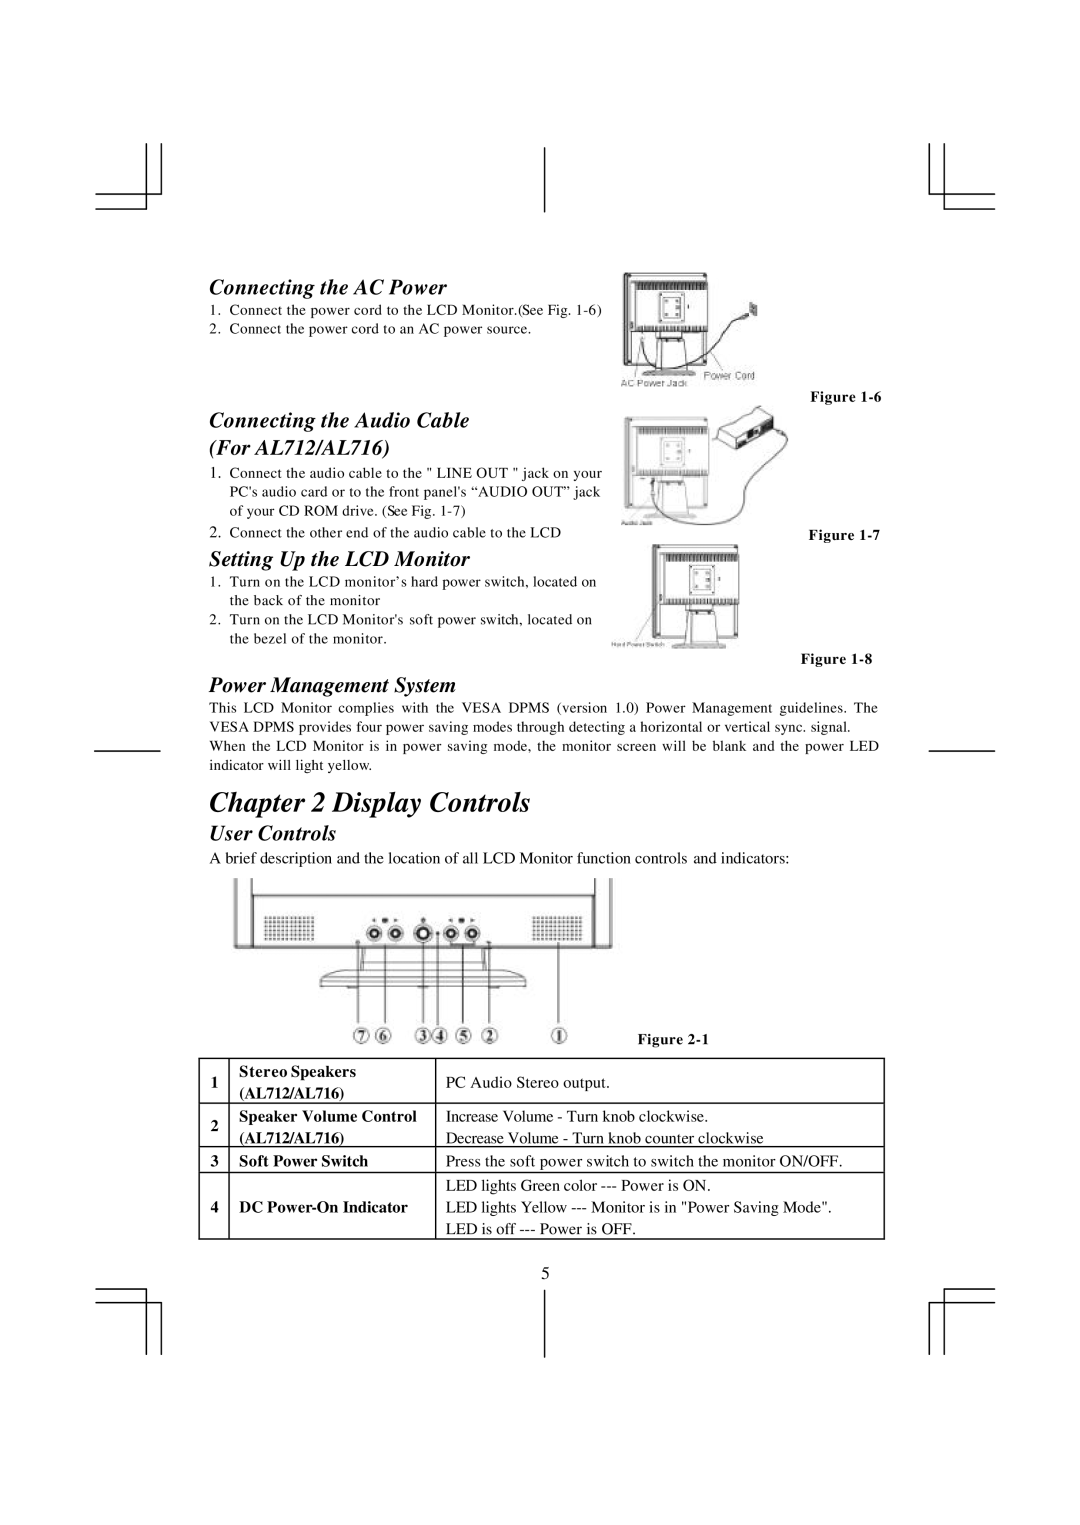
Connecting the AC Power
1.Connect the power cord to the LCD Monitor.(See Fig.
2.Connect the power cord to an AC power source.
Connecting the Audio Cable
(For AL712/AL716)
1.Connect the audio cable to the " LINE OUT " jack on your PC's audio card or to the front panel's “AUDIO OUT” jack of your CD ROM drive. (See Fig.
2.Connect the other end of the audio cable to the LCD
Setting Up the LCD Monitor
1.Turn on the LCD monitor’s hard power switch, located on the back of the monitor
2.Turn on the LCD Monitor's soft power switch, located on the bezel of the monitor.
Figure
Figure
Figure
Power Management System
This LCD Monitor complies with the VESA DPMS (version 1.0) Power Management guidelines. The VESA DPMS provides four power saving modes through detecting a horizontal or vertical sync. signal. When the LCD Monitor is in power saving mode, the monitor screen will be blank and the power LED indicator will light yellow.
Chapter 2 Display Controls
User Controls
A brief description and the location of all LCD Monitor function controls and indicators:
|
| Figure | |
|
|
| |
1 | Stereo Speakers | PC Audio Stereo output. | |
(AL712/AL716) | |||
|
| ||
2 | Speaker Volume Control | Increase Volume - Turn knob clockwise. | |
(AL712/AL716) | Decrease Volume - Turn knob counter clockwise | ||
| |||
3 | Soft Power Switch | Press the soft power switch to switch the monitor ON/OFF. | |
|
| LED lights Green color | |
4 | DC | LED lights Yellow | |
|
| LED is off | |
|
| 5 |