4.Category II bracket
Category II brackets are designed to hold the beacon securely in place. The beacon must be manually deployed. The bracket can be mounted on a vertical flat surface with beacon antenna up or on a horizontal flat surface facing skyward. This location must be easily accessible in order to manually deploy the beacon or to perform the required maintenance and functionality tests. Typical locations include near the helm station or just inside the companionway door.
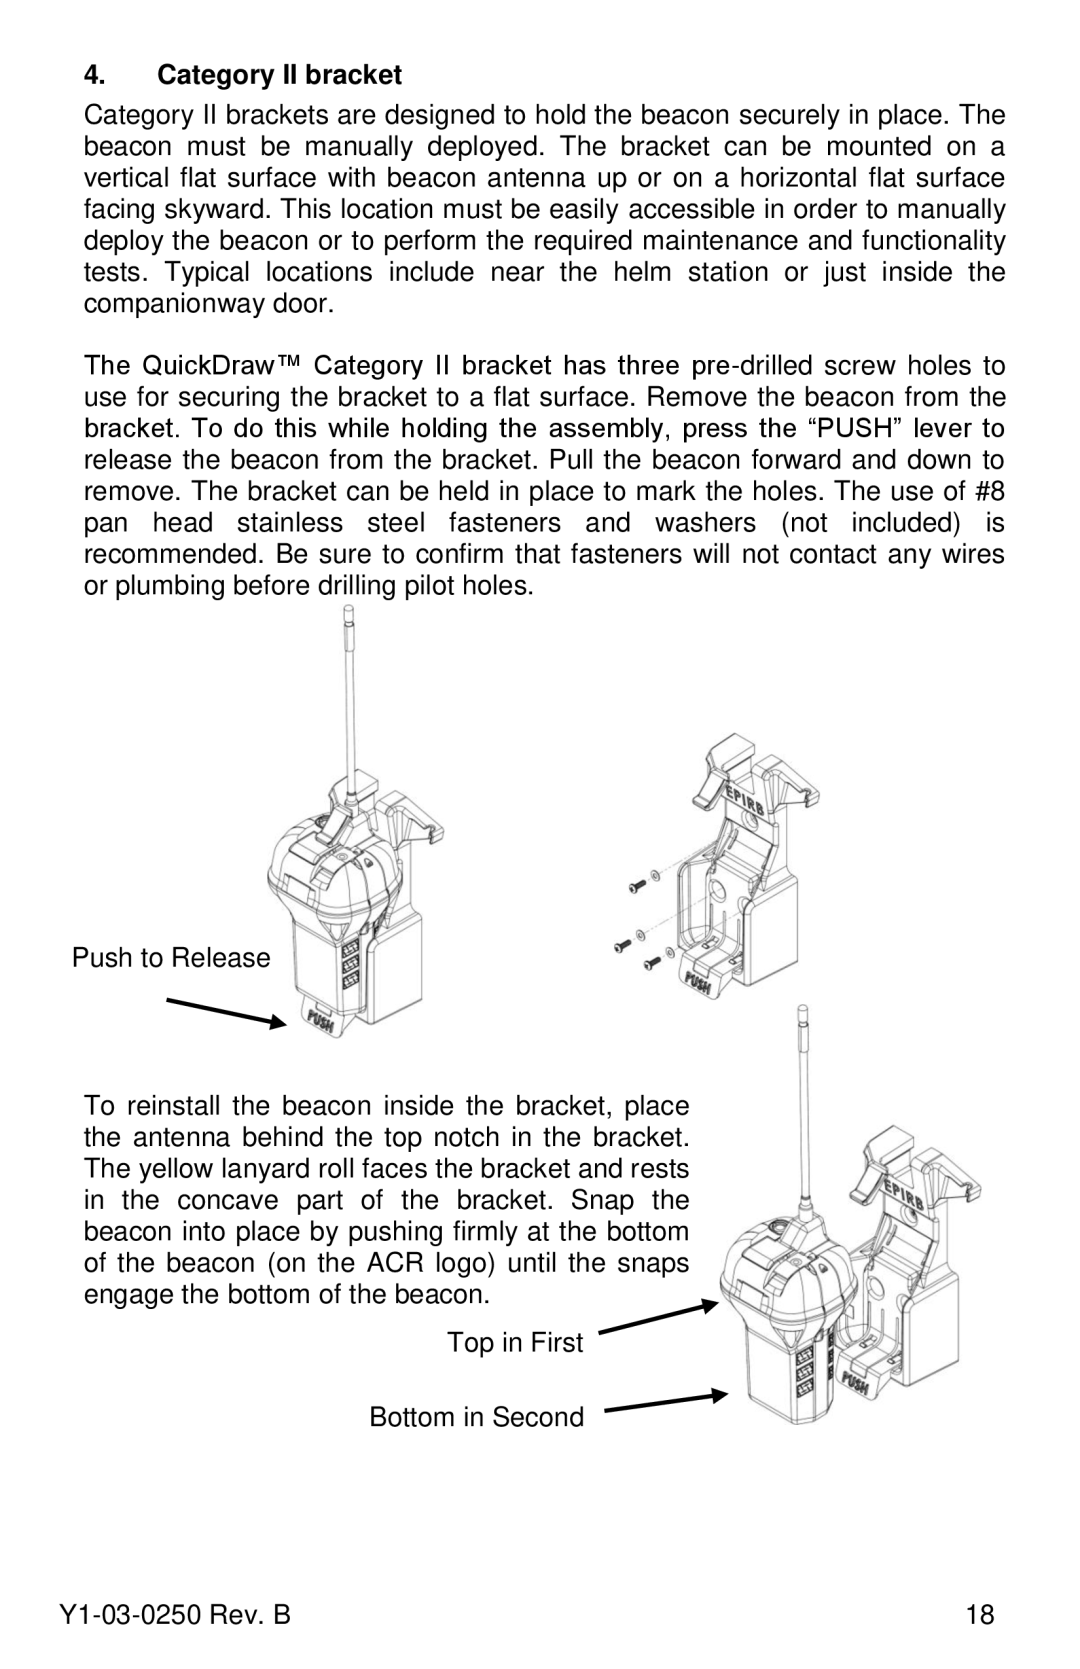
The QuickDraw™ Category II bracket has three
Push to Release
To reinstall the beacon inside the bracket, place the antenna behind the top notch in the bracket. The yellow lanyard roll faces the bracket and rests in the concave part of the bracket. Snap the beacon into place by pushing firmly at the bottom of the beacon (on the ACR logo) until the snaps engage the bottom of the beacon.
Top in First
Bottom in Second
| 18 |
