Installation
1.Install drives as described in the Disk Installation section.
2.Connect the AC power adapter’s input to a wall outlet and the output cable to the Z Disk Array’s power connector.
3.Connect either the USB 3.0 or eSATA cable from the Z Disk array to the computer.
4.Configure the Port Multilpier as described in the Port Multiplier section.
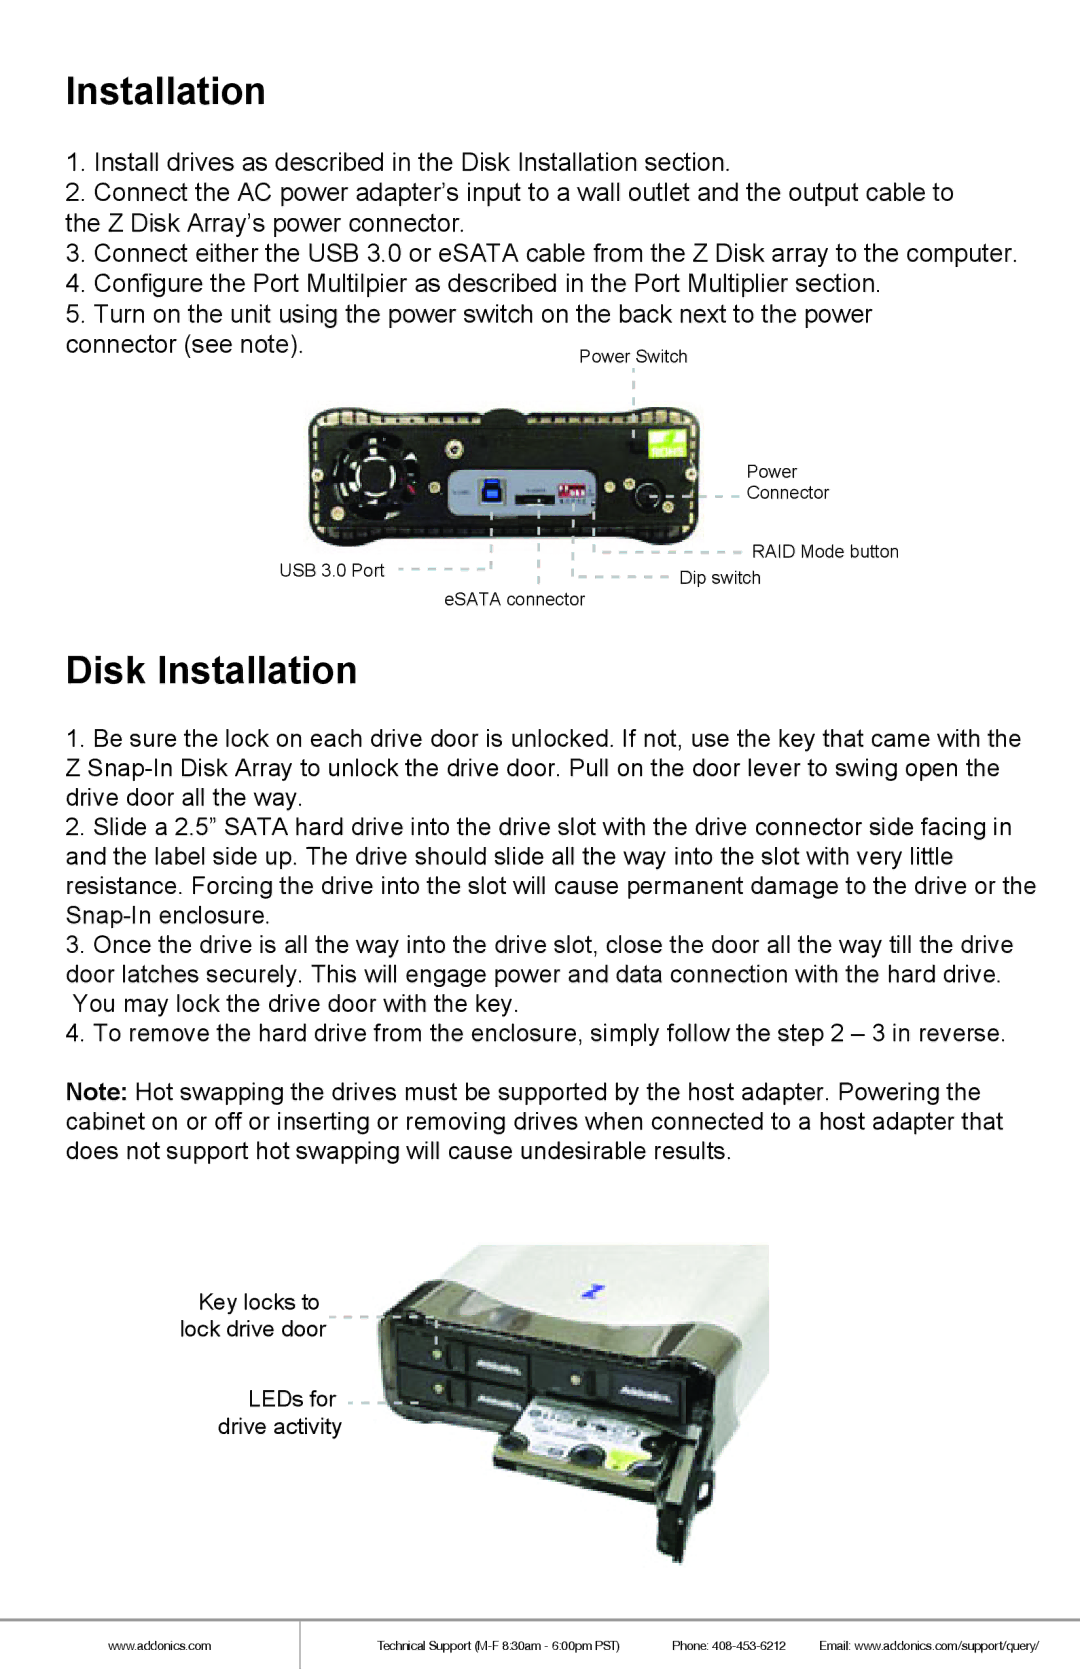
5.Turn on the unit using the power switch on the back next to the power
connector (see note).
Power
Connector
RAID Mode button
USB 3.0 Port | Dip switch |
|
eSATA connector
Disk Installation
1.Be sure the lock on each drive door is unlocked. If not, use the key that came with the Z
2.Slide a 2.5” SATA hard drive into the drive slot with the drive connector side facing in and the label side up. The drive should slide all the way into the slot with very little resistance. Forcing the drive into the slot will cause permanent damage to the drive or the
3.Once the drive is all the way into the drive slot, close the door all the way till the drive door latches securely. This will engage power and data connection with the hard drive. You may lock the drive door with the key.
4.To remove the hard drive from the enclosure, simply follow the step 2 – 3 in reverse.
Note: Hot swapping the drives must be supported by the host adapter. Powering the cabinet on or off or inserting or removing drives when connected to a host adapter that does not support hot swapping will cause undesirable results.
Key locks to lock drive door ![]()
![]()
LEDs for drive activity
www.addonics.com
Technical Support | Phone: | Email: www.addonics.com/support/query/ |