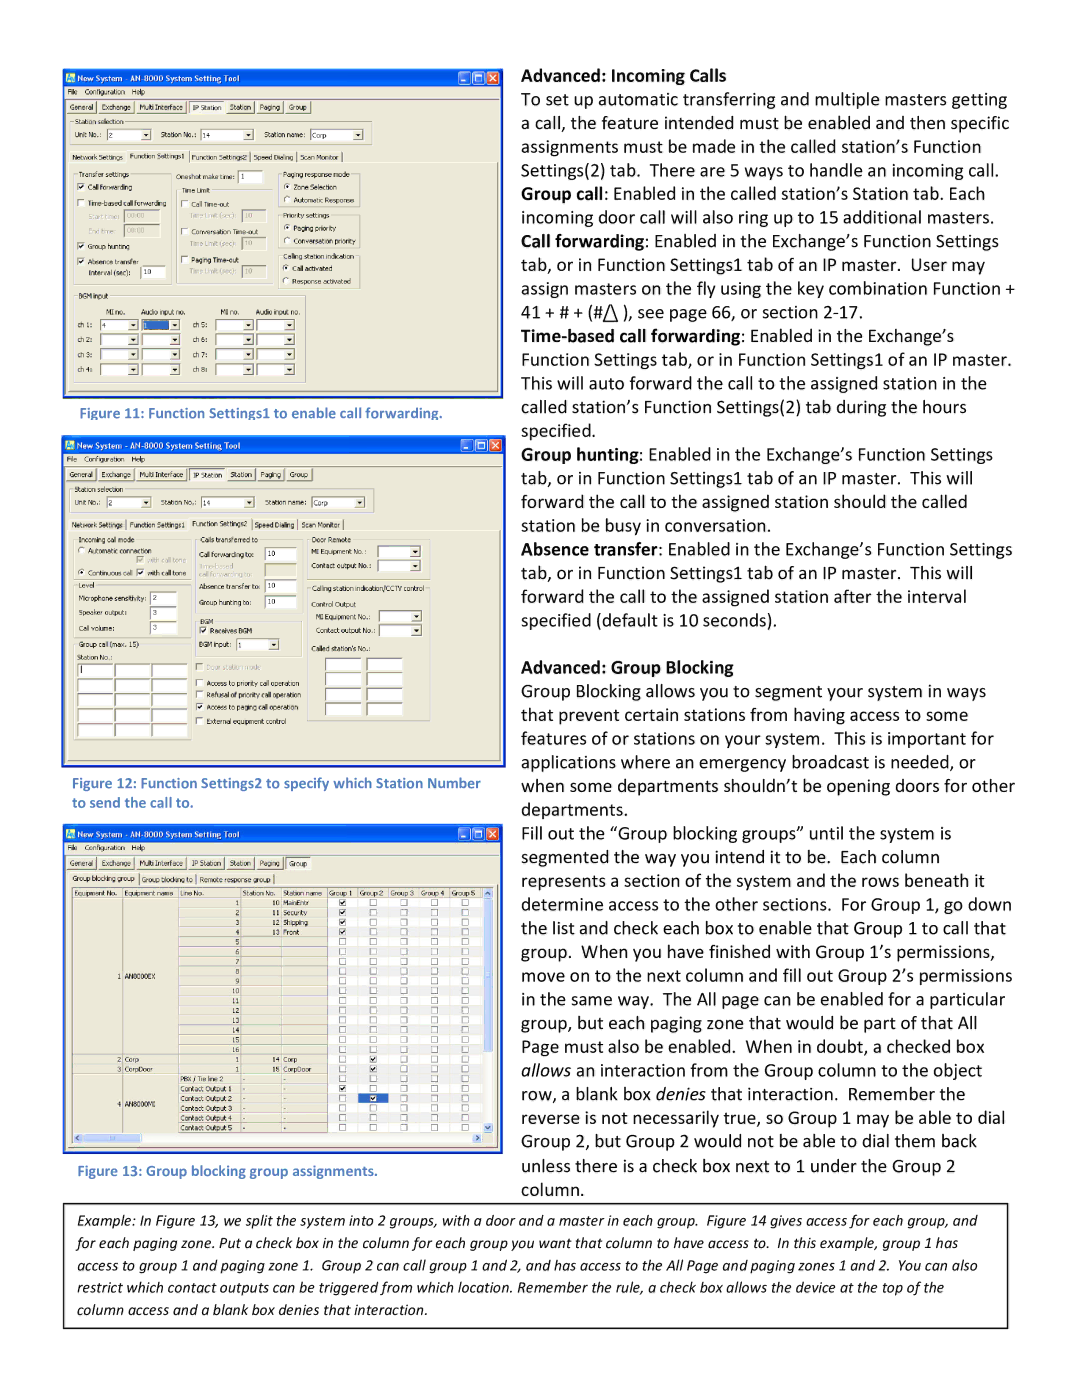
Figure 11: Function Settings1 to enable call forwarding.
Figure 12: Function Settings2 to specify which Station Number to send the call to.
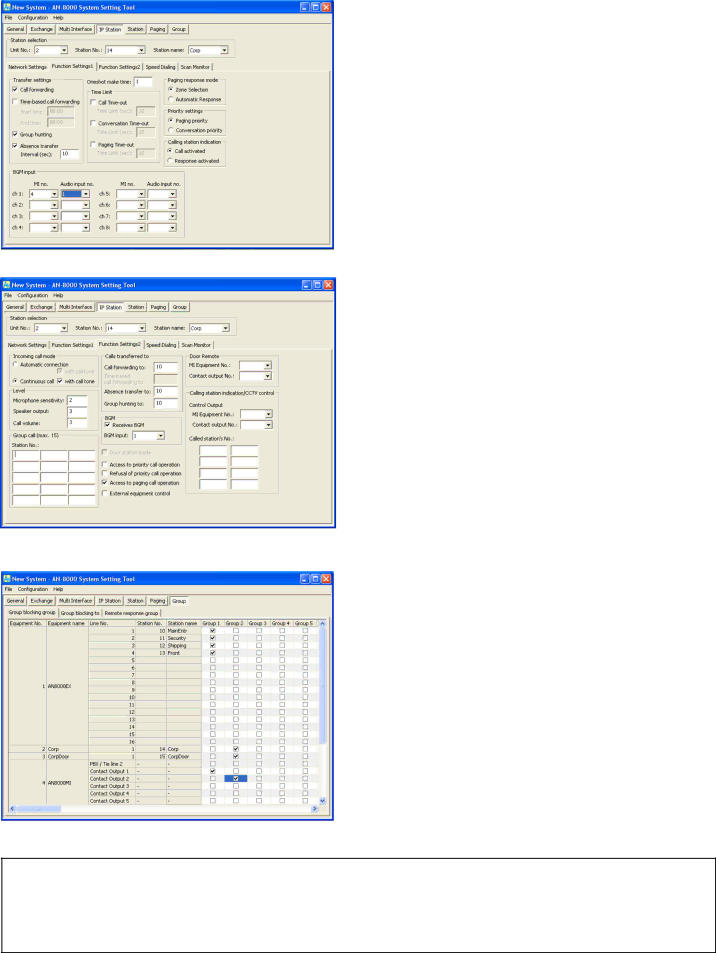
Figure 13: Group blocking group assignments.
Advanced: Incoming Calls
To set up automatic transferring and multiple masters getting a call, the feature intended must be enabled and then specific assignments must be made in the called station’s Function Settings(2) tab. There are 5 ways to handle an incoming call. Group call: Enabled in the called station’s Station tab. Each incoming door call will also ring up to 15 additional masters. Call forwarding: Enabled in the Exchange’s Function Settings tab, or in Function Settings1 tab of an IP master. User may assign masters on the fly using the key combination Function + 41 + # + (#/\ ), see page 66, or section
Group hunting: Enabled in the Exchange’s Function Settings tab, or in Function Settings1 tab of an IP master. This will forward the call to the assigned station should the called station be busy in conversation.
Absence transfer: Enabled in the Exchange’s Function Settings tab, or in Function Settings1 tab of an IP master. This will forward the call to the assigned station after the interval specified (default is 10 seconds).
Advanced: Group Blocking
Group Blocking allows you to segment your system in ways that prevent certain stations from having access to some features of or stations on your system. This is important for applications where an emergency broadcast is needed, or when some departments shouldn’t be opening doors for other departments.
Fill out the “Group blocking groups” until the system is segmented the way you intend it to be. Each column represents a section of the system and the rows beneath it determine access to the other sections. For Group 1, go down the list and check each box to enable that Group 1 to call that group. When you have finished with Group 1’s permissions, move on to the next column and fill out Group 2’s permissions in the same way. The All page can be enabled for a particular group, but each paging zone that would be part of that All Page must also be enabled. When in doubt, a checked box allows an interaction from the Group column to the object row, a blank box denies that interaction. Remember the reverse is not necessarily true, so Group 1 may be able to dial Group 2, but Group 2 would not be able to dial them back unless there is a check box next to 1 under the Group 2 column.
Example: In Figure 13, we split the system into 2 groups, with a door and a master in each group. Figure 14 gives access for each group, and for each paging zone. Put a check box in the column for each group you want that column to have access to. In this example, group 1 has access to group 1 and paging zone 1. Group 2 can call group 1 and 2, and has access to the All Page and paging zones 1 and 2. You can also restrict which contact outputs can be triggered from which location. Remember the rule, a check box allows the device at the top of the column access and a blank box denies that interaction.