 INSTALLATION & MOUNTING
| | POWER |
| | PT-1211C |
| LAN | PWR |
| |
IN0 IN1 | NC C NO | |
Note:
Contact rated at 30V, 1A.
PT
1
2
Installation Instructions:
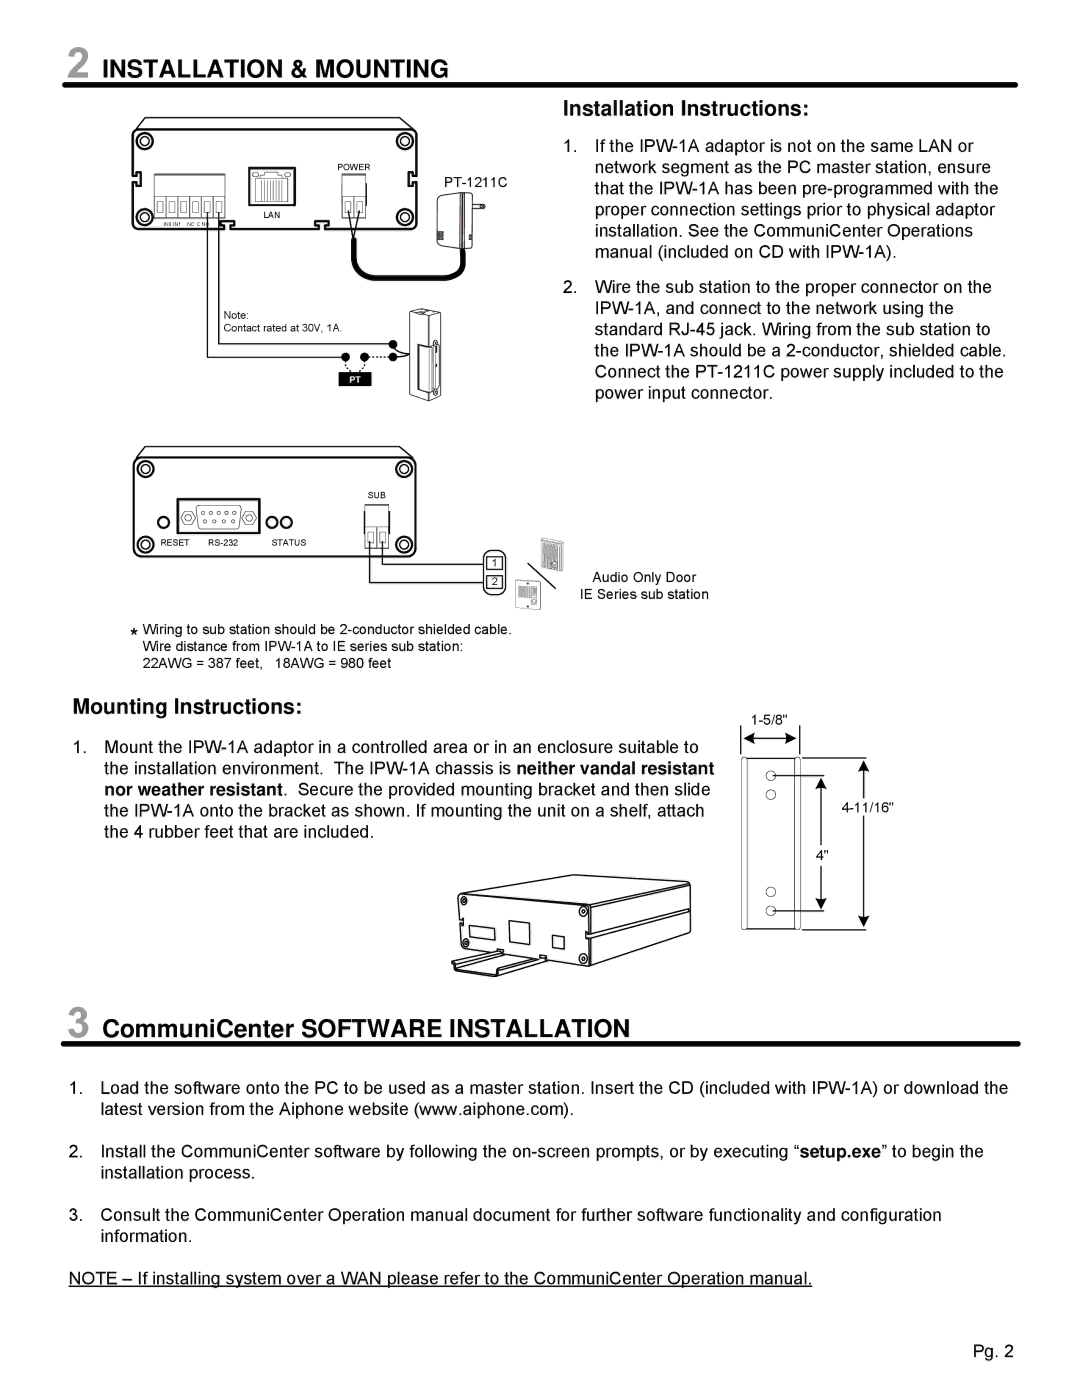
1.If the IPW-1A adaptor is not on the same LAN or network segment as the PC master station, ensure that the IPW-1A has been pre-programmed with the proper connection settings prior to physical adaptor installation. See the CommuniCenter Operations manual (included on CD with IPW-1A).
2.Wire the sub station to the proper connector on the IPW-1A, and connect to the network using the standard RJ-45 jack. Wiring from the sub station to the IPW-1A should be a 2-conductor, shielded cable. Connect the PT-1211C power supply included to the power input connector.
Audio Only Door
IE Series sub station
*Wiring to sub station should be 2-conductor shielded cable. Wire distance from IPW-1A to IE series sub station: 22AWG = 387 feet, 18AWG = 980 feet
Mounting Instructions:
1.Mount the IPW-1A adaptor in a controlled area or in an enclosure suitable to the installation environment. The IPW-1A chassis is neither vandal resistant nor weather resistant. Secure the provided mounting bracket and then slide the IPW-1A onto the bracket as shown. If mounting the unit on a shelf, attach the 4 rubber feet that are included.
 CommuniCenter SOFTWARE INSTALLATION
1.Load the software onto the PC to be used as a master station. Insert the CD (included with IPW-1A) or download the latest version from the Aiphone website (www.aiphone.com).
2.Install the CommuniCenter software by following the on-screen prompts, or by executing “setup.exe” to begin the installation process.
3.Consult the CommuniCenter Operation manual document for further software functionality and configuration information.
NOTE – If installing system over a WAN please refer to the CommuniCenter Operation manual.

 INSTALLATION & MOUNTING
 CommuniCenter SOFTWARE INSTALLATION