OPERATION
Always shut the Tractor completely down, place the transmission in park, and set the parking brake before you or anyone else attempts to connect or disconnect the Implement and Tractor hitches.
6.1 Connecting the Rear Blade
1.Shorten or remove the tractor drawbar to avoid interference when raising and lowering the rear blade..
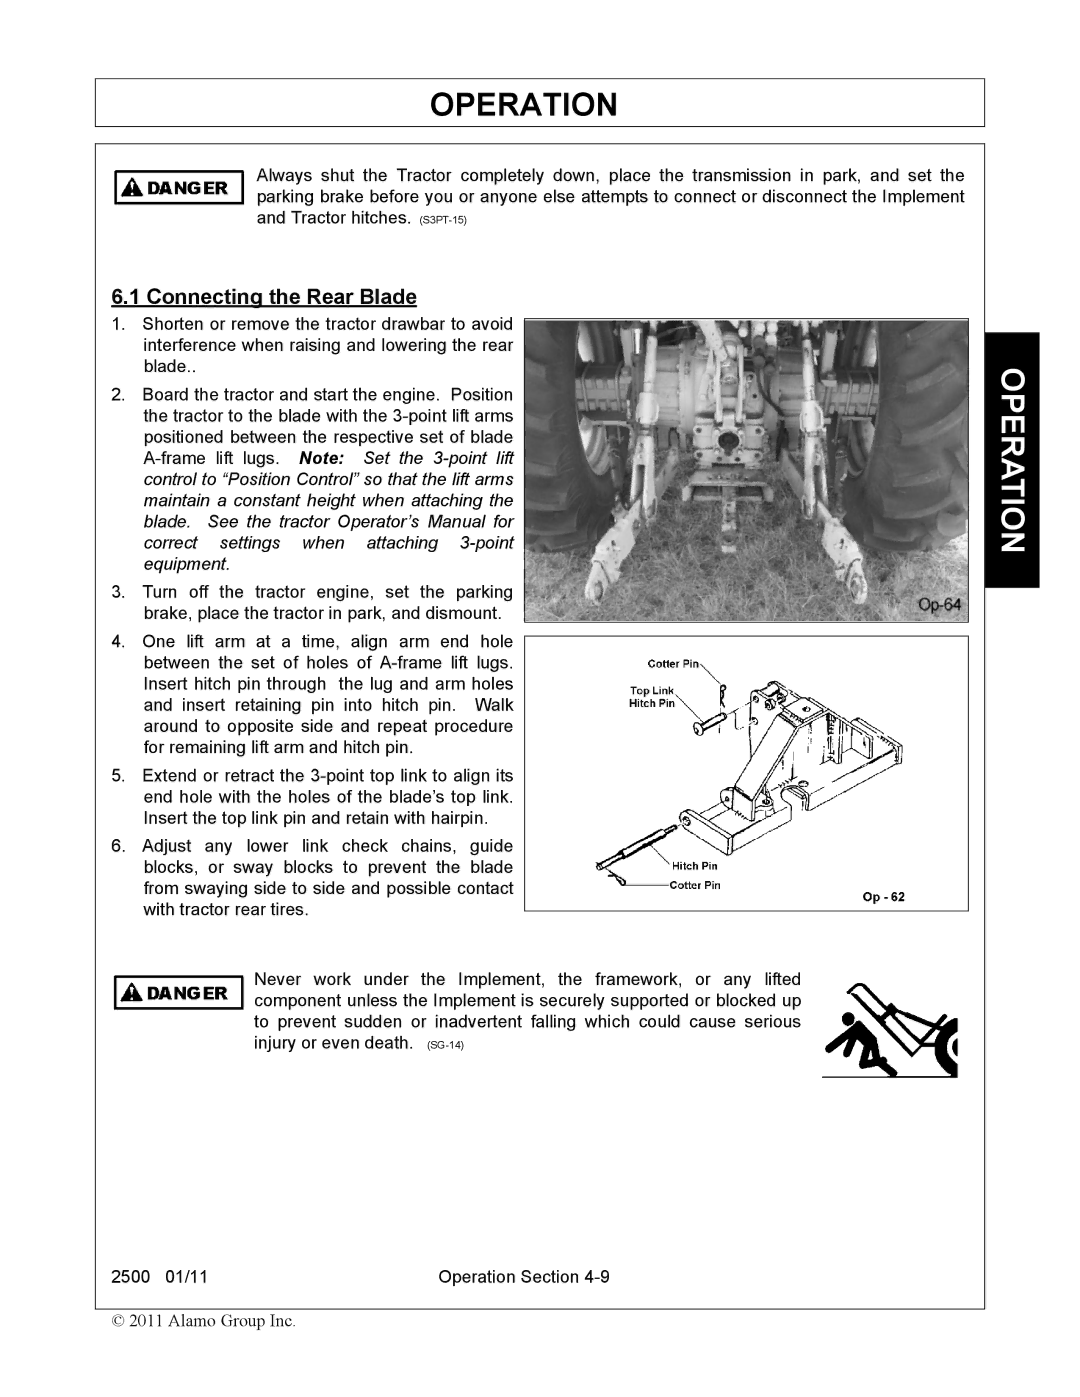
2.Board the tractor and start the engine. Position the tractor to the blade with the
3.Turn off the tractor engine, set the parking brake, place the tractor in park, and dismount.
4.One lift arm at a time, align arm end hole between the set of holes of
5.Extend or retract the
6.Adjust any lower link check chains, guide blocks, or sway blocks to prevent the blade from swaying side to side and possible contact with tractor rear tires.
Never work under the Implement, the framework, or any lifted component unless the Implement is securely supported or blocked up to prevent sudden or inadvertent falling which could cause serious injury or even death.
2500 01/11 | Operation Section |
© 2011 Alamo Group Inc.