c.For
|
| ||
|
|
|
|
Model |
| Allowable | |
| Distance from Edge | ||
|
|
| |
|
|
|
|
20 |
|
| .09 in. (2 mm) |
|
|
|
|
30 |
|
| .09 in. (2 mm) |
|
|
|
|
40 |
|
| .09 in. (2 mm) |
|
|
|
|
60 |
|
| .38 in. (10 mm) |
|
|
|
|
|
| Table 1 | |
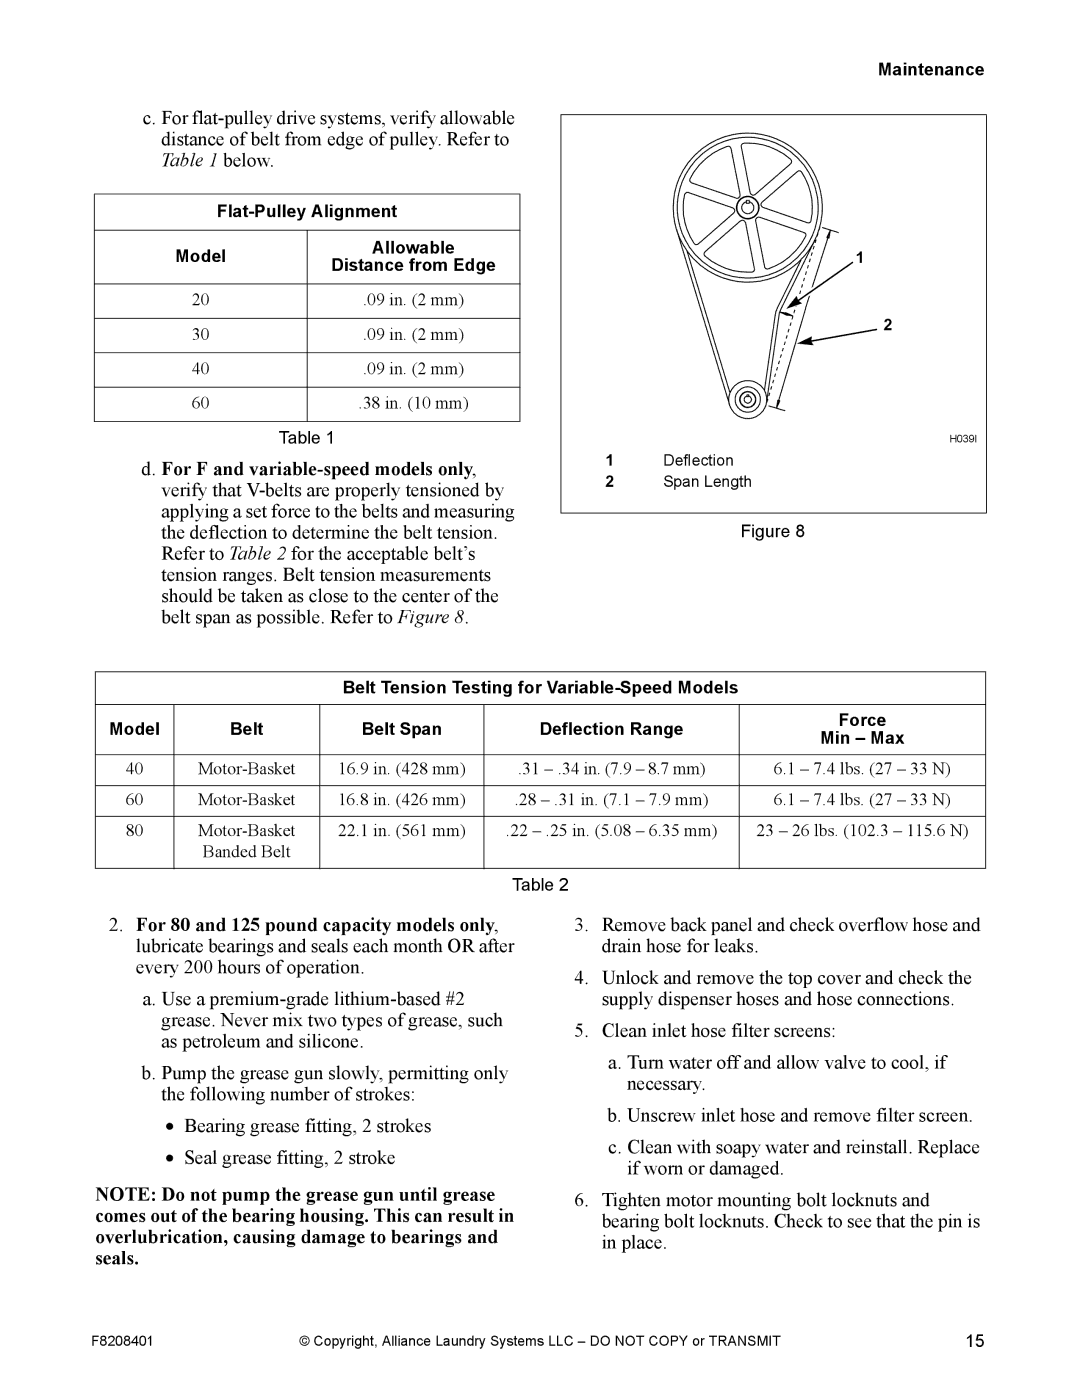
d.For F and
Maintenance
1
2
H039I
1Deflection
2Span Length
Figure 8
Belt Tension Testing for
Model | Belt | Belt Span | Deflection Range | Force | ||
Min – Max | ||||||
|
|
|
|
| ||
|
|
|
|
| ||
40 | 16.9 in. (428 mm) | .31 | 6.1 – 7.4 lbs. (27 – 33 N) | |||
|
|
|
|
|
| |
60 | 16.8 in. (426 mm) | .28 | – 7.9 mm) | 6.1 – 7.4 lbs. (27 – 33 N) | ||
|
|
|
|
|
| |
80 | 22.1 in. (561 mm) | .22 | – 6.35 mm) | 23 – 26 lbs. (102.3 – 115.6 N) | ||
| Banded Belt |
|
|
|
| |
|
|
|
|
|
| |
|
|
| Table 2 |
|
| |
2.For 80 and 125 pound capacity models only, lubricate bearings and seals each month OR after every 200 hours of operation.
a.Use a
b.Pump the grease gun slowly, permitting only the following number of strokes:
•Bearing grease fitting, 2 strokes
•Seal grease fitting, 2 stroke
NOTE: Do not pump the grease gun until grease comes out of the bearing housing. This can result in overlubrication, causing damage to bearings and seals.
3.Remove back panel and check overflow hose and drain hose for leaks.
4.Unlock and remove the top cover and check the supply dispenser hoses and hose connections.
5.Clean inlet hose filter screens:
a.Turn water off and allow valve to cool, if necessary.
b.Unscrew inlet hose and remove filter screen.
c.Clean with soapy water and reinstall. Replace if worn or damaged.
6.Tighten motor mounting bolt locknuts and bearing bolt locknuts. Check to see that the pin is in place.
F8208401 | © Copyright, Alliance Laundry Systems LLC – DO NOT COPY or TRANSMIT | 15 |
