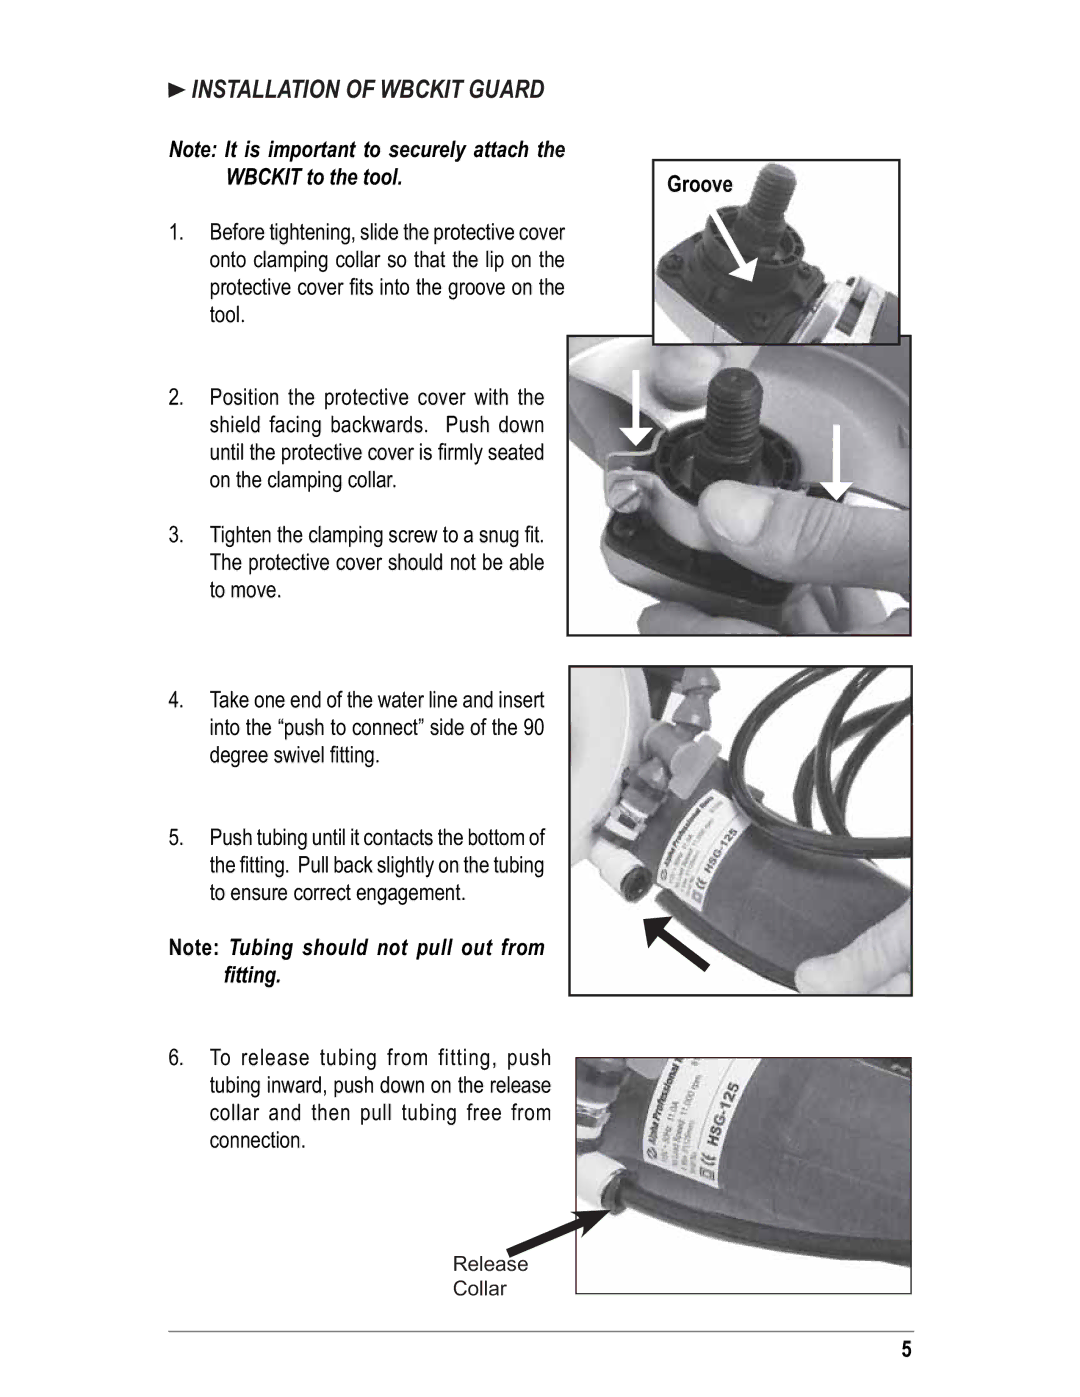
WBCKIT specifications
Alpha Tool.Com.HK Limited is a prominent player in the tool manufacturing industry, known for their innovative products designed to meet the needs of both casual users and professional tradespeople. One of their standout offerings is the WBCKIT, an all-encompassing toolkit that brings together an array of essential tools for various applications.The WBCKIT is designed with practicality and user-friendliness in mind, featuring a compact, organized case that houses tools securely while allowing for easy access. This toolkit is especially useful for those who require a portable solution without compromising on quality or functionality. The durable construction of the case ensures that the tools are protected during transport and storage, making it a reliable choice for both on-site and at-home projects.
One of the main features of the WBCKIT is its versatile selection of tools. It includes screwdrivers, pliers, a utility knife, and adjustable wrenches, among other essentials. This variety allows users to tackle different tasks, from simple household repairs to more complex projects. The ergonomic design of the tools further enhances ease of use, allowing for comfort during prolonged periods of work.
In terms of technology, the WBCKIT incorporates high-grade stainless steel in its tools, ensuring durability and resistance to wear and tear. The materials used not only enhance the lifespan of the tools but also make them easier to clean and maintain. Additionally, Alpha Tool.Com.HK Limited emphasizes quality control in its manufacturing process, which contributes to the overall reliability of the WBCKIT.
Another notable characteristic of the WBCKIT is its comprehensive user manual, which provides guidance on proper usage, safety tips, and maintenance advice. This feature is particularly beneficial for novice users who may need assistance in understanding how to use each tool effectively.
Overall, the WBCKIT by Alpha Tool.Com.HK Limited is an exceptional toolkit that combines quality, versatility, and convenience. It is an excellent solution for anyone in need of a reliable set of tools for a wide range of projects. The combination of carefully selected materials, ergonomic design, and thoughtful features make it a standout choice for both professionals and hobbyists alike, underlining Alpha Tool.Com.HK Limited's commitment to excellence in tool manufacturing.

