
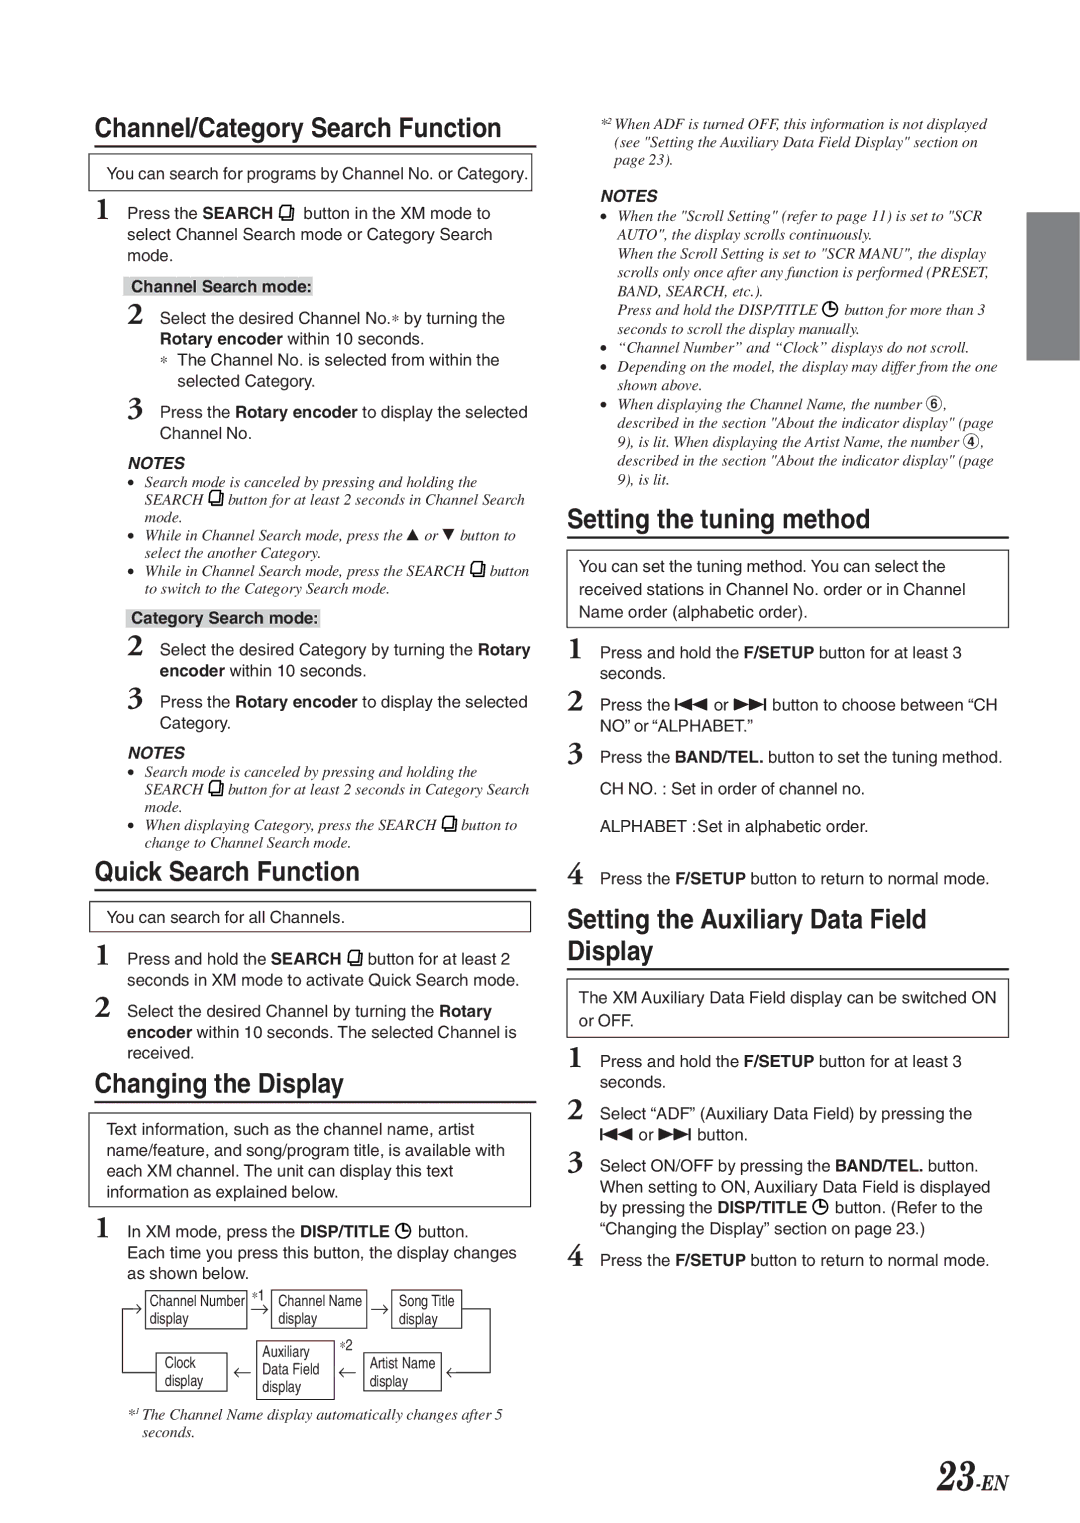
cda-9825, CDA-9826, CDA-9827 specifications
The Alpine CDA-9826, CDA-9827, and CDA-9825 are remarkable head units that represent a blend of advanced technology, user-friendly design, and high-fidelity audio performance. These models cater to audiophiles and casual listeners alike, making them popular choices among car audio enthusiasts.The CDA-9826 features a robust AM/FM tuner, enabling users to access their favorite radio stations with ease. With its built-in CD player, this unit supports CD-R and CD-RW playback, ensuring compatibility with a variety of disc formats. This model is also equipped with an auxiliary input, allowing for seamless connection of external devices, such as smartphones or portable music players. The intuitive interface boasts a large display that provides easy navigation through various settings and track information.
Moving on to the CDA-9827, this unit builds on the strengths of its predecessor. It incorporates an advanced digital signal processor (DSP), enhancing sound quality by optimizing audio signals for a clearer, more dynamic sound experience. The CDA-9827 also offers improved connectivity options, including a USB port that supports direct playback from USB devices and allows for song and artist identification. The unit's Bluetooth capability enables hands-free calling and wireless music streaming, making it a great choice for modern drivers who wish to stay connected while on the road.
The CDA-9825 is another impressive addition to Alpine's lineup, focusing more on providing essential features for a solid audio experience. While it may not have some of the more advanced options found in the 9826 and 9827 models, it still delivers excellent sound quality thanks to its powerful internal amplifier. The CDA-9825 supports various audio formats, including MP3 and WMA, ensuring listeners can enjoy their digital music library without hassle. Its equalizer settings allow users to customize their listening experience, tailoring sound profiles to their preferences.
All three models emphasize user-friendliness, featuring straightforward controls and responsive interfaces that allow drivers to adjust audio settings on the go. Alpine has prioritized aesthetic design as well, with sleek, modern finishes that complement any vehicle's interior. Collectively, the CDA-9826, CDA-9827, and CDA-9825 embody Alpine's commitment to quality sound and innovative technology, ensuring every journey is accompanied by an immersive audio experience. Whether for daily commutes or cross-country road trips, these head units make a significant impact on in-car entertainment.