Manuals
/
Alpine
/
Car Audio and Video
/
Car Stereo System
Alpine
CDE-130RR, CDE-130RM
owner manual
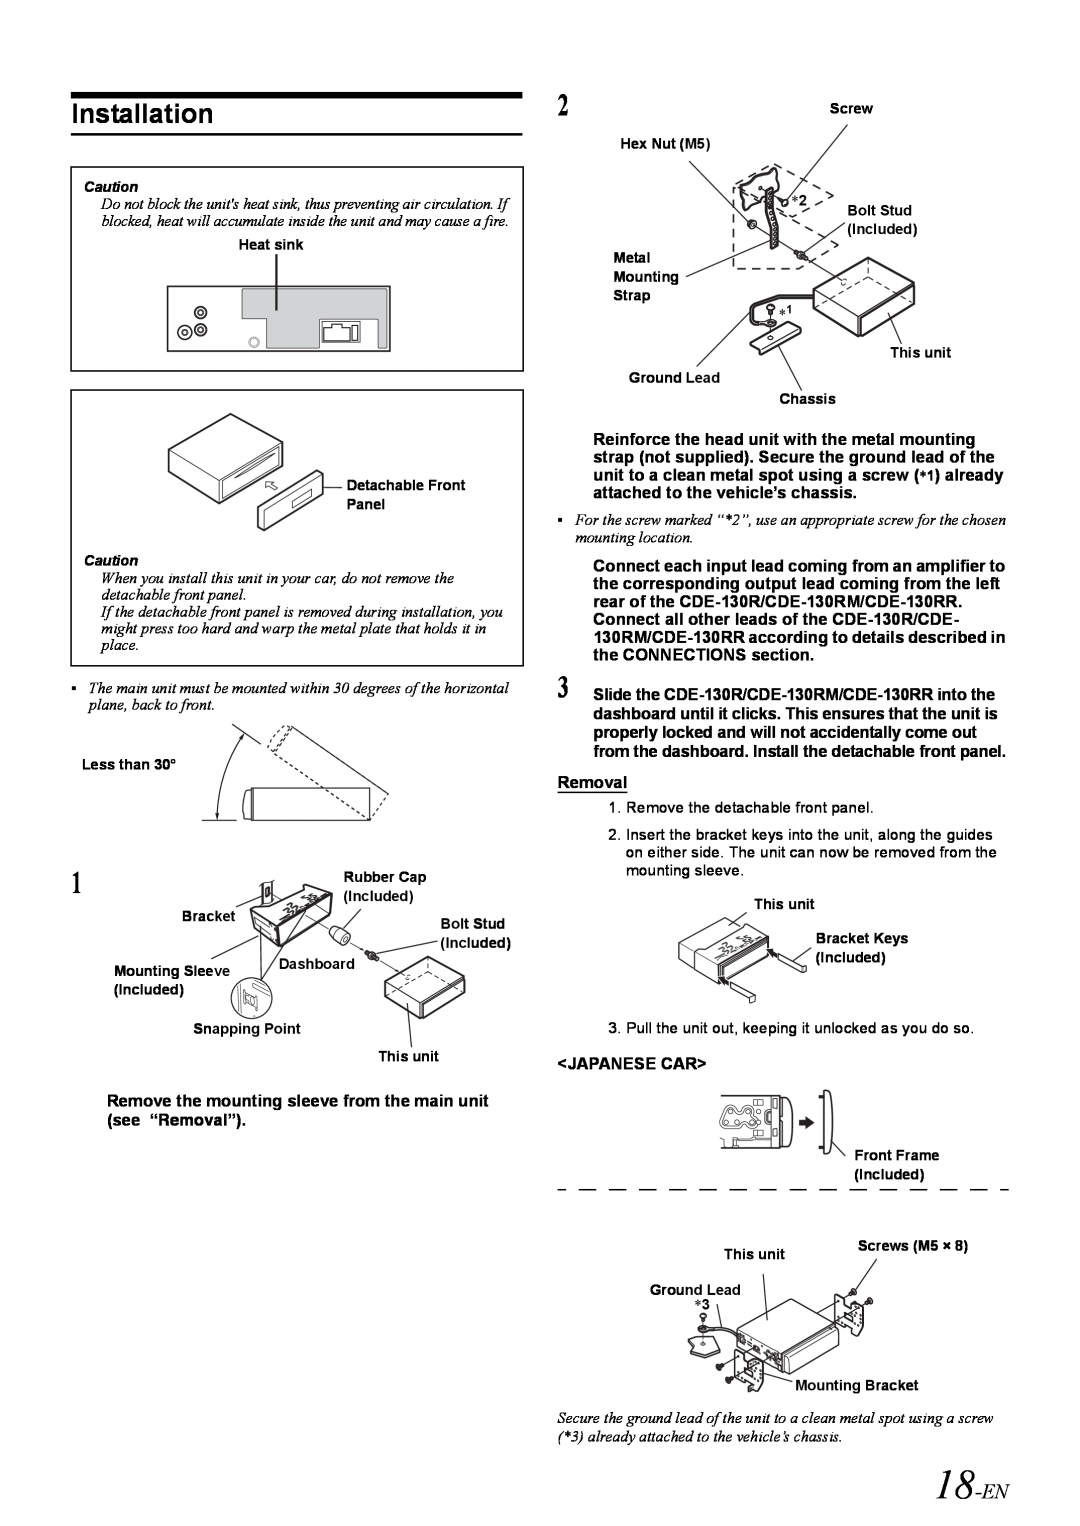
Installation, 18-EN, see “Removal”
Models:
CDE-130R
CDE-130RR
1
20
22
22
Download
22 pages
35.22 Kb
15
16
17
18
19
20
21
22
Specifications
Install
Recalling Preset RDS Stations
Accessory List
Battery
Tuning to Preset Stations
Sound Setting
Precautions
To customers using CD-R/CD-RW
Page 20
Image 20
Page 19
Page 21
Page 20
Image 20
Page 19
Page 21
Contents
CDE-130R / CDE-130RM CDE-130RR
MP3 CD Receiver
1-EN
PRECAUTIONS
Operating Instructions
2-EN
Installation Location
Disc Cleaning
Disc Accessories
3-EN
To customers using CD-R/CD-RW
On handling Compact Discs CD/CD-R/CD-RW
About media that can be played
Accessory List
Turning Power On and Off
Adjusting Volume
Getting Started
Presetting Stations Manually
Presetting Stations Automatically
Tuning to Preset Stations
Radio
Page
Setting RDS Reception Mode and Receiving RDS Stations
Recalling Preset RDS Stations
AF Alternative Frequencies Setting
PI SEEK Setting
Receiving Traffic Information
Receiving Traffic Information While Playing CD or Radio
Displaying Radio Text
7-EN
CD/MP3
Playback
Repeat Play
Folder Repeat Play MP3
M.I.X. Random Play
Folder M.I.X. Random Play MP3
Scanning Programs
Folder Scanning Programs MP3
Terminology
10-EN
Sound Setting
Adjusting Bass Level/Treble Level Balance Between Left and Right
Equalizer Presets Factory’s EQ
Fader Between Front and Rear
Using the Front AUX Input Terminal
Other Functions
Displaying the Text
12-EN
Controlling USB memory Optional
Playing MP3 Files with the USB memory Optional
USB Memory Connection Optional
About MP3 File of USB Memory
Information
In Case of Difficulty
Basic
Radio
15-EN
Indication for CD Player
Indication for USB memory
Specifications
16-EN
17-EN
Installation and Connections
Precautions
see “Removal”
Installation
18-EN
Connections
19-EN
Antenna To Amplifier To Power Antenna Ignition Key Battery
BATTERY
20-EN
Top
Page
Image
Contents