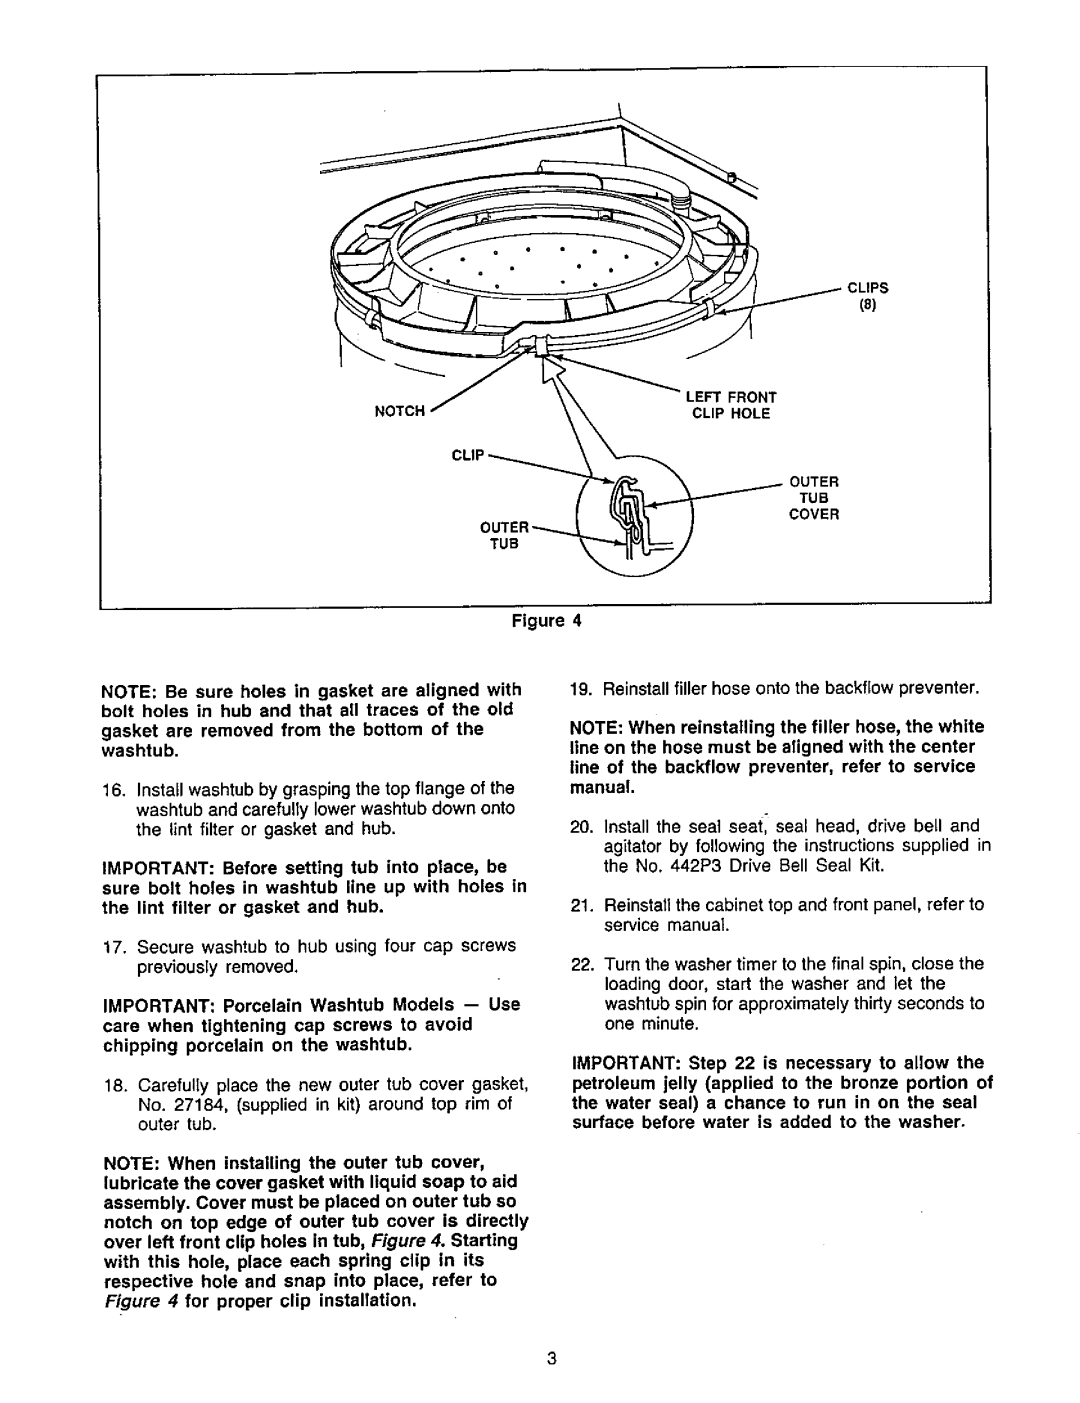
CLIPS
(8)
NOTCH | LEFT FRONT |
CLIP HOLE |
)UTER
TUB
COVER
TUB
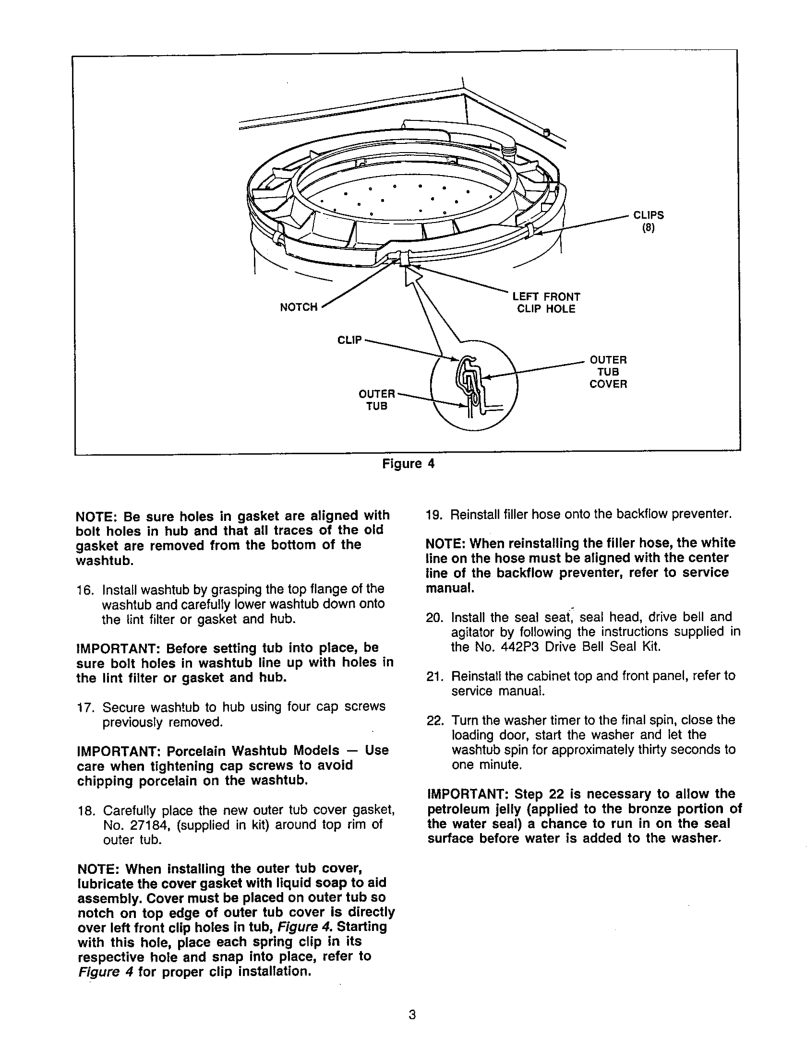
Figure 4
NOTE: Be sure holes in gasket are aligned with bolt holes in hub and that all traces of the old
gasket are removed from the bottom of the washtub.
16.Install washtub by grasping the top flange of the washtub and carefully lower washtub down onto the lint filter or gasket and hub.
IMPORTANT: Before setting tub into place, be sure bolt holes in washtub line up with holes in the lint filter or gasket and hub.
17.Secure washtub to hub using four cap screws previously removed.
IMPORTANT: Porcelain Washtub Models
care when tightening cap screws to avoid chipping porcelain on the washtub.
19. Reinstall filler hose onto the backfiow preventer.
NOTE: When reinstalling the filler hose, the white line on the hose must be aligned with the center line of the backflow preventer, refer to service manual.
20.Install the seal seatl seal head, drive bell and
agitator by following the instructions supplied in the No. 442P3 Drive Bell Seal Kit.
21.Reinstall the cabinet top and front panel, refer to service manual.
22.Turn the washer timer to the final spin, close the loading door, start the washer and let the washtub spin for approximately thirty seconds to one minute.
IMPORTANT: Step 22 is necessary to allow the
18.Carefully place the new outer tub cover gasket, No. 27184, (supplied in kit) around top rim of outer tub.
NOTE: When installing the outer tub cover, lubricate the cover gasket with liquid soap to aid assembly. Cover must be placed on outer tub so
notch on top edge of outer tub cover is directly over left front clip holes in tub, Figure 4. Starting
with this hole, place each spring clip in its respective hole and snap into place, refer to Figure 4 for proper clip installation.
petroleum jelly (applied to the bronze portion of the water seal) a chance to run in on the seal surface before water is added to the washer.
3