Important Instructions
For Installing
No. 495P3 Hub and Seal Kit
Kit | Consists | of: |
|
| |
1 | 27125 | Gasket (Washtub) | |||
1 | 27184 | Gasket | (Outlet | Tub Cover) | |
1 | 27615P | Sealant |
|
| |
1 | 29728 | Spline | Insert |
| |
1 |
| Hub and Seal Assembly | |||
1 | 442P3 | Drive Bell Seal | Kit | ||
1 | Instructions |
| |||
_ _,WARNING
To reduce the risk of electric shock or
injury to persons, disconnect washer power cord before servicing the
washer. If water is present in the
washtub, spin and pump out before
attempting to remove the drive bell.
TO INSTALL NO. 495P3 HUB AND SEAL KIT
IMPORTANT: Be sure the inner surface of the tub flange is clean of all foreign material before installing the new seal.
8.Apply a small amount of No. 27615P Sealant (supplied in kit) around the outer surface of the tub flange, Figure 2.
IMPORTANT: DO NOT allow sealant to get in contact with the flinger, Figure 2, as this could
prevent the flinger from keeping moisture out of the upper bearing.
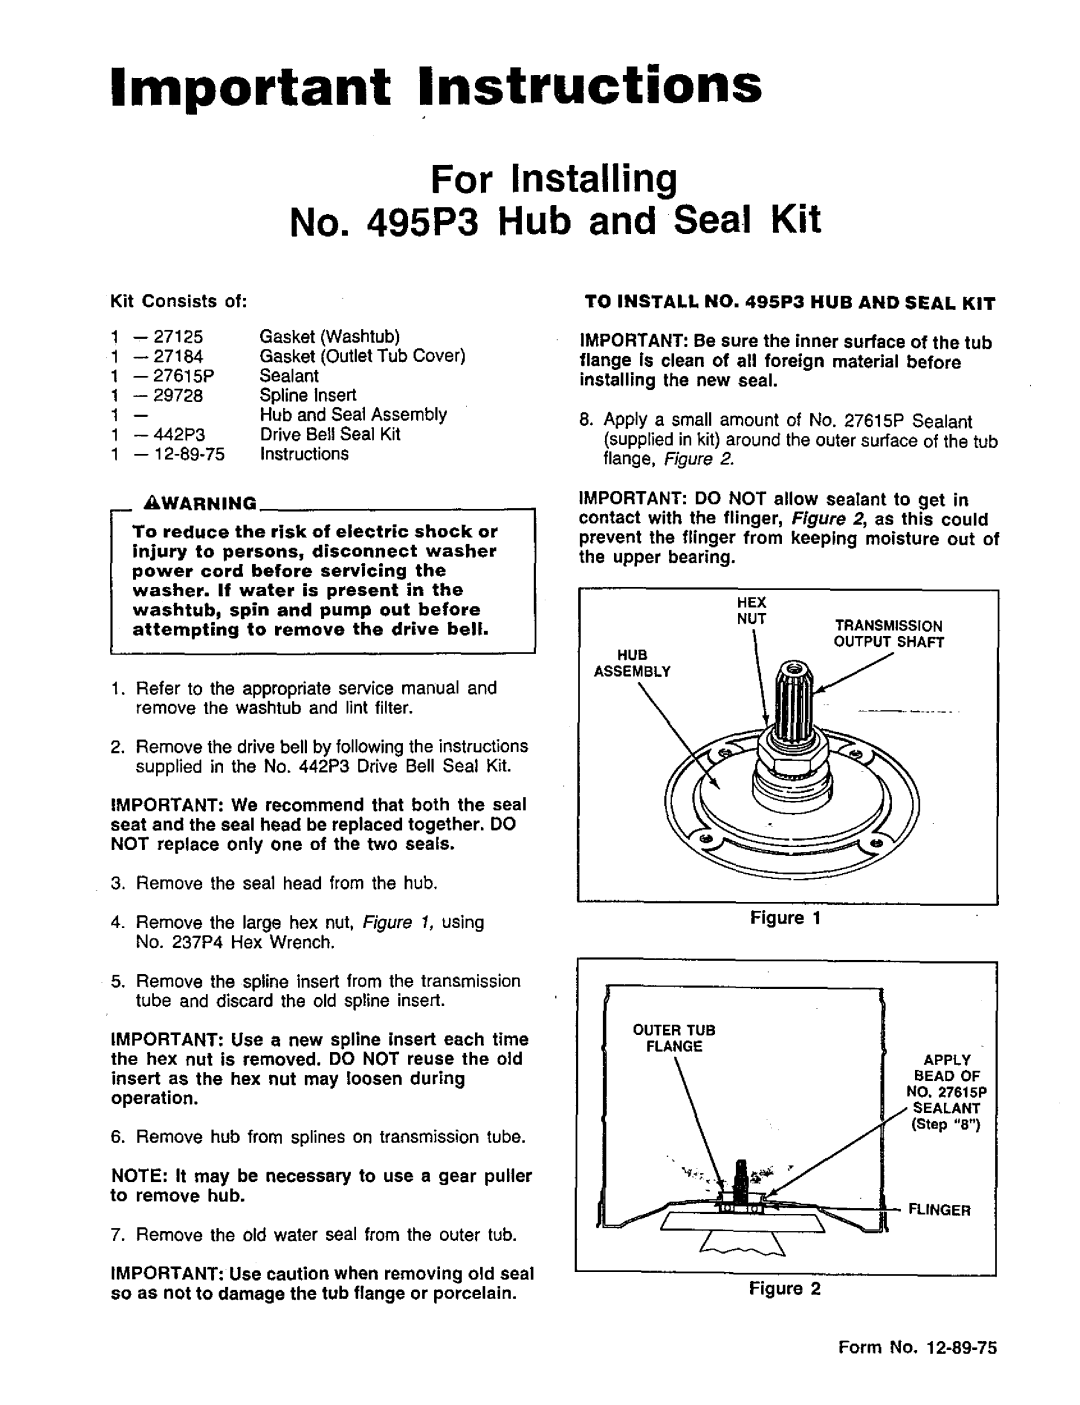
HEX
NUT
TRANSMISSION
OUTPUT SHAFT
HUB
ASSEMBLY
1.Refer to the appropriate service manual and remove the washtub and lint filter.
2.Remove the drive bell by following the instructions supplied in the No. 442P3 Drive Bell Seal Kit.
IMPORTANT: We recommend that both the seal seat and the seal head be replaced together. DO NOT replace only one of the two seals.
3.Remove the seal head from the hub,
4.Remove the large hex nut, Figure 1, using No. 237P4 Hex Wrench,
5.Remove the spline insert from the transmission tube and discard the old spline insert.
IMPORTANT: Use a new spline insert each time the hex nut is removed. DO NOT reuse the old
insert as the hex nut may loosen during operation.
6. Remove hub from splines on transmission tube.
NOTE: It may be necessary to use a gear puller to remove hub.
7. Remove the old water seal from the outer tub.
IMPORTANT: Use caution when removing old seal so as not to damage the tub flange or porcelain.
Figure 1
OUTER TUB
FLANGE
APPLY
BEAD OF
NO. 27615P
Figure 2