APC Smart-UPS 420/620
User’s Manual
Installation and Initial Start-Up
To obtain warranty coverage, please fill out and return the warranty registration card now.
Inspection
Inspect the UPS upon receipt. Notify the carrier and dealer if there is damage. The packaging is recyclable; save it for reuse or dispose of it properly.
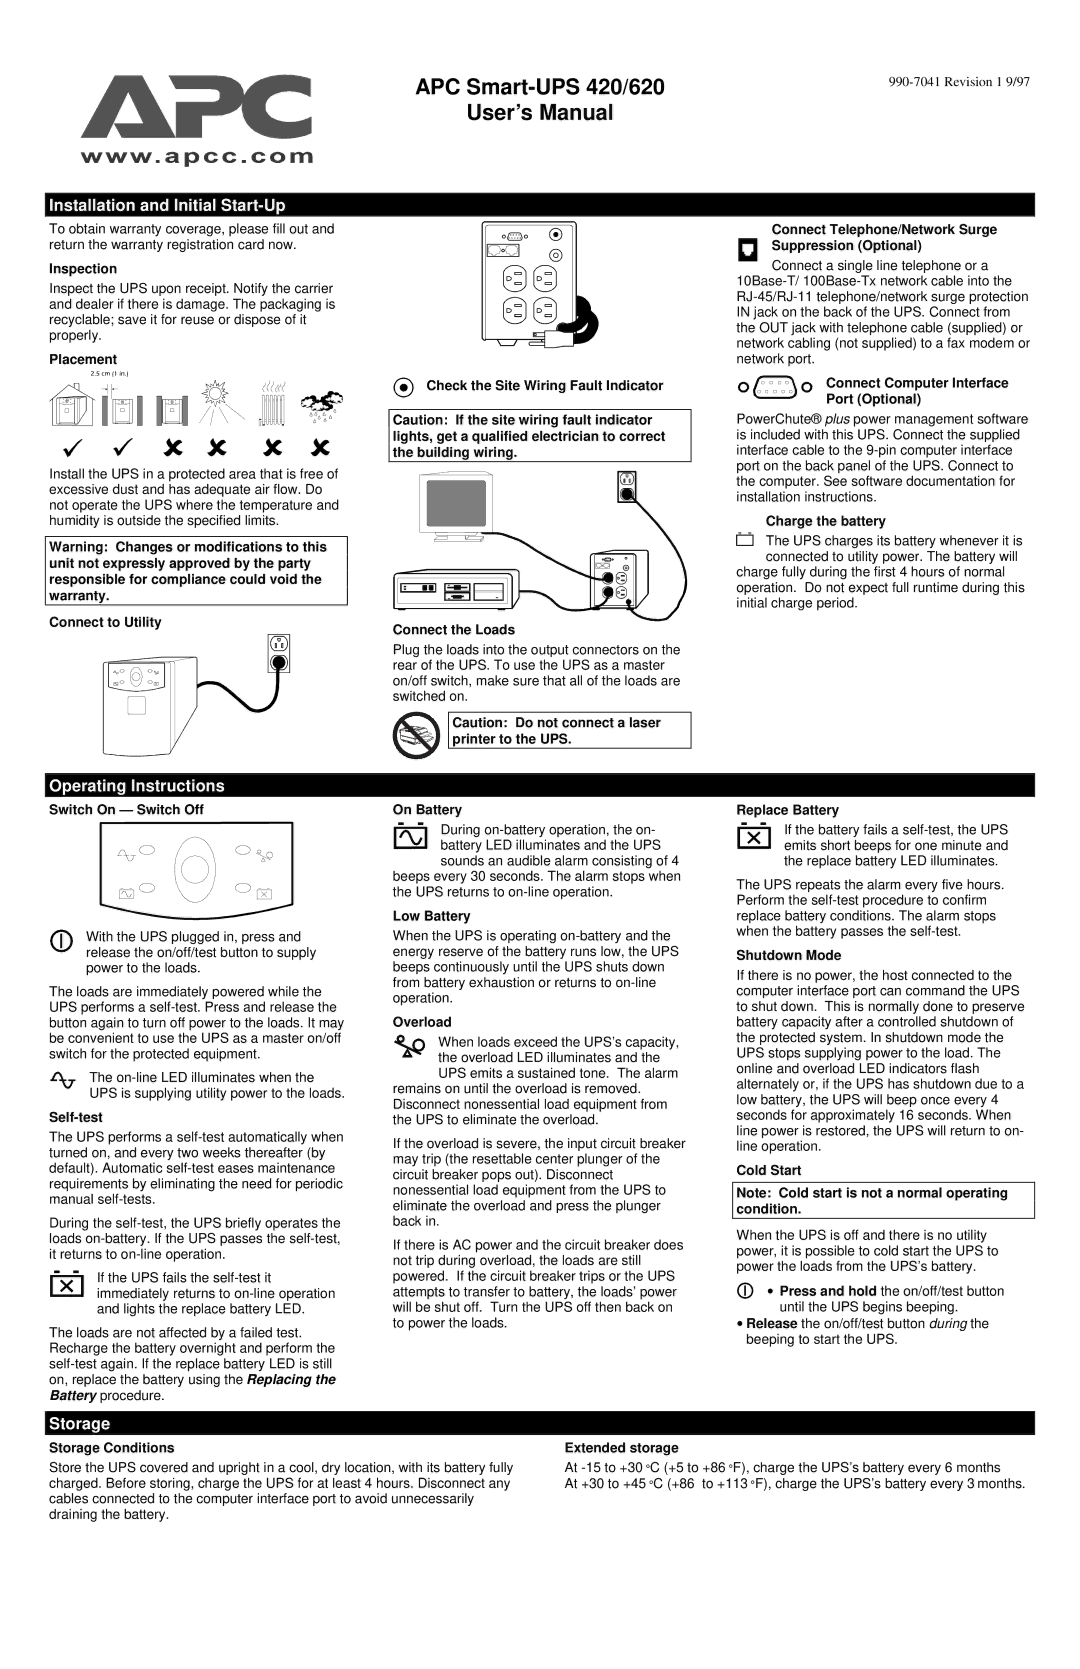
Placement
Install the UPS in a protected area that is free of excessive dust and has adequate air flow. Do not operate the UPS where the temperature and humidity is outside the specified limits.
Warning: Changes or modifications to this unit not expressly approved by the party responsible for compliance could void the warranty.
Connect to Utility
Check the Site Wiring Fault Indicator
Caution: If the site wiring fault indicator lights, get a qualified electrician to correct the building wiring.
Connect the Loads
Plug the loads into the output connectors on the rear of the UPS. To use the UPS as a master on/off switch, make sure that all of the loads are switched on.
Caution: Do not connect a laser printer to the UPS.
Connect Telephone/Network Surge Suppression (Optional)
Connect a single line telephone or a
Connect Computer Interface
Port (Optional)
PowerChute®plus power management software is included with this UPS. Connect the supplied interface cable to the
Charge the battery
The UPS charges its battery whenever it is connected to utility power. The battery will
charge fully during the first 4 hours of normal operation. Do not expect full runtime during this initial charge period.
Operating Instructions
Switch On — Switch Off
With the UPS plugged in, press and release the on/off/test button to supply power to the loads.
The loads are immediately powered while the UPS performs a
The
Self-test
The UPS performs a
During the
If the UPS fails the
The loads are not affected by a failed test. Recharge the battery overnight and perform the
On Battery
During
battery LED illuminates and the UPS sounds an audible alarm consisting of 4
beeps every 30 seconds. The alarm stops when the UPS returns to
Low Battery
When the UPS is operating
Overload
When loads exceed the UPS’s capacity,
the overload LED illuminates and the UPS emits a sustained tone. The alarm
remains on until the overload is removed. Disconnect nonessential load equipment from the UPS to eliminate the overload.
If the overload is severe, the input circuit breaker may trip (the resettable center plunger of the circuit breaker pops out). Disconnect nonessential load equipment from the UPS to eliminate the overload and press the plunger back in.
If there is AC power and the circuit breaker does not trip during overload, the loads are still powered. If the circuit breaker trips or the UPS attempts to transfer to battery, the loads’ power will be shut off. Turn the UPS off then back on to power the loads.
Replace Battery
If the battery fails a
The UPS repeats the alarm every five hours. Perform the
Shutdown Mode
If there is no power, the host connected to the computer interface port can command the UPS to shut down. This is normally done to preserve battery capacity after a controlled shutdown of the protected system. In shutdown mode the UPS stops supplying power to the load. The online and overload LED indicators flash alternately or, if the UPS has shutdown due to a low battery, the UPS will beep once every 4 seconds for approximately 16 seconds. When line power is restored, the UPS will return to on- line operation.
Cold Start
Note: Cold start is not a normal operating condition.
When the UPS is off and there is no utility power, it is possible to cold start the UPS to power the loads from the UPS’s battery.
∙ Press and hold the on/off/test button until the UPS begins beeping.
∙Release the on/off/test button during the beeping to start the UPS.
Storage
Storage Conditions
Store the UPS covered and upright in a cool, dry location, with its battery fully charged. Before storing, charge the UPS for at least 4 hours. Disconnect any cables connected to the computer interface port to avoid unnecessarily draining the battery.
Extended storage
At
At +30 to +45 °C (+86 to +113 °F), charge the UPS’s battery every 3 months.