
1340M Series, 1340 Series specifications
The American Standard 1340M Series and 1340 Series faucets represent a blend of elegance, functionality, and advanced technology, making them a popular choice among homeowners and professionals alike.One of the standout features of the 1340M Series is its sleek and contemporary design. Available in a range of finishes, including polished chrome and brushed nickel, these faucets effortlessly complement various decor styles, from modern to traditional. The clean lines and smooth contours of the faucet not only enhance aesthetic appeal but also make them easy to clean and maintain.
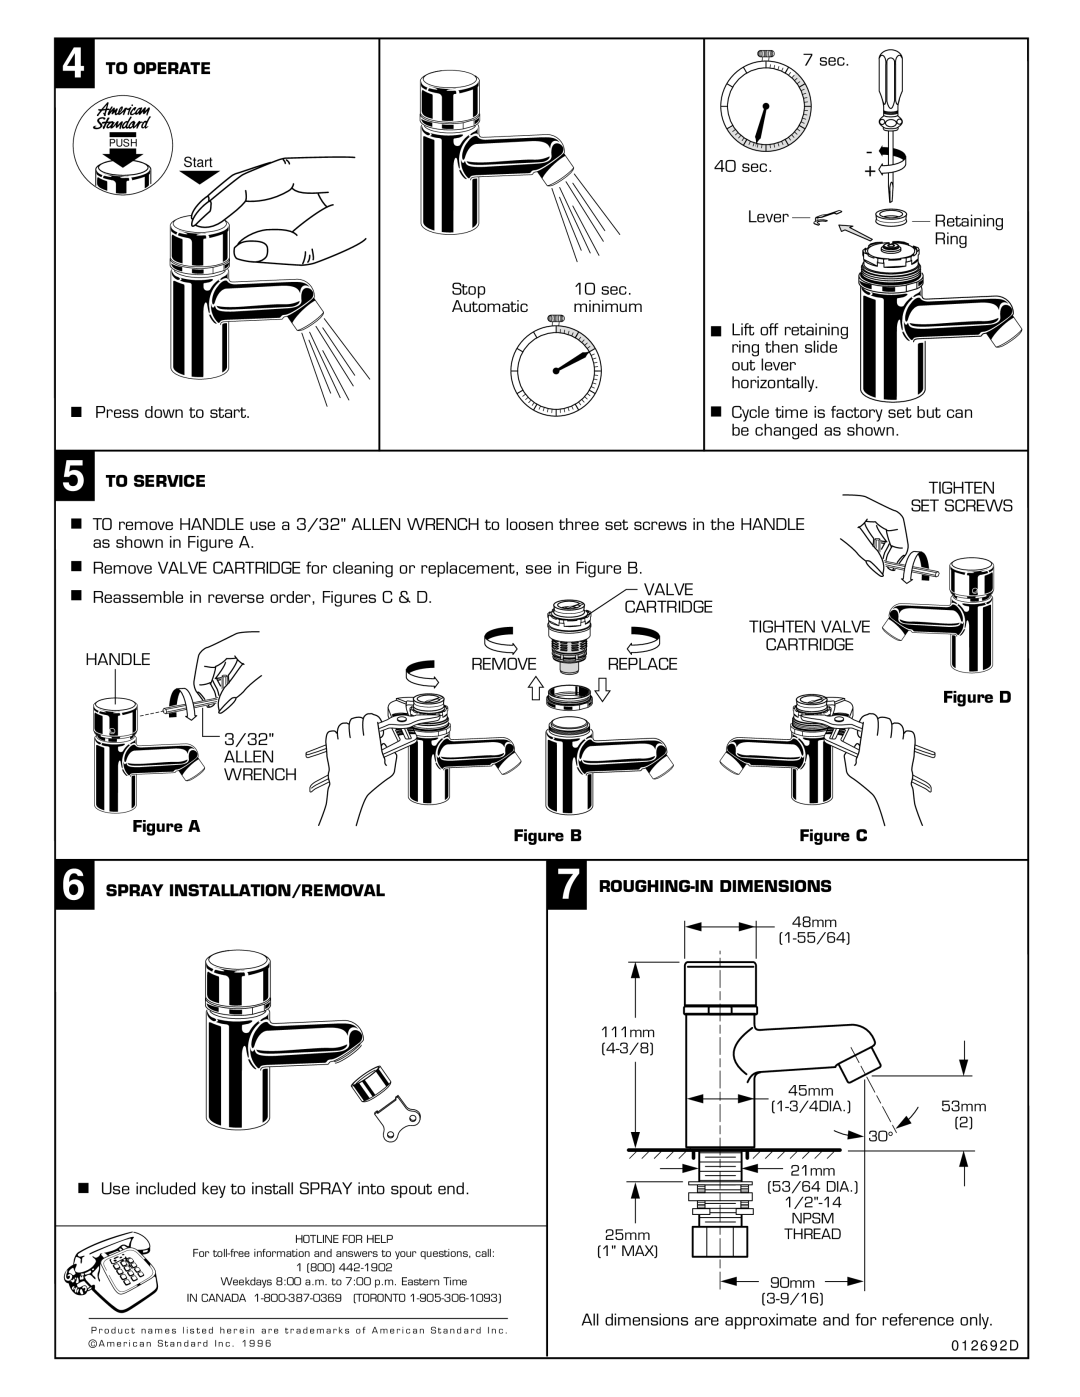
Technologically, the 1340 Series is equipped with the innovative Speed Connect installation system. This feature simplifies the installation process, reducing the time and effort required to set up the faucet. With fewer parts and an easy-to-follow guide, even those with minimal DIY experience can achieve professional results.
Moreover, the 1340M Series incorporates the EcoFlow technology, which is designed to conserve water without compromising performance. This feature allows users to enjoy a powerful spray while using significantly less water than conventional faucets. As environmental concerns become increasingly important, this ability to reduce water consumption without sacrificing usability is a major advantage.
The 1340 Series also focuses on user comfort. The ergonomic handle design ensures smooth operation, allowing users to easily adjust water temperature and flow. This attention to user experience is complemented by the inclusion of ceramic disc cartridges, which provide a leak-free performance and long-lasting durability. These cartridges contribute to the overall reliability and longevity of the faucet, making it a worthwhile investment.
In terms of versatility, the 1340M Series is available in various configurations, including single-handle and double-handle models. This variety allows consumers to choose the option that best fits their specific needs and preferences. Additionally, these faucets are compatible with a range of sinks and setups, making them suitable for both new installations and retrofits.
To summarize, the American Standard 1340M Series and 1340 Series faucets combine modern aesthetics with practical features. With their easy installation, water-saving technologies, and user-friendly design, these faucets exemplify a commitment to quality and sustainability, making them a smart choice for any bathroom or kitchen renovation.