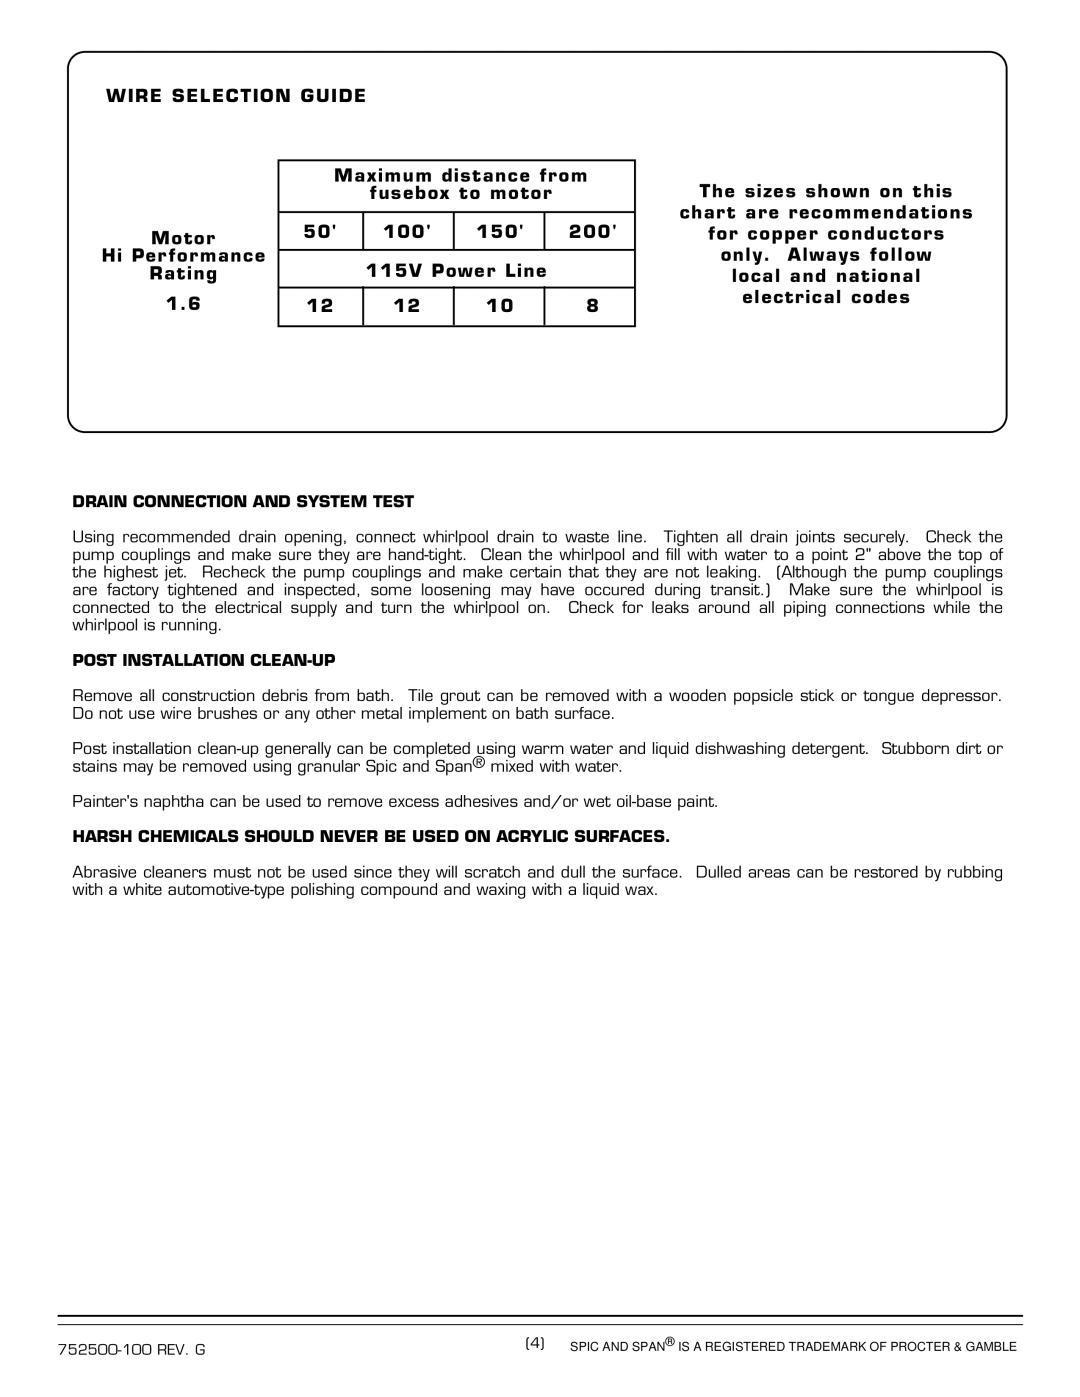
WIRE SELECTION GUIDE
Motor
Hi Performance
Rating
1.6
Maximum distance from
fusebox to motor
50' | 100' | 150' |
| 200' |
|
|
|
|
|
| 115V Power Line |
| ||
|
|
|
|
|
12 | 12 | 10 |
| 8 |
|
|
|
|
|
The sizes shown on this
chart are recommendations
for copper conductors
only. Always follow
local and national
electrical codes
DRAIN CONNECTION AND SYSTEM TEST
Using recommended drain opening, connect whirlpool drain to waste line. Tighten all drain joints securely. Check the pump couplings and make sure they are
POST INSTALLATION CLEAN-UP
Remove all construction debris from bath. Tile grout can be removed with a wooden popsicle stick or tongue depressor. Do not use wire brushes or any other metal implement on bath surface.
Post installation
Painter's naphtha can be used to remove excess adhesives and/or wet
HARSH CHEMICALS SHOULD NEVER BE USED ON ACRYLIC SURFACES.
Abrasive cleaners must not be used since they will scratch and dull the surface. Dulled areas can be restored by rubbing with a white
(4) | SPIC AND SPAN | ® | IS A REGISTERED TRADEMARK OF PROCTER & GAMBLE | |
|
|