ON
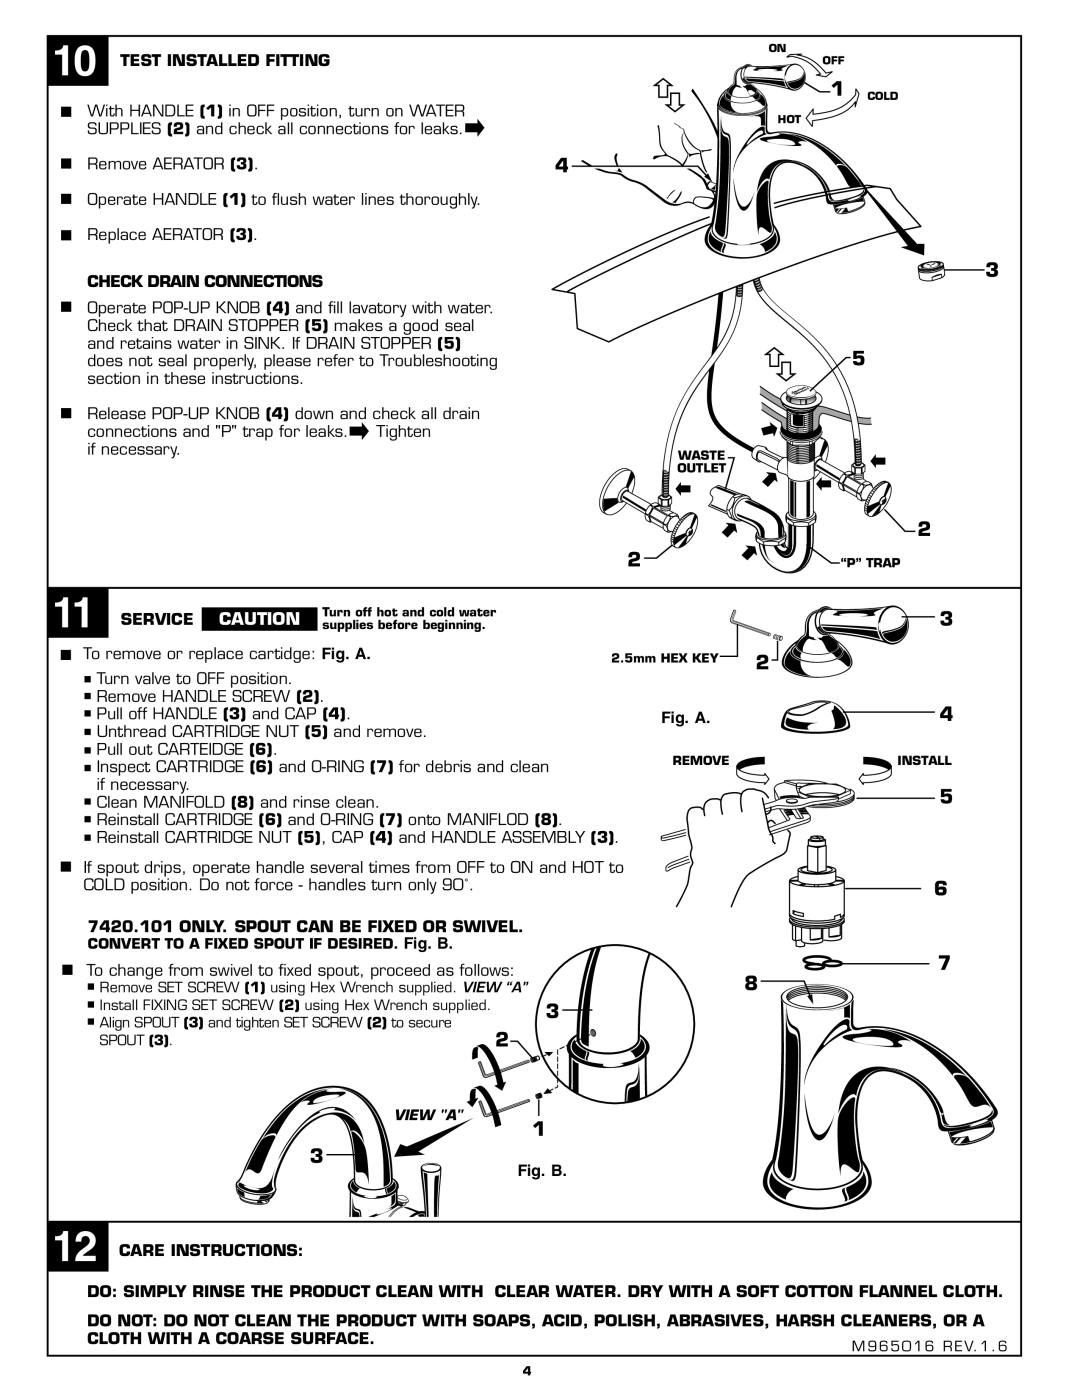
10 TEST INSTALLED FITTING
With HANDLE (1) in OFF position, turn on WATER SUPPLIES (2) and check all connections for leaks.![]()
Remove AERATOR (3).
Operate HANDLE (1) to flush water lines thoroughly.
Replace AERATOR (3).
CHECK DRAIN CONNECTIONS
Operate
Release ![]() Tighten
Tighten
if necessary.
4![]()
![]()
![]()
WASTE
OUTLET
OFF
1 COLD
HOT
3
![]() 5
5
|
|
|
| 2 |
|
|
| 2 | “P” TRAP |
11 SERVICE CAUTION | Turn off hot and cold water |
|
| 3 |
supplies before beginning. |
|
| ||
To remove or replace cartidge: Fig. A. |
| 2.5mm HEX KEY | 2 | |
Turn valve to OFF position. |
|
|
| |
|
|
|
| |
Remove HANDLE SCREW (2). |
|
| 4 | |
Pull off HANDLE (3) and CAP (4). |
| Fig. A. | ||
Unthread CARTRIDGE NUT (5) and remove. |
|
|
| |
Pull out CARTEIDGE (6). |
|
| REMOVE | INSTALL |
Inspect CARTRIDGE (6) and | ||||
if necessary. |
|
|
| 5 |
Clean MANIFOLD (8) and rinse clean. |
|
| ||
Reinstall CARTRIDGE (6) and |
|
| ||
Reinstall CARTRIDGE NUT (5), CAP (4) and HANDLE ASSEMBLY (3). |
| |||
If spout drips, operate handle several times from OFF to ON and HOT to |
| |||
COLD position. Do not force - handles turn only 90˚. |
|
| 6 | |
7420.101 ONLY. SPOUT CAN BE FIXED OR SWIVEL. |
|
|
| |
CONVERT TO A FIXED SPOUT IF DESIRED. Fig. B. |
|
| 7 | |
To change from swivel to fixed spout, proceed as follows: |
|
| ||
Remove SET SCREW (1) using Hex Wrench supplied. VIEW “A” |
|
| 8 | |
Install FIXING SET SCREW (2) using Hex Wrench supplied. | 3 |
|
| |
Align SPOUT (3) and tighten SET SCREW (2) to secure |
|
| ||
|
|
| ||
SPOUT (3). | 2 |
|
|
|
| VIEW "A" | 1 |
|
| |
3 |
| Fig. B. |
|
|
12 CARE INSTRUCTIONS:
DO: SIMPLY RINSE THE PRODUCT CLEAN WITH CLEAR WATER. DRY WITH A SOFT COTTON FLANNEL CLOTH.
DO NOT: DO NOT CLEAN THE PRODUCT WITH SOAPS, ACID, POLISH, ABRASIVES, HARSH CLEANERS, OR A CLOTH WITH A COARSE SURFACE.
4