VANITY INSTALLATION
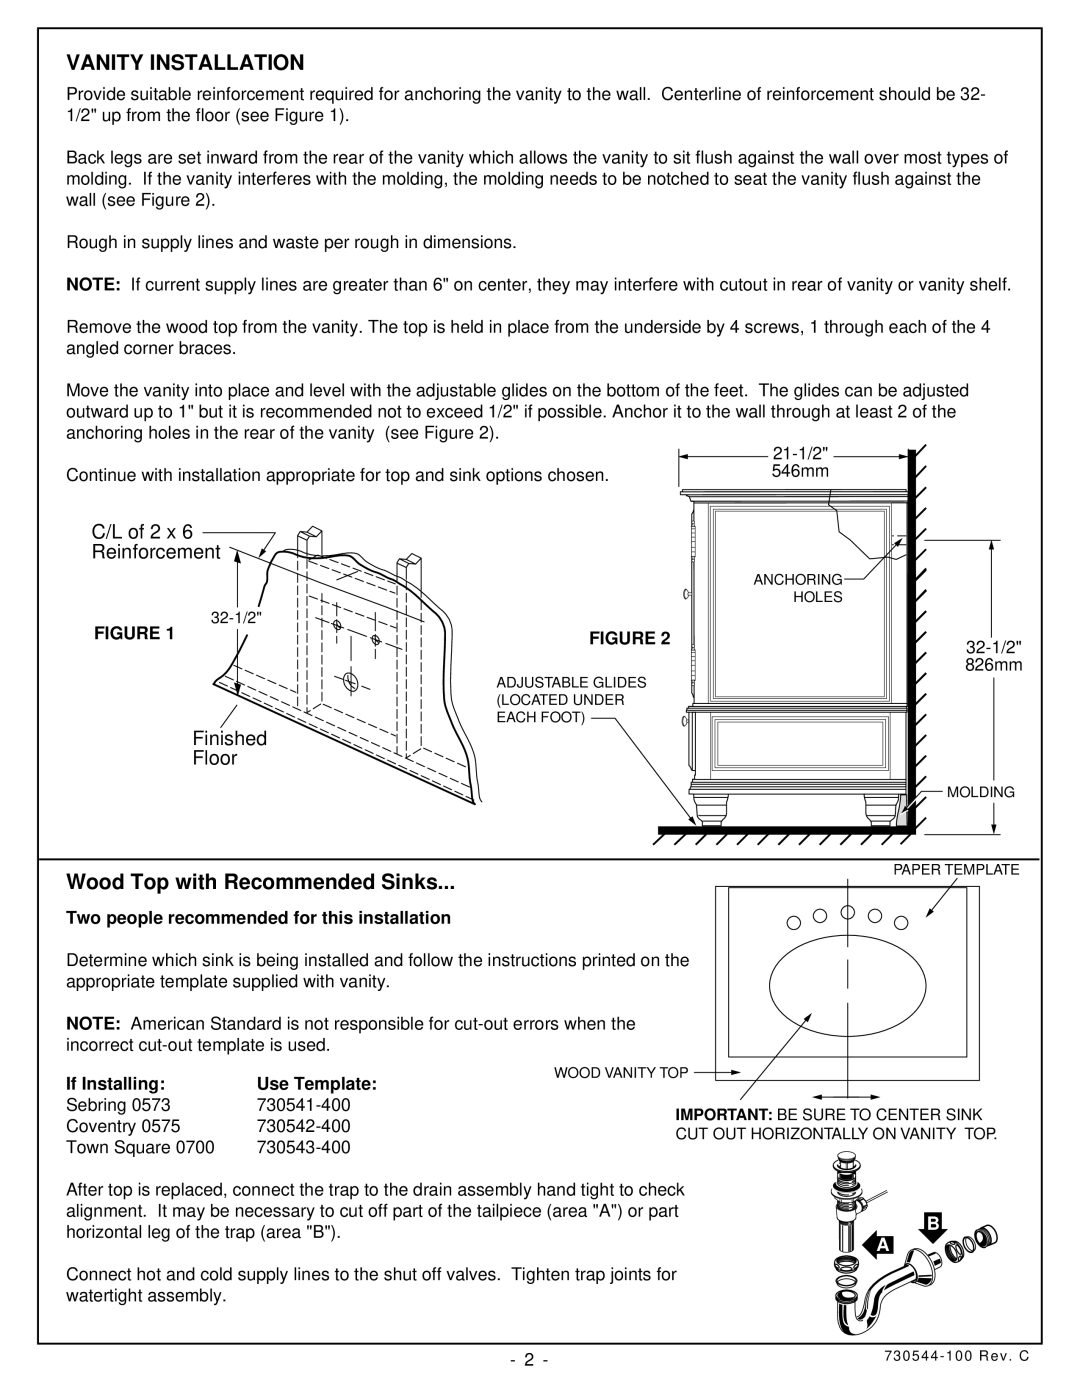
Provide suitable reinforcement required for anchoring the vanity to the wall. Centerline of reinforcement should be 32- 1/2" up from the floor (see Figure 1).
Back legs are set inward from the rear of the vanity which allows the vanity to sit flush against the wall over most types of molding. If the vanity interferes with the molding, the molding needs to be notched to seat the vanity flush against the wall (see Figure 2).
Rough in supply lines and waste per rough in dimensions.
NOTE: If current supply lines are greater than 6" on center, they may interfere with cutout in rear of vanity or vanity shelf.
Remove the wood top from the vanity. The top is held in place from the underside by 4 screws, 1 through each of the 4 angled corner braces.
Move the vanity into place and level with the adjustable glides on the bottom of the feet. The glides can be adjusted outward up to 1" but it is recommended not to exceed 1/2" if possible. Anchor it to the wall through at least 2 of the anchoring holes in the rear of the vanity (see Figure 2).
Continue with installation appropriate for top and sink options chosen.
C/L of 2 x 6
Reinforcement
FIGURE 1 | |
FIGURE 2 |
ADJUSTABLE GLIDES (LOCATED UNDER EACH FOOT)
Finished
Floor
21-1/2" 546mm
ANCHORING
HOLES
![]() MOLDING
MOLDING
Wood Top with Recommended Sinks...
Two people recommended for this installation
PAPER TEMPLATE
Determine which sink is being installed and follow the instructions printed on the appropriate template supplied with vanity.
NOTE: American Standard is not responsible for
If Installing: | Use Template: | WOOD VANITY TOP |
|
|
|
| |
| |||||||
|
|
|
|
| |||
Sebring 0573 |
|
|
|
|
| ||
IMPORTANT: BE SURE TO CENTER SINK | |||||||
Coventry 0575 | |||||||
CUT OUT HORIZONTALLY ON VANITY TOP. | |||||||
Town Square 0700 | |||||||
|
|
|
|
| |||
After top is replaced, connect the trap to the drain assembly hand tight to check alignment. It may be necessary to cut off part of the tailpiece (area "A") or part horizontal leg of the trap (area "B").
Connect hot and cold supply lines to the shut off valves. Tighten trap joints for watertight assembly.
B
A
- 2 - | 730544 - 100 Rev . C |