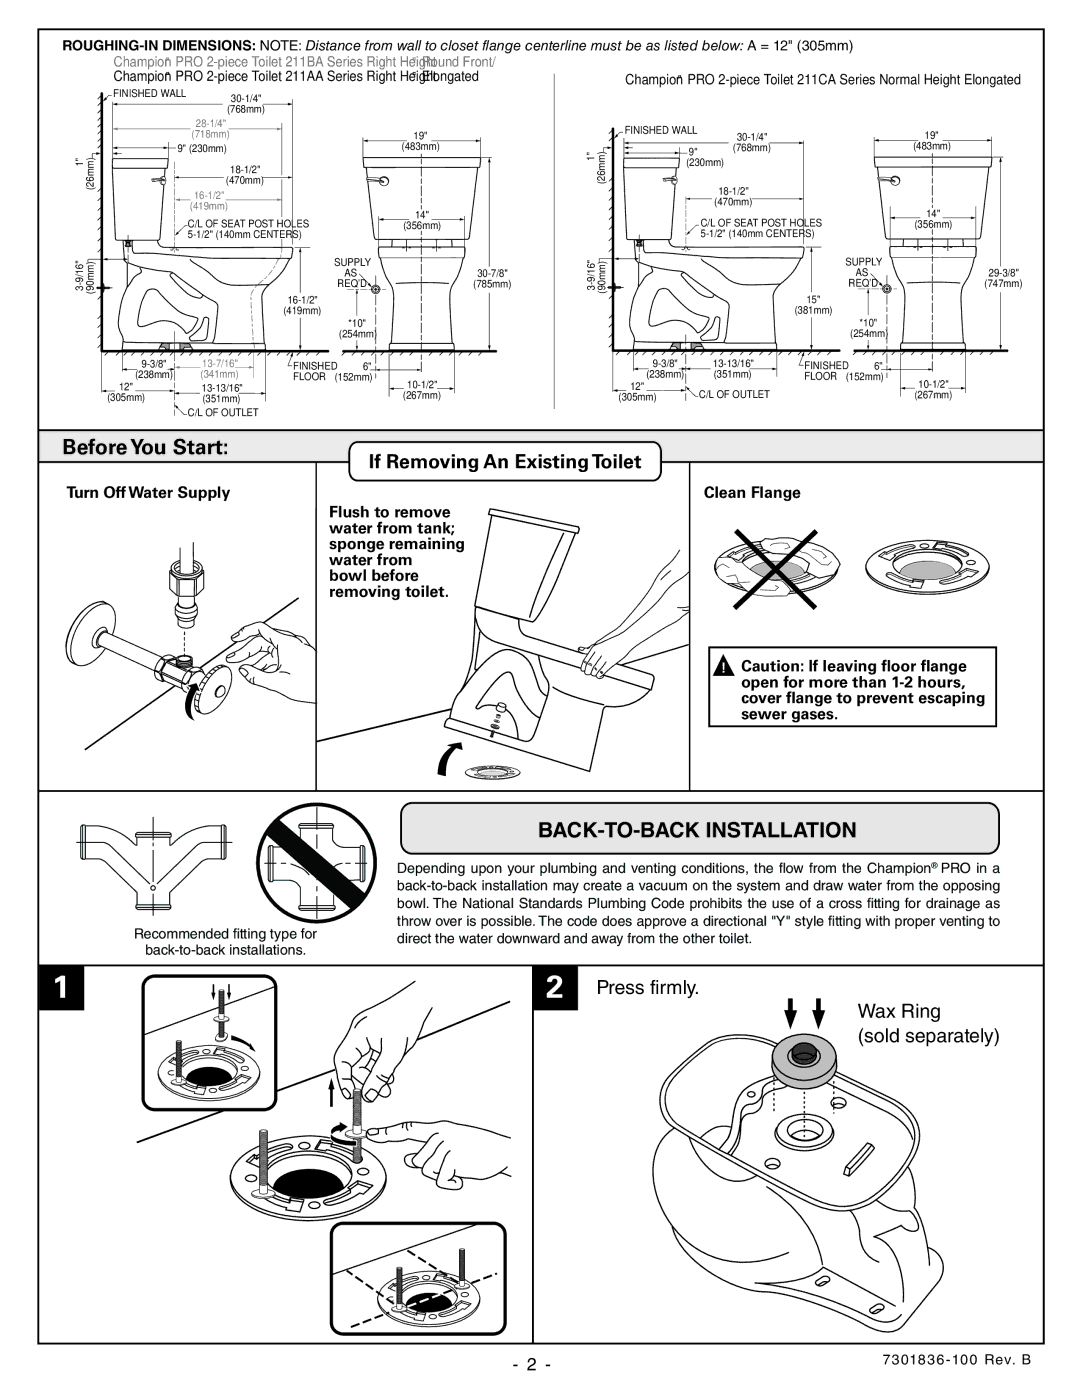
211AA, Champion Pro 2 Piece Toilet, 211CA, 211BB specifications
The American Standard 211AA, 211CA, and 211BB are part of the Champion Pro line of two-piece toilets designed to enhance bathroom functionality and comfort. These models are renowned for their combination of modern technology, efficient water usage, and reliable flushing performance, making them ideal choices for a variety of bathroom settings.One of the standout features of the Champion Pro toilets is their powerful flushing system. The Champion flushing mechanism is specifically designed to handle bulk waste effectively, reducing the chances of clogging. With a flush that is rated for a maximum of 1.28 gallons per flush, these toilets are water-efficient and meet the standards set by WaterSense, helping homeowners conserve water while maintaining optimal performance.
The design of the Champion Pro toilets also emphasizes user comfort. These models feature a comfortable height that can accommodate users of all ages, making it easier for everyone to use the toilet efficiently. The elongated bowl design provides additional space and comfort, further enhancing the user experience.
Moreover, American Standard has integrated their innovative EverClean surface onto these toilet models. This special coating reduces the growth of bacteria, mold, and mildew on the toilet surface, contributing to a more hygienic bathroom environment. With the EverClean technology, cleaning becomes much simpler as it resists stains and keeps the toilet looking fresh over time.
Another characteristic that sets the 211AA, 211CA, and 211BB apart is their robust construction. Made from durable vitreous china, these toilets are built to last. The two-piece configuration makes installation straightforward and provides flexibility in bathroom design.
American Standard ensures that their Champion Pro toilets are not only functional but also aesthetically pleasing. Available in a variety of colors and finishes, they can seamlessly integrate into any bathroom décor.
Overall, the American Standard 211AA, 211CA, and 211BB Champion Pro 2 Piece Toilets combine advanced technology, comfort, and style, making them a smart choice for homeowners looking to upgrade their bathrooms. With powerful flushing capabilities, water-saving designs, and innovative cleanliness features, these toilets are a testament to American Standard's commitment to quality and performance in bathroom fixtures.

