T980.722, T980.712, T980.732, T980.702 specifications
American Standard has long been synonymous with quality and innovation in plumbing fixtures, and their T980 series shower systems encapsulates this commitment exceptionally well. The T980.712, T980.722, T980.732, and T980.702 models are designed to enhance the showering experience while combining modern technology with user-friendly features.One of the standout features across the T980 series is the use of American Standard's proprietary technologies aimed at water conservation. With their Eco-Performance technology, these shower systems provide a flow rate of 2.5 gallons per minute, significantly reducing water usage without compromising on performance. This eco-friendly approach not only helps conserve water but also contributes to lower utility bills, making these models attractive choices for environmentally conscious consumers.
Another innovative aspect of the T980 series is the incorporation of a multi-function showerhead. Depending on the model, users can enjoy various spray patterns like massage, rain, and mist, allowing for a customizable shower experience. The easy-to-use lever adjusts between modes smoothly, giving users the freedom to switch depending on their mood or preference at that moment.
The T980 series is crafted with durability in mind. Made from high-quality materials, these shower systems resist corrosion and tarnishing, ensuring they maintain their fresh appearance over years of use. Furthermore, the finishes available for these models, including polished chrome and brushed nickel, allow homeowners to choose options that best fit their bathroom decor.
Safety and comfort have also been taken into account with the T980 series. The units feature a temperature control mechanism, providing consistent water temperature even when other plumbing fixtures are in use. Additionally, each model in the T980 line is equipped with a slip-resistant shower base, enhancing safety for users of all ages.
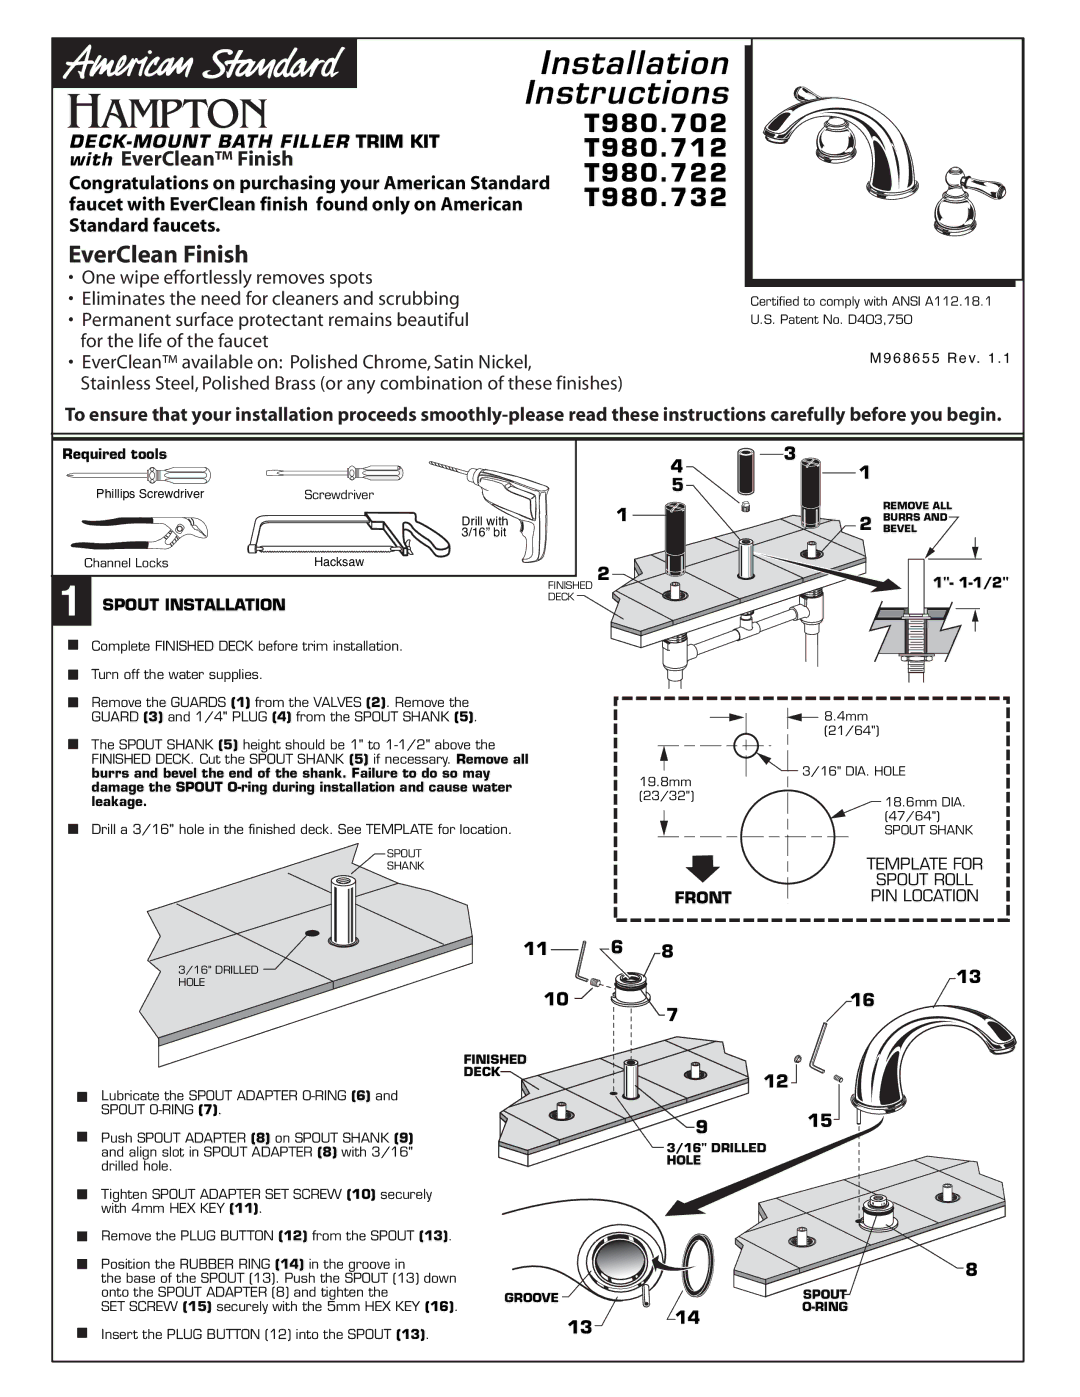
Installation of these systems is designed to be straightforward, accommodating standard plumbing configurations. American Standard’s comprehensive instructions and supporting materials ensure that even those with limited DIY experience can set up their new shower system with relative ease.
Overall, the American Standard T980 series, including the T980.712, T980.722, T980.732, and T980.702 models, represents a harmonious blend of style, efficiency, and advanced technology, making them a worthy consideration for anyone looking to upgrade their shower experience.