Special Features
Programming the Memory Buttons
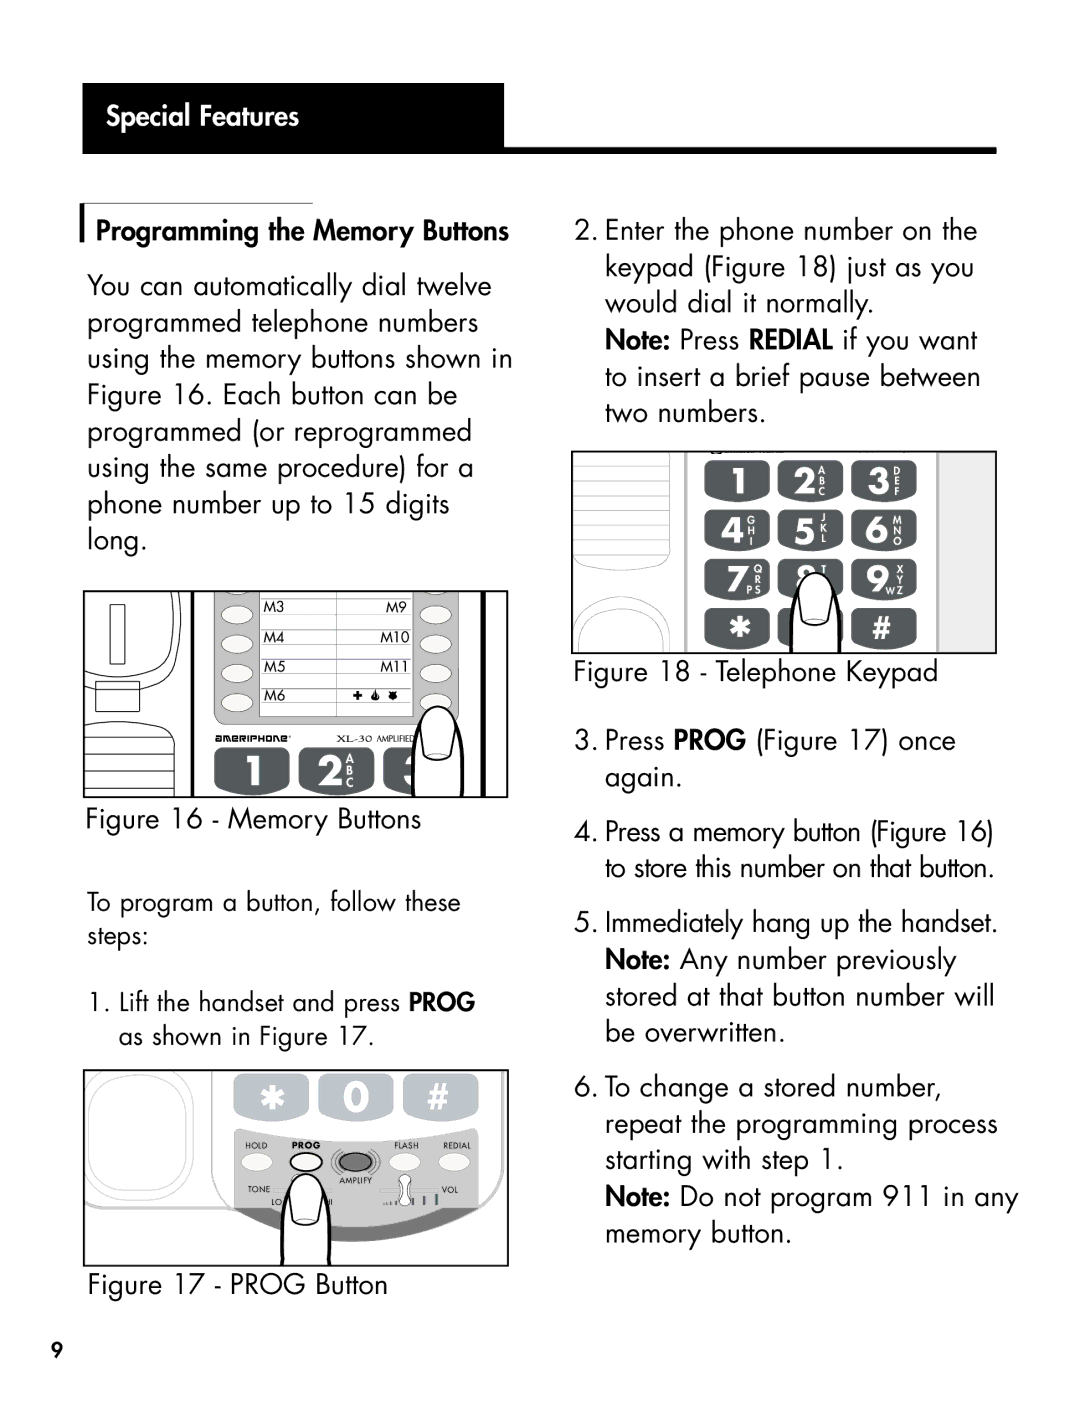
You can automatically dial twelve programmed telephone numbers using the memory buttons shown in Figure 16. Each button can be programmed (or reprogrammed using the same procedure) for a phone number up to 15 digits long.
M3 |
| M9 |
M4 |
| M10 |
M5 |
| M11 |
M6 |
|
|
| ¤ |
|
1 | A | D |
2CB | 3 EF |
2.Enter the phone number on the keypad (Figure 18) just as you would dial it normally.
Note: Press REDIAL if you want to insert a brief pause between
two numbers.
|
| DIALOGUE XL 40 |
1 | A | D |
2CB | 3 EF | |
G | J | M |
4 HI | 5 L | 6 ON |
| K |
|
Q | T | X |
7P RS | 8UV | 9W YZ |
* | O |
|
0 PE | # |
Figure 18 - Telephone Keypad
3.Press PROG (Figure 17) once again.
Figure 16 - Memory Buttons
To program a button, follow these steps:
1.Lift the handset and press PROG as shown in Figure 17.
HOLD*PROG | 0 |
| # |
FLASH | REDIAL | ||
TONE | AMPLIFY |
| VOL |
|
| ||
LO | HI |
|
|
Figure 17 - PROG Button
4.Press a memory button (Figure 16) to store this number on that button.
5.Immediately hang up the handset. Note: Any number previously stored at that button number will be overwritten.
6.To change a stored number, repeat the programming process starting with step 1.
Note: Do not program 911 in any memory button.
9
