Back Bay
1.Using a Phillips screwdriver, remove the screw that attaches the carrier to the chassis. Note: On some production models, the screw is not present nor required.
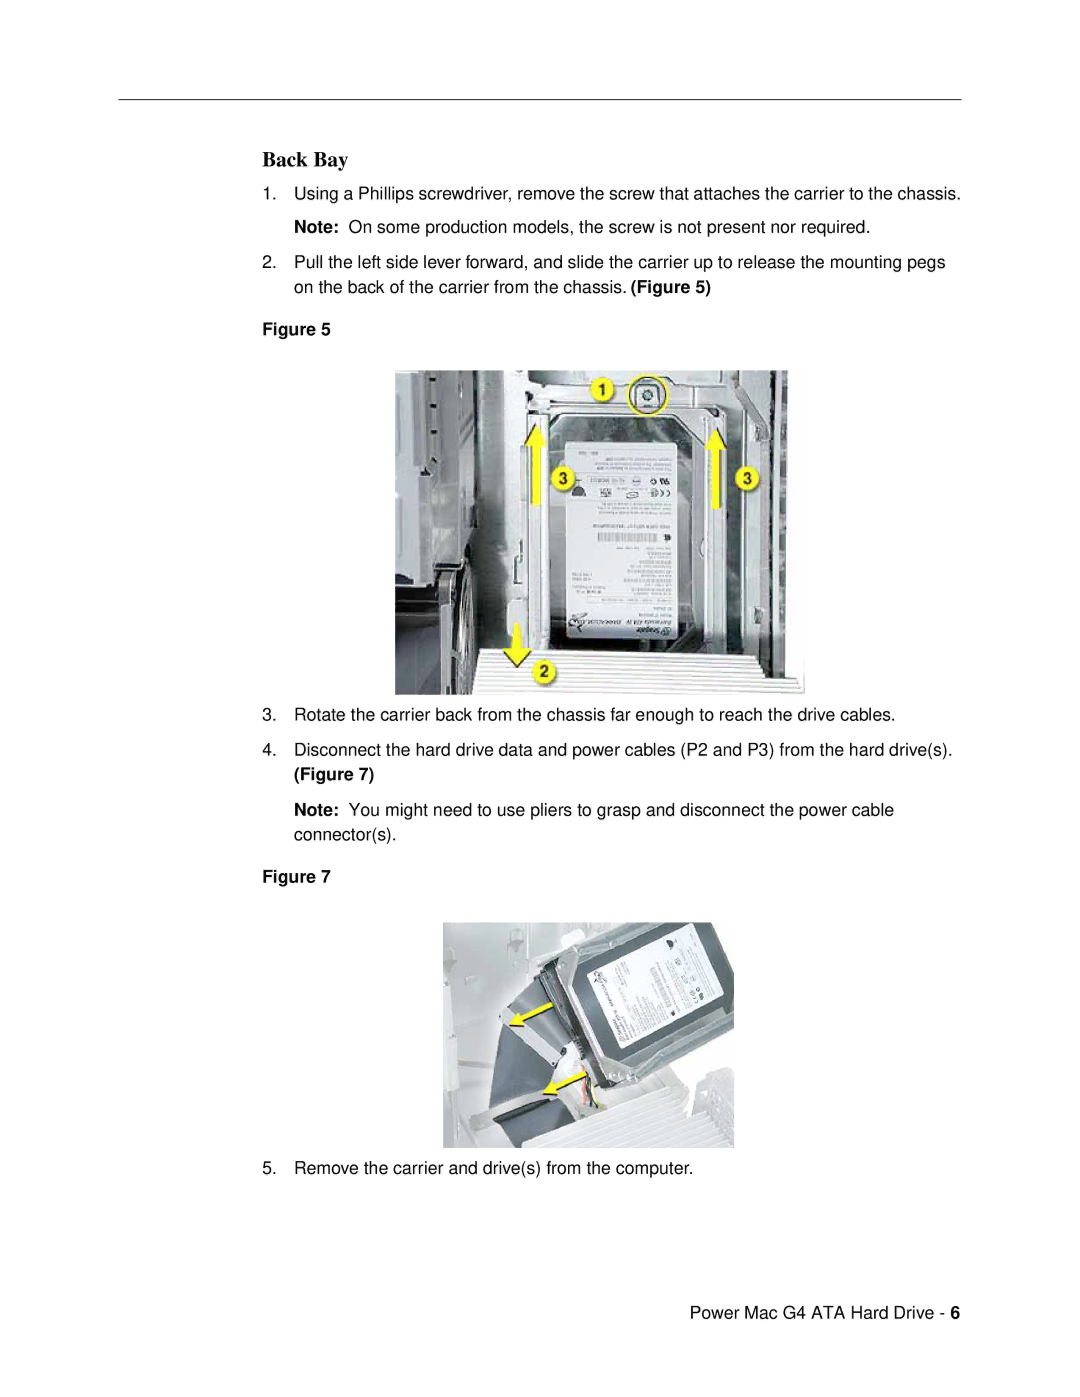
2.Pull the left side lever forward, and slide the carrier up to release the mounting pegs on the back of the carrier from the chassis. (Figure 5)
Figure 5
3.Rotate the carrier back from the chassis far enough to reach the drive cables.
4.Disconnect the hard drive data and power cables (P2 and P3) from the hard drive(s).
(Figure 7)
Note: You might need to use pliers to grasp and disconnect the power cable connector(s).
Figure 7
5. Remove the carrier and drive(s) from the computer.
Power Mac G4 ATA Hard Drive - 6