Manuals
/
Apple
/
Computer Equipment
/
Projector
Apple
manual
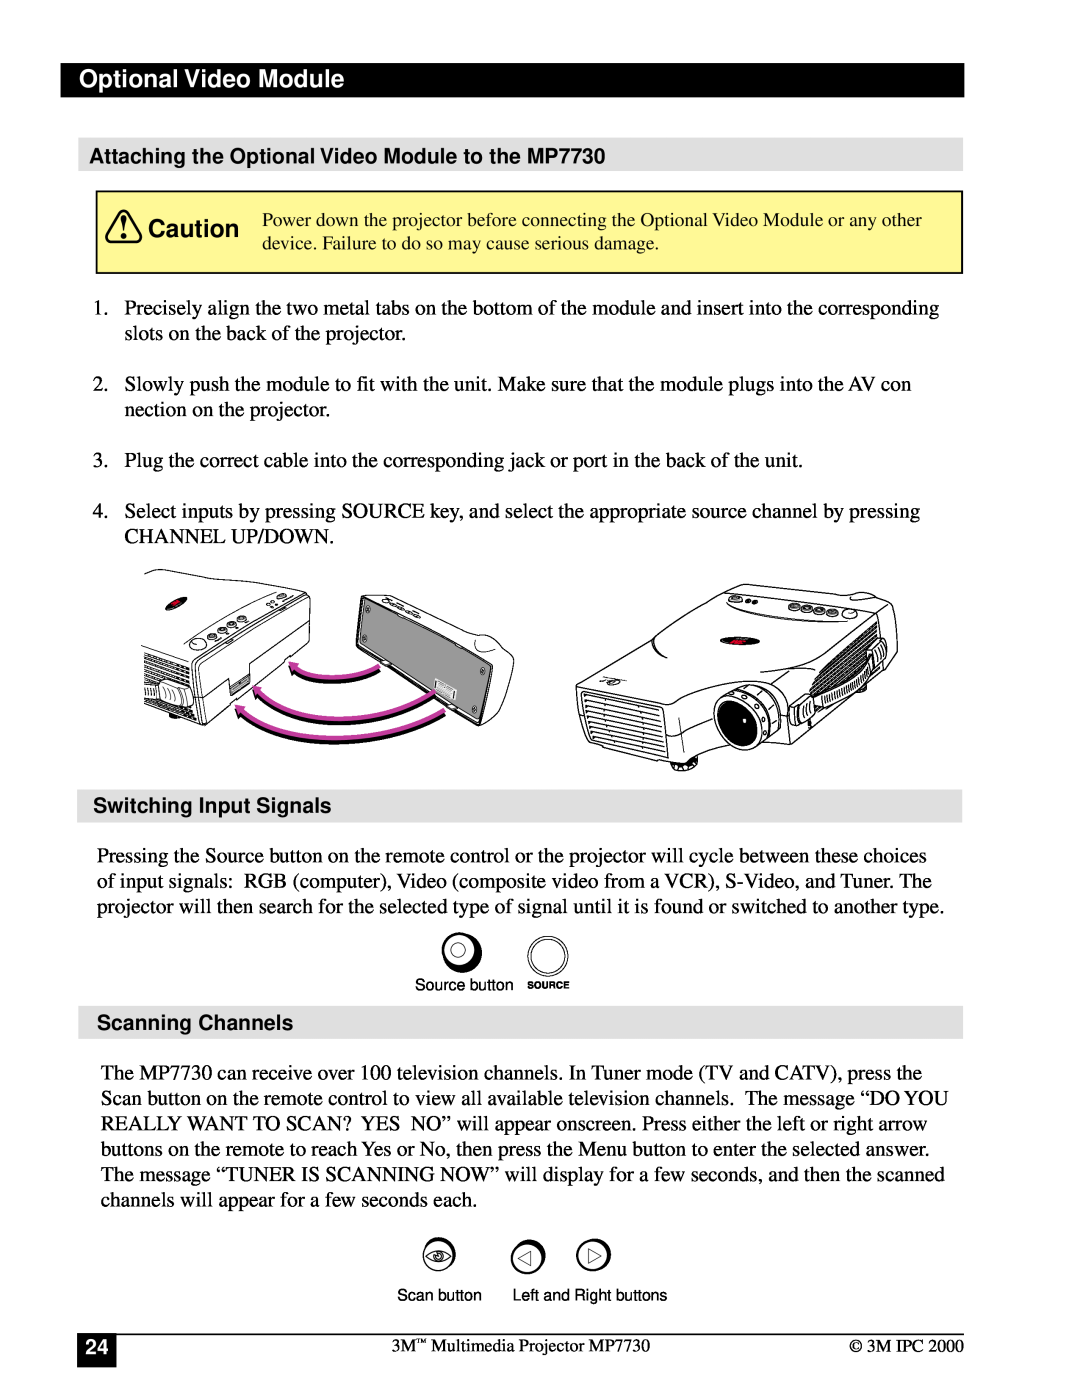
Attaching the Optional Video Module to the MP7730, Switching Input Signals
Models:
MP7730
1
24
40
40
Download
40 pages
52.46 Kb
21
22
23
24
25
26
27
28
Troubleshooting
Specification
Machine Characteristics
Screen Chart
Warranty
Dimension
Maintenance
Accessories
Horizontal Phase
Resetting the Lamp Hours
Page 24
Image 24
Page 23
Page 25
Page 24
Image 24
Page 23
Page 25
Contents
MP7730 Projecteur multimédia Guide de l’opérateur
MP7730 Multimedia-Projektor Benutzerhandbuch
Proyector de Multimedia MP7730 Manual del Usuario
MP7730 Proiettore Multimediale Manuale dell’operatore
Page
Table of Contents
System Setup
Maintenance
Troubleshooting
Important Safeguards
Introduction
Intended Use
Indicates a potentially hazardous situation which
Product Safety Labels
Save These Instructions
Model No. FP850 Rating ~100-240V, 50-60Hz, 2A Serial No. 9170A02007
YWWXXXXXHD8312 H
Warranty Limited Warranty
Thank You for Choosing 3M
Limitation Of Liability
Patents, Trademarks & Copyrights
Shipping Box Contents
Optional Accessories
Gender Change XGA MAC Monitor Adaptor
Video Module RCA with tuner
Part Identification
Machine Characteristics
External Control Pad Buttons
Remote Control Identification
Note These features are for use only with the optional video module
1 2 4 5 7 8
Remote Control Features
Volume
Freeze
Mute
Installing or Replacing Batteries
Laser
Disk Pad
R-Click, L-Click
System Setup
Screen Chart
Digital Keystone Correction
Connecting to Various Equipment
Connection Terminals
Power
Apple Desktop Mouse
VirtualMouse for PC Computer
1. Select Start/Settings/Control Panel 2. Select Add New Hardware
3. Click Options 4. Then Change Systems Settings
Power
Operation
Startup
Main Menu
Menu Pages
Display Menu
To Menu Items
Keystone
Brightness
Keystone0-255
Brightness
Contrast0-255
Image Menu
Horizontal Phase
Auto Resize Auto Resize H.Phase H.Phase H.Size H.Size H.Position
x1 x1 x1
Operation Menu
x1 x1 x1
To Menu Items
Shutdown
000000
000100
000030
Features
Optional Video Module
Optional Video Module Connections
NTSC Package
Switching Input Signals
Attaching the Optional Video Module to the MP7730
Scanning Channels
Image Sub-Menu
Less More
Green
Source is video or S-video
TV/CATV
CATV
Scan
Add/Erase
Reverse
START SCANNING? YesNo
Source Menu
Source
Video
S-Video
Maintenance
Lamp Use and Replacement of Lamp
Lamp/Temperature Status LED Indicators
Lamp Replacement
Resetting the Lamp Hours
Troubleshooting
PROBLEMS
SOLUTIONS
Status Indicator Lights and Messages
Service Information
Accessories
Not Included with Basic Packet
Ordering Parts or Getting Information
Technical Specifications
Appendix
General
Optical
Dimensions
246 mm 9.7 in
202 mm 8 in 67 mm 2.6 in 67 mm 2.6 in
MP7630
Preset Display Resolution Table
Resolution
H Sync kHz
V Sync kHz
Nationality Codes API TV System Code Definition NTSC Tuner Box
Page
Important Notice
3M Austin Center
3M Canada
3M Mexico, S.A. de C.V
Top
Page
Image
Contents