Installation
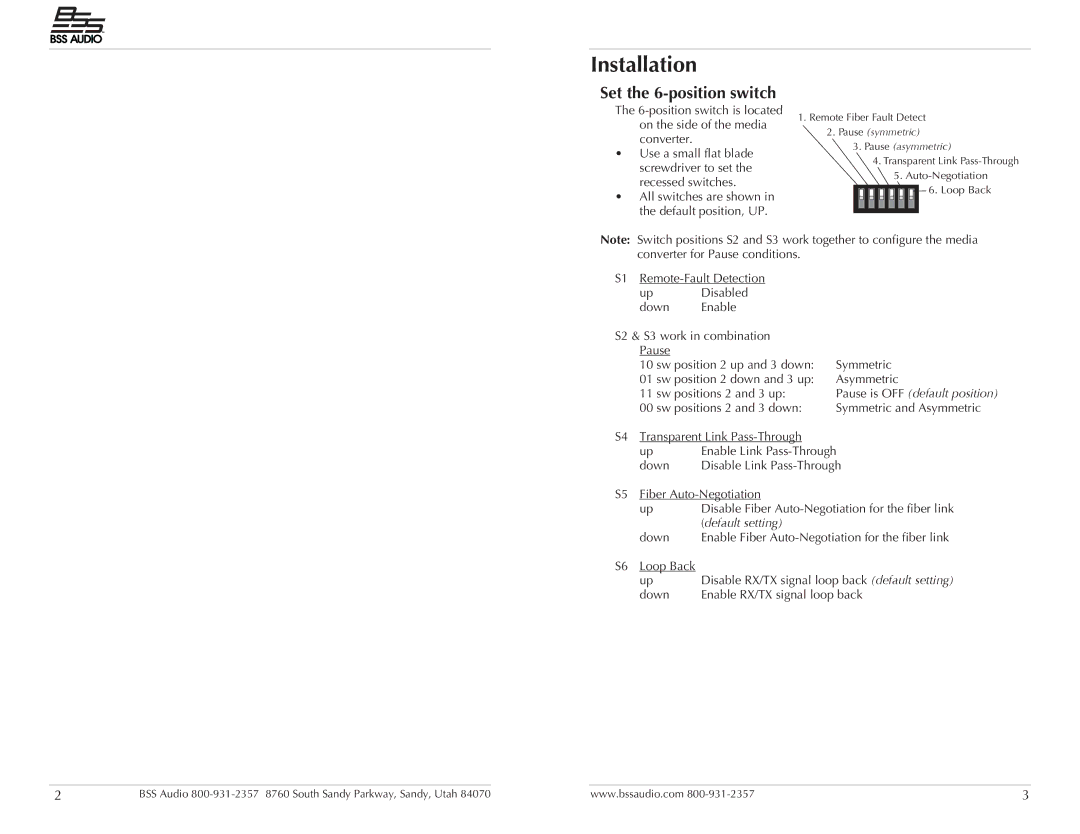
Set the 6-position switch
The
•Use a small flat blade screwdriver to set the recessed switches.
•All switches are shown in the default position, UP.
1.Remote Fiber Fault Detect
2.Pause (symmetric)
3.Pause (asymmetric)
4.Transparent Link
5.![]() 6. Loop Back
6. Loop Back
Note: Switch positions S2 and S3 work together to configure the media converter for Pause conditions.
S1
up Disabled
down Enable
S2 & S3 work in combination |
| |
Pause |
|
|
10 sw position 2 up and 3 down: | Symmetric | |
01 sw position 2 down and 3 up: | Asymmetric | |
11 sw positions 2 and 3 up: | Pause is OFF (default position) | |
00 sw positions 2 and 3 down: | Symmetric and Asymmetric | |
S4 Transparent Link |
| |
up | Enable Link | |
down | Disable Link | |
S5 Fiber |
| |
up | Disable Fiber | |
| (default setting) |
|
down | Enable Fiber | |
S6 Loop Back | Disable RX/TX signal loop back (default setting) | |
up | ||
down | Enable RX/TX signal loop back | |
2 | BSS Audio | www.bssaudio.com | 3 |