
DVR-3024M, DVR-3024MD specifications
The Approach Tech DVR-3024M and DVR-3024MD are advanced digital video recorders designed for professional security surveillance systems. These models embody cutting-edge technology, delivering superior performance and reliability for both residential and commercial applications.The DVR-3024M features 24-channel recording capabilities, allowing users to monitor multiple locations simultaneously. This model supports a variety of camera types, including analog and IP cameras, making it a versatile choice for diverse security setups. The DVR-3024MD enhances this functionality by incorporating additional features tailored for more demanding environments, such as support for higher resolution cameras and enhanced data management.
One of the standout features of both models is their real-time recording capability at 1080p resolution. This ensures that users capture high-quality video footage with clarity, making it easier to identify individuals and details in crucial situations. The systems also support H.264 video compression technology, which optimizes storage space without compromising video quality. This is particularly beneficial for users with extensive recording needs, as it allows longer retention of footage without requiring excessive storage resources.
The Approach Tech DVRs are equipped with an intuitive user interface, enabling easy navigation through menus and settings. Users can access live feeds, playback footage, and manage settings seamlessly via a connected monitor or remotely through web browsers and mobile apps. This remote access feature is crucial for users who require constant surveillance, providing peace of mind regardless of location.
In terms of connectivity, the DVR-3024M and DVR-3024MD come with multiple encoding options and can stream video over networks, allowing users to monitor their premises from anywhere in the world. They support power over Ethernet (PoE), simplifying installation by reducing the need for additional power sources for cameras.
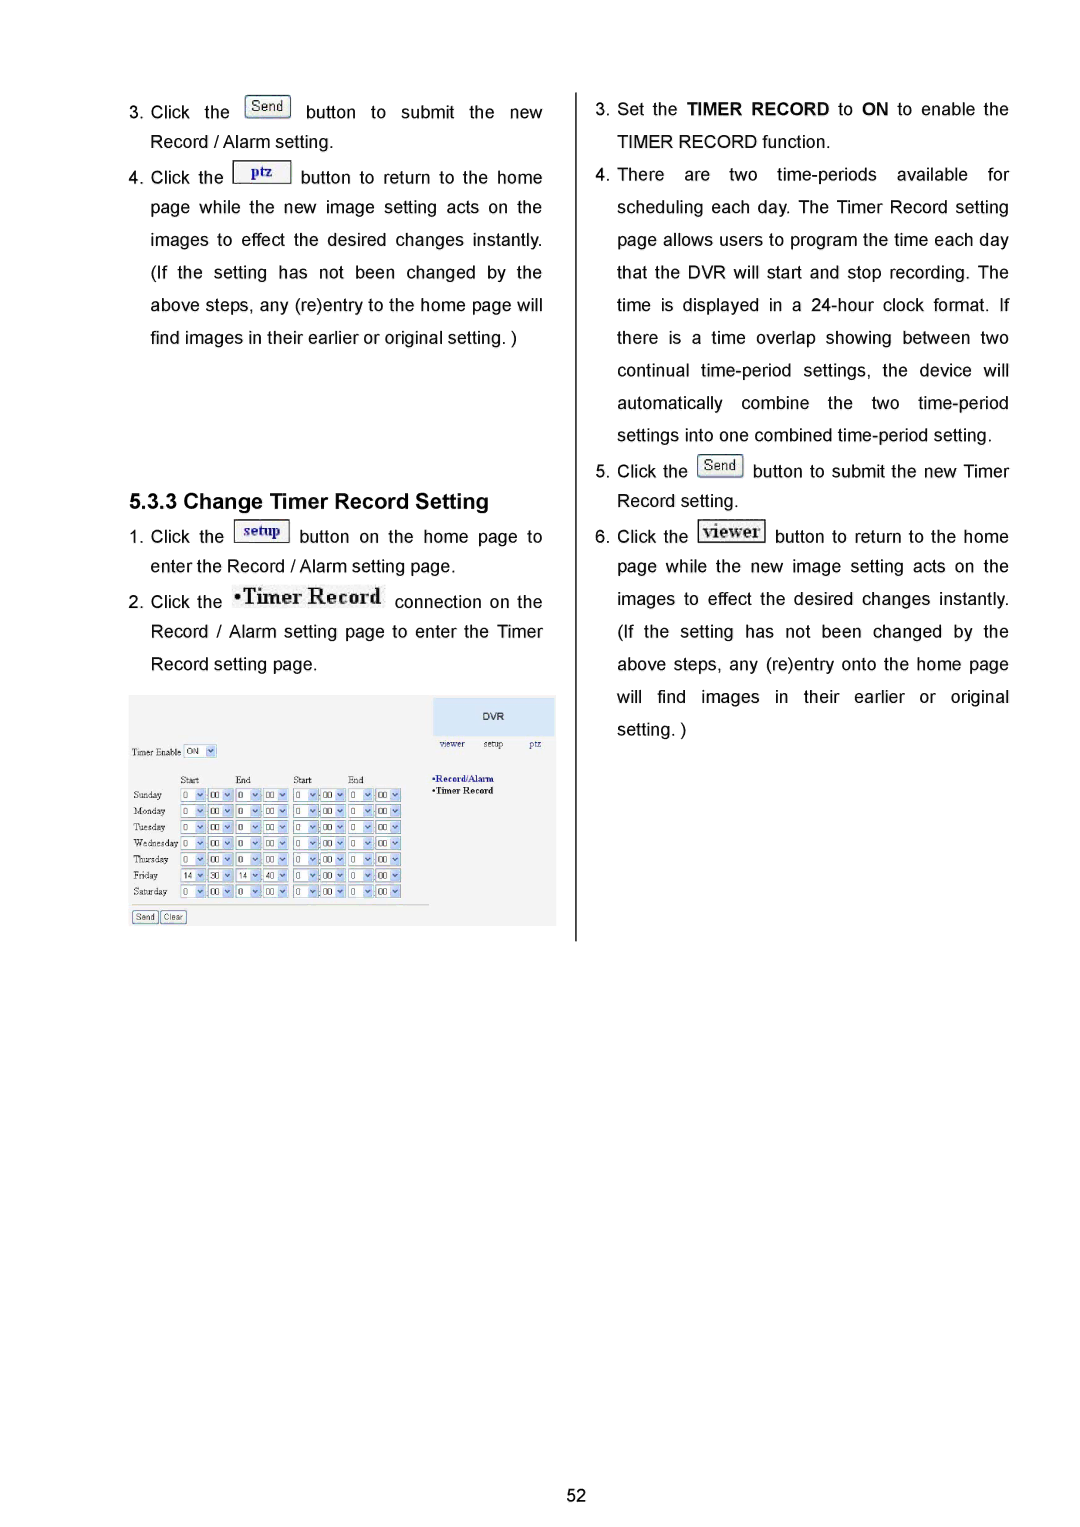
Both models also feature advanced motion detection, enabling automatic recording only when action is detected. This not only conserves storage space but also makes it easier to locate significant footage during playback. Alerts and notifications can be customized to keep users informed about any unusual activity.
In summary, the Approach Tech DVR-3024M and DVR-3024MD stand out as reliable and feature-rich options for anyone looking to implement a sophisticated surveillance system. With superior recording capabilities, user-friendly interfaces, and advanced connectivity options, these models are well-equipped to meet the needs of modern security demands.