
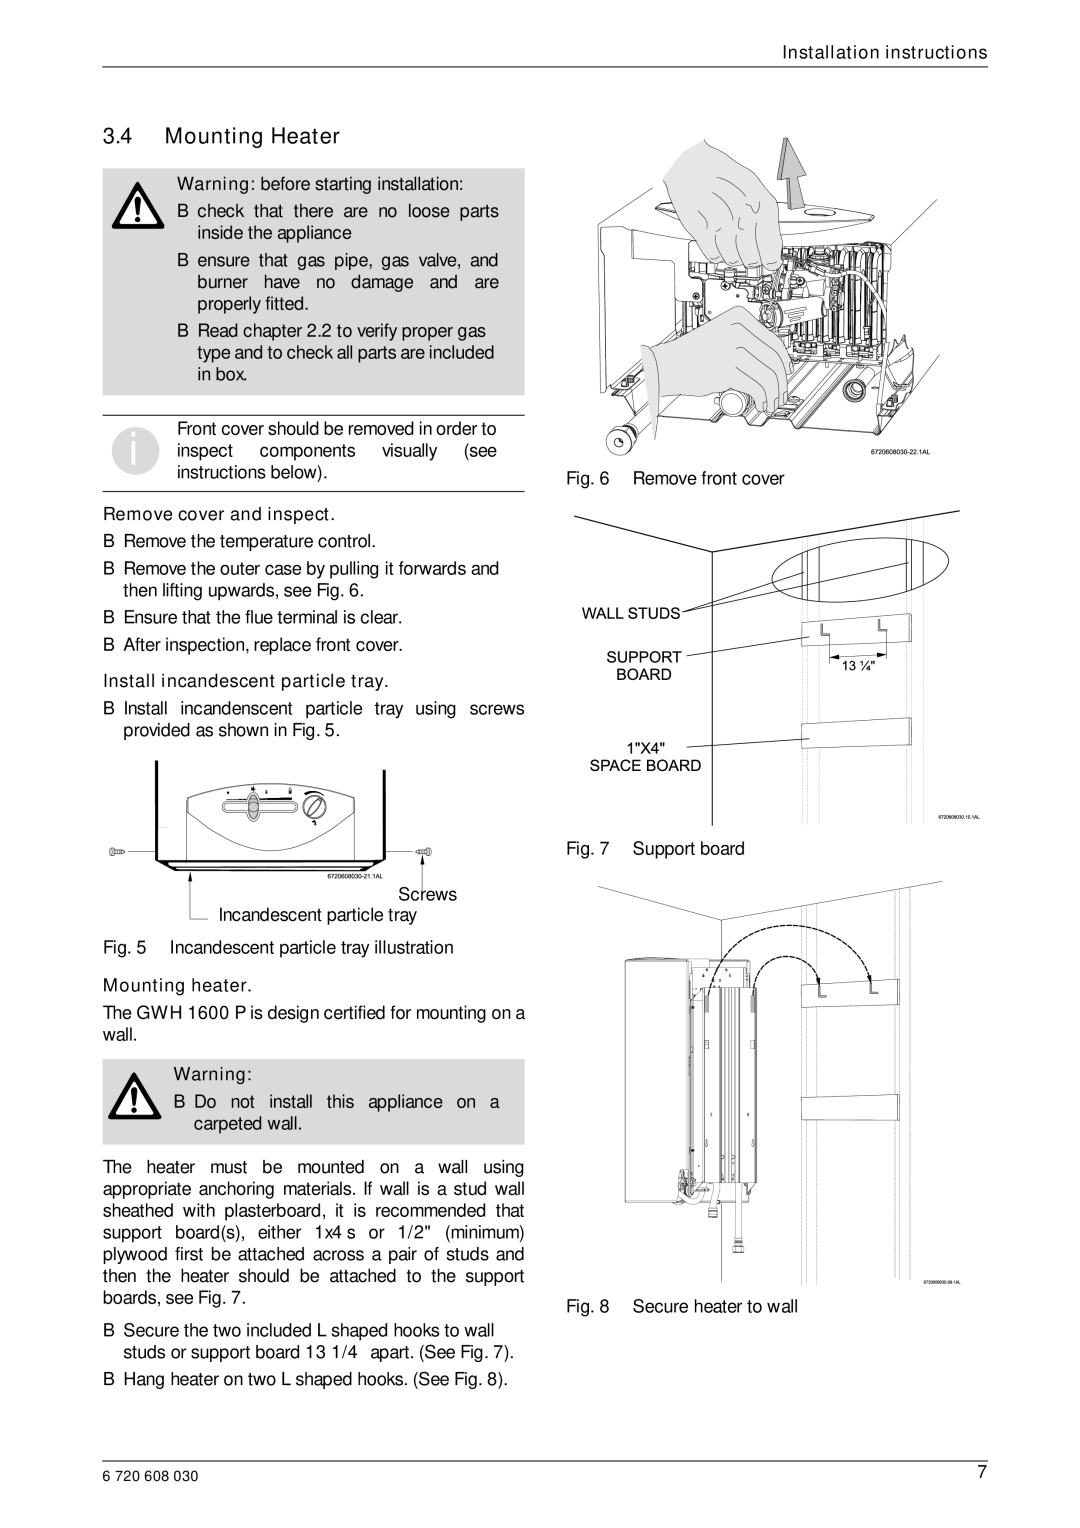
GWH 1600 P specifications
The AquaStar GWH 1600 P is a state-of-the-art gas water heater designed to efficiently meet the hot water needs of residential users. Renowned for its innovative features and user-friendly technology, the AquaStar GWH 1600 P stands out in the competitive market of heating solutions.One of the main features of this model is its impressive heating capacity. With a power output of 16 liters per minute, it ensures an abundant supply of hot water for multiple applications simultaneously. This makes it ideal for households with high-demand hot water needs, such as families or homes with multiple bathrooms.
The GWH 1600 P employs advanced combustion technology that optimizes fuel efficiency. It utilizes a microprocessor-controlled system that adjusts the gas flow based on the water demand, ensuring a consistent and efficient heating performance. This not only translates into energy savings but also contributes to reduced carbon emissions, making it an environmentally friendly option.
Another notable characteristic of the AquaStar GWH 1600 P is its safety features. The unit is equipped with a range of safety mechanisms, including an automatic shut-off system that activates in the event of a gas leak or excessive temperatures. This provides peace of mind for users, ensuring that safety is prioritized without compromising performance.
Moreover, the GWH 1600 P is designed for ease of installation and maintenance. It features a compact design, allowing for versatile placement options within a home. The intuitive digital display provides clear information on the operation, enabling users to monitor and adjust settings effortlessly.
The durability of the AquaStar GWH 1600 P is another characteristic worth mentioning. Constructed with high-quality materials, the unit is built to withstand the rigors of daily use, ensuring longevity and reliability.
In conclusion, the AquaStar GWH 1600 P gas water heater combines efficiency, safety, and durability into a single, powerful solution for hot water needs. With its robust performance and advanced technologies, it remains a top choice for homeowners seeking a dependable and economical heating solution for their hot water requirements. Whether for daily use or for special occasions, the AquaStar GWH 1600 P is equipped to deliver unmatched performance and satisfaction.